3D motion design is no longer reserved for big studios. Editors, solo creators, and in‑house teams can now add depth, parallax, and 3D movement directly in After Effects. This guide focuses on practical workflows, smart shortcuts, and template‑based approaches you can plug into real client projects and everyday edits.Explore 3D-ready templates
📋 Table of Contents
Understanding the Fundamentals of 3D Motion Design
What 3D motion design actually is
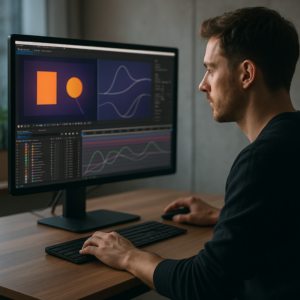
3D motion design is the craft of creating moving visuals that use three-dimensional space: objects have width, height, and depth, and the camera can move around them. For editors and After Effects users, it usually means working with layers that exist in 3D space, realistic lighting, shadows, and more complex camera moves than basic 2D keyframes.
2D vs 3D in an editor’s workflow
In a typical video project, 2D animation covers titles, lower thirds, and flat graphics. 3D motion design adds:
- Parallax between foreground and background
- Depth-aware camera moves and rack focus
- More realistic product shots or UI fly-throughs
- Layered environments for lyric videos, promos, and explainers
For you as an editor or creator, that means you can keep viewers engaged longer, communicate hierarchy better, and give even simple footage a “premium” feel without leaving After Effects.
True 3D vs 2.5D in After Effects
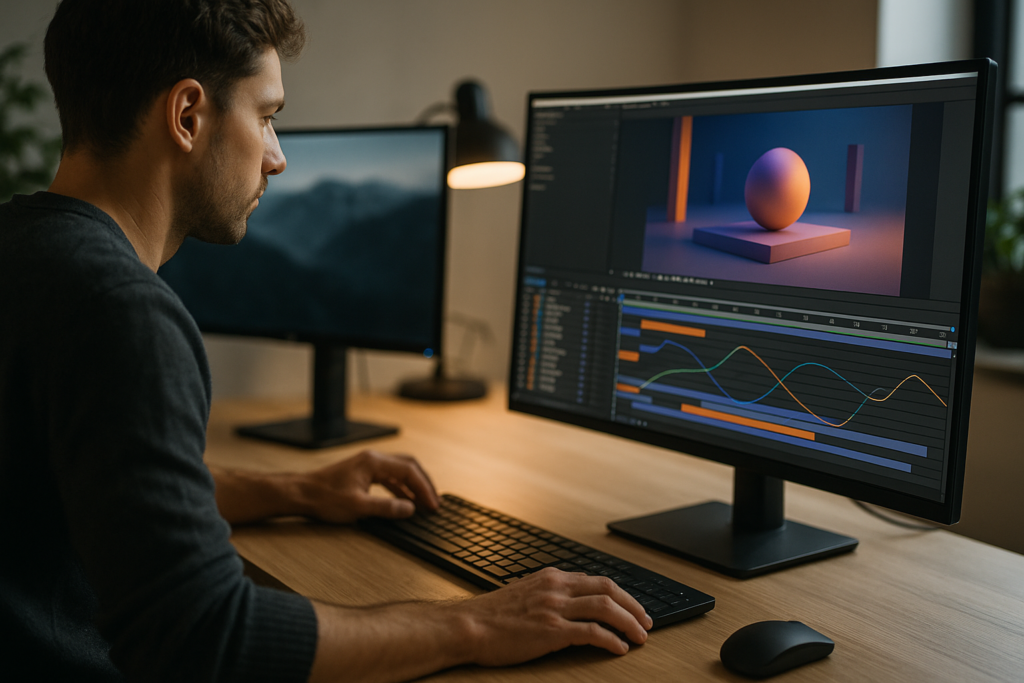
Most 3D motion design inside After Effects is technically 2.5D: flat layers placed in 3D space. Think of photos, shapes, or UI cards at different Z positions, animated with a camera. True 3D uses real 3D geometry (meshes, extrusions, reflections). Both approaches are valid for client work:
- 2.5D – faster, lighter, great for social content, UI motion, and text-based graphics.
- True 3D – better for product spins, logo extrusions, and stylized worlds, but heavier on performance.
Why 3D motion design matters
3D motion design is no longer just a “nice to have.” Platforms are saturated with templates, presets, and flashy cuts. What stands out now is depth and polish. Even subtle 3D touches can:
- Increase retention on reels and shorts
- Make product and UI demos feel more tangible
- Sell mood and story faster in intros and bumpers
- Help clients feel they are getting studio-level output
Who 3D motion design is for
You do not need to be a full-time 3D generalist. 3D motion design in After Effects is especially useful if you are:
- An editor who wants to keep motion graphics in-house
- A YouTube creator or streamer building a recognisable visual language
- A motion designer who mainly works with 2D but wants to add depth without switching apps
- A social media creative who needs standout hooks and product visuals under tight deadlines
How this connects to your daily projects
Whether you are cutting music videos, lyric edits, explainers, or UI promos, 3D motion design lets you reuse the same assets in more dynamic ways. A flat screenshot becomes a flying dashboard grid. A logo becomes part of a 3D scene. A simple title card turns into a camera-driven opener with layers and light. The rest of this guide focuses on how to do that efficiently, with an editor-first mindset.
3D Animation in After Effects and Common Use Cases
What 3D animation in After Effects looks like
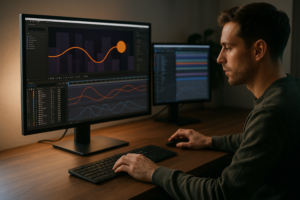
3D animation in After Effects means enabling the 3D switch on layers, adding a camera and lights, and animating properties like position, rotation, and depth (Z). Unlike a full 3D package, you stay in a familiar layer-based timeline, so editors can adopt it quickly.
Typical 3D animation styles in After Effects
- Layered parallax scenes – multiple images or cards at different depths, like a multi-plane stage.
- UI and widget fly-throughs – interface panels floating in 3D space, often used in tech and finance promos.
- 3D-infused lyric and music visuals – text and elements arranged in 3D environments to create depth behind the artist or footage.
- Stylized 3D titles – animated type that orbits around invisible axes or moves through volumetric space.
Real project examples for 3D motion design
To make this concrete, imagine a UI-focused promo where dashboards and cards float in space. A project like the Google Maps-style widget animation shows how 2.5D layers, depth, and camera moves can sell the feel of an interactive product. Similarly, music-focused edits like the cinematic visual for a track or a stylized lyric layout such as colorful lyric compositions are prime candidates for 3D text arrangements and camera sweeps.
Where 3D fits in different content types
- Social reels and shorts – quick 3D camera moves for titles, product highlights, and UI callouts.
- Music and lyric videos – 3D environments for text, grids, and particles around the artist.
- Tech and finance explainers – floating dashboards, cards, and stats in 3D space, similar to a fintech dashboard-style sequence.
- Branded intros and bumpers – logo reveals, kinetic titles, and modular segments that can be reused across videos.
Why editors love 3D in After Effects
3D animation in After Effects lets you stay inside your existing pipeline:
- One project file for edit and motion graphics on simpler jobs.
- Easy relinking and swapping of assets (logos, screenshots, lyrics, UI captures).
- Flexible templates that you can adapt to new campaigns or songs with minimal changes.
Once you understand the basics, you can lean on pre-built scenes, rigs, and templates to get 3D motion design into your timeline without having to model or texture from scratch.
Frequent 3D Motion Design Mistakes in After Effects
Overcomplicating before nailing the basics
Many editors turn on 3D and immediately stack up cameras, lights, and heavy plugins. The result is slow previews and chaotic timelines. Start with a single camera, a few 3D layers, and no effects beyond motion blur until you are comfortable.
Common technical missteps
- Messy compositions – no naming, random precomps, duplicated comps with “final_final” naming. This makes 3D setups hard to debug.
- Ignoring frame rate and resolution – mixing 23.976 and 30 fps or designing a 4K 3D scene for content that finishes in 1080p wastes time and power.
- Wrong camera rig – animating position and point of interest directly instead of using a null-based rig often leads to awkward moves.
- Unoptimized lights and shadows – too many lights with high shadow quality kills performance.
Timing and easing problems
3D camera moves magnify timing mistakes. If you avoid the Graph Editor, your 3D animation can feel robotic or nauseating. Watch for:
- Linear keyframes on long camera moves that stop abruptly.
- Uneven spacing between layers that kills the parallax effect.
- Keyframes clustered too close together, creating micro-jerks in movement.
Checklist to avoid timing issues
- Use Easy Ease or custom Bezier curves on main camera moves.
- Keep camera motion limited to one or two axes at a time.
- Preview moves with low-res settings before adding effects.
Misusing motion blur and depth-of-field
Motion blur and DOF can make 3D motion design feel cinematic, but they are often misused:
- Motion blur on every single background element, causing muddy results.
- Depth-of-field so strong that text or UI is unreadable.
- Enabling camera DOF too early, forcing slow renders during blocking and layout.
Performance-killing habits
- Building a huge 3D scene in a single comp instead of modular sections.
- Using multiple heavy particle systems, glows, and adjustment layers before locking camera moves.
- Ignoring pre-render opportunities for locked segments.
Practical fixes
To keep 3D animation in After Effects practical for client deadlines:
- Block your camera and layer positions in simple colors or solids first.
- Switch to Draft 3D or use region of interest when experimenting.
- Only turn on high-quality lighting, shadows, and DOF for near-final passes.
By avoiding these pitfalls, your 3D motion design work stays editable, responsive, and reliable under revisions.
Choosing the Right 3D Approach for Each Project
Start from the final deliverable
Before you animate anything in 3D, clarify where the video will live and how it will be used. Vertical reels, YouTube explainers, cinematic openers, and corporate decks all need different pacing and complexity. The right 3D motion design approach is the one that hits the brief within the time and budget you actually have.
Social reels and shorts
For vertical content, you need speed and legibility:
- Use simple 2.5D card layouts and quick camera moves.
- Emphasize bold, readable type and large UI elements.
- Animate one idea per shot: a product spin, a UI reveal, or a lyric phrase.
YouTube content and mid-length videos
Creators often need repeatable systems: intro, lower thirds, transitions, and call-to-action animations that match a channel’s look. Here, reusable 3D scenes and pre-rigged camera moves shine. You can build a modular toolkit once and reuse it across multiple episodes.
Ads and product promos
For promos, 3D motion design should support clarity and desirability:
- Showcase the product from multiple angles or UI states.
- Use 3D space for storytelling: start wide, move into detail, then pull back.
- Limit effects and focus on clean lighting, reflections, and motion.
Cinematic and music-driven projects
Music videos and visualizers benefit from richer 3D environments. You might arrange lyrics, shapes, and particles in 3D space with rhythmic camera moves. A stylized visual sequence can mix 2.5D layers, glows, and depth to keep interest over a full track without feeling repetitive.
Corporate and explainer work
Here, consistency and clarity are more important than experimental moves. 3D motion design often supports data, UI, or process steps. Consider using a small set of flexible scenes that can be updated for new presentations, regions, or product lines.
When templates and subscriptions make sense
Editors and motion designers working on multiple clients or recurring series rarely have time to hand-build fresh 3D systems for every job. A curated library or an Unlimited After Effects Templates Subscription can save hours by giving you pre-built:
- 3D-ready UI layouts and widget scenes
- Camera rigs with clean, editable keyframes
- Lyric, title, and transition systems that already live in 3D space
Leaning on official documentation
Whenever you hit a wall on 3D cameras, lights, or rendering behavior, cross-check your assumptions with the official After Effects help and documentation. This is especially useful for understanding how Draft 3D, 3D renderers, and hardware acceleration interact on your system.
Decision-making framework
When a new project arrives, ask yourself:
- Does this truly need full 3D, or will layered 2.5D be enough?
- How many unique scenes do I need, and can any be reused from previous work or templates?
- What is the maximum render time per version I can realistically allow?
- Which shots absolutely must have 3D depth, and which can stay simple?
Answering these questions early lets you design a 3D approach that fits your constraints instead of fighting them later.Choose a faster 3D workflow
Practical Template-Based 3D Workflow in After Effects
Start with the right project setup
Before importing any assets or templates, lock in key settings:
- After Effects version – check that your chosen project or template matches your installed version to avoid missing features or broken effects.
- Frame rate – set the comp to match your final output (23.976, 25, or 30 fps) before you start animating. Avoid mixing different frame rates in one 3D-heavy timeline.
- Resolution – design at the delivery resolution (1080×1920 for vertical, 1920×1080 or 4K for horizontal) so your 3D motion feels intentional.
Organizing comps, precomps, and naming
3D scenes get messy fast. Use a clear folder structure:
- “01_SCENES” for master 3D comps.
- “02_PRECOMPS” for text, UI, and graphic building blocks.
- “03_ASSETS” for footage, music, and images.
Within each comp, name camera rigs, nulls, and key layers clearly (e.g., “CAM_Main,” “CTRL_Camera,” “UI_Card_Front”). This small habit massively speeds up revisions and hand-offs.
Working with 3D-ready templates
When you open a 3D motion design template, scan for:
- A dedicated Controls comp for colors and global settings.
- Precomps labeled like “EDIT_TEXT_HERE” or “DROP_UI_HERE.”
- Camera controllers or master nulls instead of raw camera keyframes.
Many UI or widget-style projects, similar to a social widget animation, rely on a handful of well-organized 3D scenes. Understanding the controller structure lets you adapt them quickly for new channels or brands.
Performance tips while blocking animation
- Turn on Draft 3D for rough layout and camera tests.
- Solo important layers when tweaking timing.
- Lower preview resolution and skip frames if needed.
- Use simple solids or placeholder cards until moves are approved.
Managing plugin dependencies
Some 3D motion design templates require third-party plugins (for example, particular renderers or particle systems). To stay flexible:
- Check the documentation or project notes to see which plugins are required.
- Whenever possible, favour templates that either use native tools or include a fallback version.
- If a plugin-heavy option is unavoidable, isolate that sequence in its own comp and pre-render it to a high-quality codec once locked.
Customizing colors, typography, and transitions
Think of a 3D template as a system, not a locked design. Follow a simple pass order:
- Pass 1 – Structure: adjust camera movement, layer arrangement, and duration so the sequence fits your audio and edit.
- Pass 2 – Branding: apply brand colors, replace fonts, and swap in your logos or UI captures.
- Pass 3 – Details: refine transitions, overlap actions, and add subtle secondary motion.
This structured approach keeps you from getting stuck tweaking tiny easing curves before the main timing is approved.
Keyframe organization and precomps
For complex 3D motion design, keep keyframes discoverable:
- Drive cameras via one or two main controllers (position and rotation) instead of scattering keyframes across many layers.
- Precomp sections that loop or repeat so you can reuse them without duplicating keyframe work.
- Use comments or label colors on key layers to highlight important controls.
Preview and caching basics
To keep 3D animation in After Effects responsive:
- Disable heavy effects for layout passes, then enable them for short, focused previews.
- Use work area trims to preview only the segment you are adjusting.
- Cache long camera moves after you are satisfied with timing so you don’t re-render them every tweak.
Realistic use cases for template-driven 3D
Here are a few workflows where a 3D-ready template saves serious time:
- Reels and shorts – pre-built 3D intros, end cards, and UI hooks that you swap content into weekly.
- Ads and product promos – modular scenes for hero shots, feature callouts, and pricing panels, adapted from a single master project.
- Music and lyric edits – looping 3D text environments that can be retimed and recolored track by track.
- Channel branding – a library of 3D transitions, lower thirds, and bumpers that stay on-brand across months of uploads.
Quality checks before export
Before rendering, run through a quick checklist:
- Check that all text is legible with DOF and motion blur enabled.
- Ensure important UI or product details stay on screen long enough to read.
- Preview with audio to confirm hits and transitions match the beat or VO.
- Review in both full-res and a small window to see how it reads on mobile.
With these steps, template-based 3D motion design becomes a structured, repeatable workflow instead of a one-off experiment.
Advanced 3D Motion Design Systems and Long-Term Workflow
Designing for consistency across a whole series
When you work on recurring content—weekly shows, campaigns, or artist visuals—3D motion design should support a consistent visual language. Build a small internal library of:
- Reusable camera rigs (slow push, orbit, reveal, crash zoom).
- Standard 3D environments (grid floor, floating cards, data walls).
- Unified color and lighting setups saved as template comps.
Instead of reinventing the look each time, you just remix these building blocks to fit new topics or tracks.
Using styleframes and references
Before animating, create static styleframes for key shots or borrow still frames from previous work. This keeps your 3D motion design grounded in a clear visual target and avoids endless trial and error.
Modular transitions and systems
Think in modules rather than single-use comps:
- 3D transitions that work between any two scenes.
- Text rigs where you simply paste new copy into precomps.
- Card-based layouts where you swap out assets without touching camera keys.
For example, a UI-based data wall similar in complexity to the scenes you might see in animated finance widgets can live as a master comp. You then create variations by changing content only.
Export and render strategies
3D motion requires more render time. To keep your pipeline efficient:
- Use intermediate high-quality exports (ProRes, DNxHD, or similar) for locked 3D segments that you then cut in your NLE.
- Reserve lossless or near-lossless exports for assets you might reuse across multiple projects.
- Test a short section of the heaviest scene first to estimate total render time.
Dynamic link considerations
Linking After Effects 3D scenes directly into your edit software can be convenient, but it also means longer load and render times in the NLE. If a sequence is revision-stable, pre-render it instead and only dynamic-link sections that will change frequently.
Keeping projects lightweight over time
When you work worldwide with distributed teams or need to archive projects for later updates, file size matters. To keep 3D motion design projects manageable:
- Remove unused assets with the Collect Files feature when archiving.
- Limit the number of nested comps that contain heavy effects and pre-renders.
- Save versioned project files at logical milestones instead of duplicating comps endlessly.
Quality control for 3D motion design
Before delivering, review your work with a systematic eye:
- Check that parallax, focus, and lighting guide the viewer’s attention.
- Look for awkward camera rotations or gimbal-like motion.
- Scrub through at half-speed to spot any sudden jumps, popping elements, or unintentional layer intersections.
Building your own internal templates
Over time, your best 3D motion design projects can become internal templates:
- Save reusable comps and rigs in a dedicated “TEMPLATES” folder.
- Replace client-specific logos and assets with placeholders.
- Add instructions in a text layer for future you or collaborators.
This turns each successful project into an asset you can adapt for future clients or series instead of starting from scratch every time.
Long-Tail Questions About 3D Motion Design and After Effects
Common search intents from editors and creators
When people explore 3D motion design and 3D animation in After Effects, they often ask similar, practical questions. Here are concise answers tailored to real workflows.
- “Can I do 3D without leaving After Effects?” – Yes. For many commercial projects, 2.5D layers, cameras, and lights are enough. For advanced product renders, you might still rely on dedicated 3D apps, but a lot of UI, lyric, and title work can stay fully in After Effects.
- “Is 3D motion design too heavy for a laptop?” – Not if you work smart: use Draft 3D, keep scenes modular, and avoid stacking many heavy effects. Vertical and social content rarely needs simulation-heavy shots.
- “How do I get smoother camera moves?” – Use a camera parented to a null, animate the null, and refine curves in the Graph Editor. Keep moves simple: one main direction per shot, with eased starts and stops.
- “Do I need plugins for 3D in After Effects?” – Native tools cover a lot, especially for cards, titles, and UI. Plugins are helpful for specific looks (particles, reflections, complex 3D geometry), but not mandatory for professional motion design.
- “What is the best way to learn 3D motion design quickly?” – Deconstruct existing templates and projects. Replace text and assets, study how cameras and controllers are set up, then rebuild a small scene from scratch using the same logic.
- “How do I keep 3D sequences consistent across multiple videos?” – Create a master style project with standardized cameras, lighting, and color controls, then duplicate it for each new video. This is particularly effective for recurring series, whether you work with local clients or collaborate worldwide.
Where 3D fits in a broader edit
3D motion design does not need to dominate a whole video. You can use it strategically:
- At the start and end for recognition (intros and outros).
- To highlight key chapters or features within a longer piece.
- As loopable backgrounds under text or performance footage.
Thinking of 3D as a focused storytelling and branding tool keeps your workload manageable while still raising production value.
Bringing 3D Motion Design Into Your Everyday Workflow
Recap of core principles
3D motion design inside After Effects becomes practical when you treat it as an extension of your existing edit, not a separate discipline. Focus on:
- Using 2.5D techniques and simple camera rigs for most projects.
- Keeping comps, precomps, and controllers organized and clearly named.
- Blocking out movement first, then adding detail and effects later.
- Leaning on proven project structures and templates instead of reinventing every scene.
Benefits for editors and creators
When integrated well, 3D animation in After Effects gives you:
- Cleaner, more intentional motion that guides attention.
- Faster turnarounds thanks to reusable systems and scenes.
- More consistent results across channels, campaigns, or episodes.
Next steps for applying this guide
Pick one upcoming project—a reel, a promo, or a lyric cut—and decide which one or two shots will benefit most from depth. Build or adapt a small 3D scene for those shots first. As you get comfortable, expand that system into reusable intros, transitions, and widgets that fit your clients or channel.
With a thoughtful approach to 3D motion design, you can add depth, polish, and flexibility to your work while staying firmly within realistic production timelines and budgets.Start scaling your 3D edits
Conclusions
3D motion design in After Effects is most powerful when treated as a structured, repeatable workflow. By using 2.5D setups, organized templates, and smart preview habits, you can deliver deeper, more engaging visuals without sacrificing deadlines or flexibility.
FAQ
Do I need a powerful GPU for 3D motion design in After Effects?
A strong GPU helps, but smart workflow matters more. Use Draft 3D, modular scenes, and minimal heavy effects so even mid-range machines perform well.
What is the difference between 2.5D and full 3D in After Effects?
2.5D uses flat layers arranged in 3D space with a camera, while full 3D uses true geometry. Most UI, text, and social animations are efficiently done with 2.5D.
How can I make my 3D camera moves feel more cinematic?
Parent the camera to a null, animate the null only, use eased curves in the Graph Editor, and limit moves to one or two axes with clear start and end points.
What render settings should I use for 3D-heavy sequences?
Render master 3D shots to a high-quality mezzanine codec like ProRes or DNxHD, then do any final encoding for web or social platforms from your editing software.
How do I avoid long render times with 3D animation in After Effects?
Lock timing first using Draft 3D, disable heavy effects until the end, pre-render stable segments, and keep each scene focused instead of building one huge 3D comp.
Can I reuse the same 3D motion design setup for different clients?
Yes. Build neutral base projects with placeholder text and assets, then swap in logos, colors, and copy per client to maintain speed and consistency.