To animate shape paths in After Effects, you keyframe a shape’s Path property (or related path-based operators like Trim Paths) and then edit the path’s vertices and Bezier handles over time so the vector outline smoothly morphs from one state to another. That’s the core idea-and once you understand where the Path property lives, how After Effects interpolates between points, and which modifiers (Trim Paths, Merge Paths, expressions) can do the heavy lifting, you can build everything from simple line-draw animations to complex morphing logos and UI flourishes.
This guide is written for the real world: deadlines, revisions, and the occasional “can you make it more… alive?” note. We’ll start with what shape paths actually are, then walk through setup, keyframing, precision editing, advanced modifiers, multi-path choreography, performance tuning, common mistakes, and finally how to leverage presets and templates without surrendering creative control. Along the way, if you want deeper official documentation, Adobe’s own learning resources (often surfaced under Adobe Learn) are a useful companion-especially when you want the authoritative wording for a feature or a quick refresher on a panel you haven’t touched since last year.
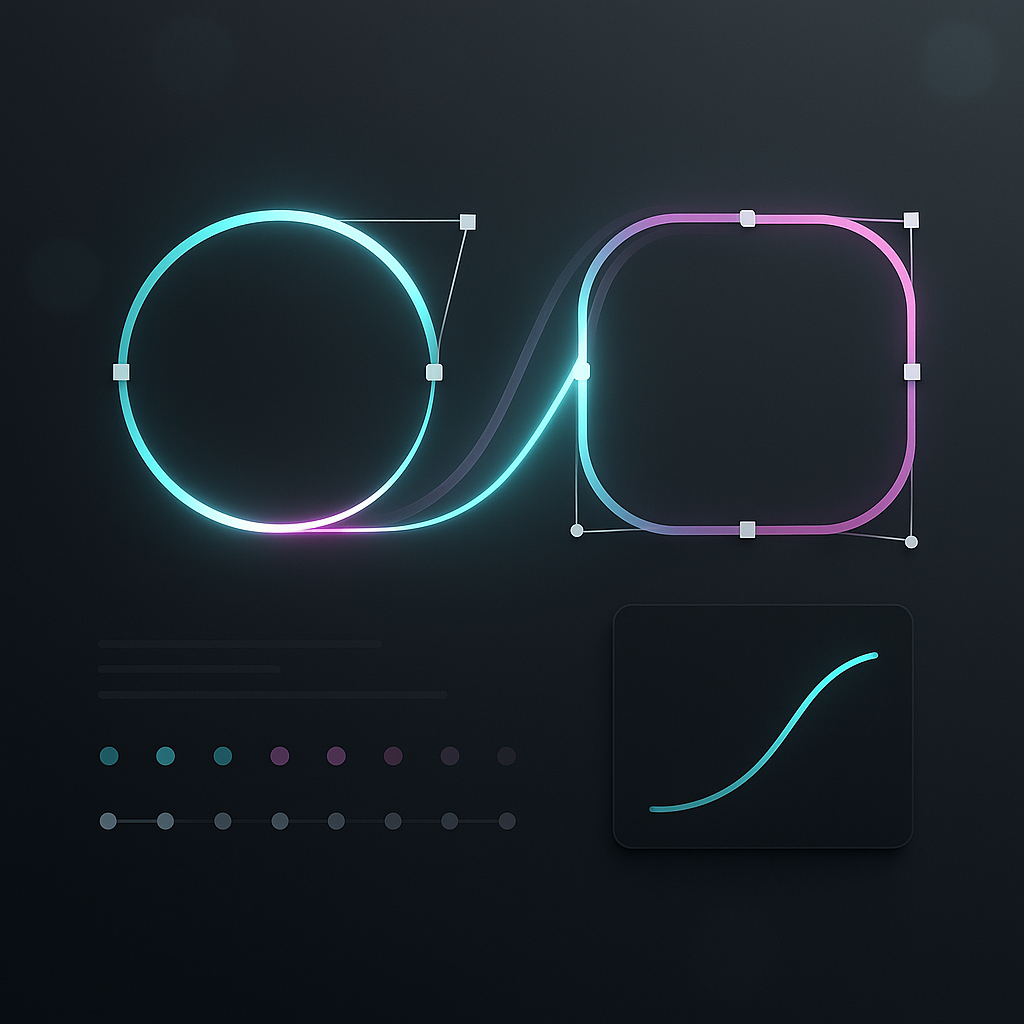
Watch After Effects shape path animation examples
📋 Table of Contents
What are shape paths in After Effects?
In After Effects, a shape path is the vector outline that defines a shape inside a Shape Layer. Think of it as a set of points connected by segments-straight or curved-that can be filled, stroked, trimmed, repeated, merged, and animated. Unlike pixel layers, shape paths are resolution-independent: you can scale them up for 4K, 8K, or “the client’s LED wall that’s somehow wider than your apartment,” and they remain crisp.
Shape paths live inside a hierarchy: Layer > Contents > Group > Path (plus any Fill/Stroke/Operators). This hierarchy matters because it determines what you’re animating. Are you morphing the path itself? Or are you animating a stroke along it? Or are you using the path as a mask-like guide for other effects? Knowing the difference saves hours of keyframe wrestling.
How do shape paths function in animations?
When you animate a path, After Effects interpolates between two (or more) path states. Each state is essentially a snapshot of the path’s vertices and their Bezier handles at a given time. The program tries to match point-to-point between keyframes, which is why path morphs can look elegant-or like a rubber band fighting a lawnmower-depending on how consistent your point count and point order are.
Shape paths function as both geometry and instruction. They define the visible outline (geometry), but they also drive operators like Trim Paths (instruction). With Trim Paths, for example, the path becomes a “track” that a stroke can travel along. With Repeaters, a single path can become a pattern. With Merge Paths, multiple paths can combine into one silhouette that can then be animated as a unified form.
One subtle but important detail: shape paths in Shape Layers are different from masks on footage layers, even though both are “paths.” They share concepts (vertices, tangents, keyframes), but they live in different places and interact with different toolsets. Shape paths are designed for vector graphics workflows; masks are designed for compositing and isolation. You can animate both, but you’ll reach for them for different reasons.
Types of shape paths available in After Effects
After Effects gives you several ways to create paths, and the “type” often influences how you animate:
- Parametric shapes (Rectangle, Ellipse, Polygon, Star): These have size, roundness, and other parameters. You can animate those parameters without converting to a Bezier path.
- Bezier paths (Path): Created with the Pen tool or by converting parametric shapes. These are point-based and ideal for morphing.
- Imported vector paths: From Illustrator (or other vector sources). These can be pasted into After Effects as shape paths and then animated.
- Text-to-shapes paths: Convert text to shapes and you get editable vector outlines for each character-perfect for kinetic typography and logo reveals.
Parametric shapes are great for clean, controllable animations (like UI elements) because they remain editable as “mathy” objects. Bezier paths are your sculpting clay: more flexible, more expressive, and occasionally more chaotic if you don’t manage point structure carefully.
How to set up a shape layer for path animation
Good path animation begins before you set a single keyframe. Setup is where you decide what kind of path you need, how it’s grouped, and which properties should remain parametric versus converted to Bezier. If you’ve ever animated something and later realized you needed rounder corners-or fewer points-you already know why setup matters.
Also, shape layers can become dense quickly: multiple groups, multiple strokes, multiple operators. A tidy structure isn’t just for your future self; it makes animation decisions clearer. When a client asks for “the line to draw on faster but only on the second half,” you want to know exactly where that line lives.
Creating and editing shape layers
To create a Shape Layer, you can:
- Choose a shape tool (Rectangle, Ellipse, etc.) and drag in the Comp panel.
- Or use the Pen tool to draw a custom shape (make sure no layer is selected if you want a new shape layer).
Once created, open the layer in the Timeline and navigate: Contents → Shape Group → Path (or Rectangle Path 1, Ellipse Path 1, etc.). If you start with a parametric shape and later need vertex-level control, you can right-click the parametric path (e.g., Rectangle Path 1) and choose Convert To Bezier Path. That swap is a one-way door: you gain point editing, but you lose the parametric sliders like Roundness.
Editing shape layers is easiest when you embrace two habits:
- Name things: “Shape 1” becomes “Underline,” “Blob Morph,” or “Logo Outline.” Your timeline becomes readable instantly.
- Group logically: Keep related paths in the same group when they share operators (like Trim Paths). Separate them when they need independent animation.
If you’re importing from Illustrator, you can copy a path (or group) and paste it into After Effects. Many artists prefer to paste into a shape layer’s path property to keep everything vector-native. When you do this, check the scale and orientation-Illustrator and After Effects sometimes disagree about what “normal” means, and you may need to adjust transform properties at the group level.
Accessing and manipulating path properties
The key property for morphing is typically the Path property found under a shape group. For example:
- Layer > Contents > Group 1 > Path 1 > Path
For parametric shapes, you’ll see Size, Position (within the group), and maybe Roundness or Points. Those can be animated too, and often more cleanly than a full path morph. If you can animate Size instead of a dozen vertices, do it. Your render time and your sanity will thank you.
To manipulate the path directly:
- Select the shape layer and then select the Path property in the Timeline.
- In the Comp panel, you’ll see vertices and handles. Drag vertices to reshape; drag handles to change curvature.
- Use selection tools (Selection tool / Direct Selection tool behavior) to move points precisely.
One more structural tip: consider animating at the group transform level (Contents → Group → Transform) when you want to move/rotate/scale the shape without changing the path itself. It’s cleaner, more reversible, and it keeps your path keyframes focused on actual shape changes rather than overall motion.
How to animate shape paths using keyframes
Keyframing shape paths is where After Effects feels like animation and not just design. You define a start state, define an end state, and then sculpt the in-between by adjusting timing, easing, and point behavior. The trick is to make the software’s interpolation work with you, not against you.
Before you begin, decide what you’re animating:
- Morphing: Path → Path (the outline changes).
- Revealing: Stroke/Trim Paths (the outline is drawn on).
- Transforming: Group Transform (the shape moves as a whole).
This section focuses on morphing: animating the Path property itself.
Adding keyframes to path properties
To animate a path:
- Twirl down your shape layer to find Path.
- Move the playhead to your starting time.
- Click the stopwatch next to Path to set the first keyframe.
- Move the playhead to a later time.
- Edit the path in the Comp panel (move points/handles) to create the new shape. After Effects automatically creates a new keyframe.
That’s the mechanical process. The artistic process is choosing shapes that can morph elegantly. As a rule, morph between forms that have similar “visual logic”: a circle to a rounded square is easy; a circle to a complex logo is possible but needs point planning. If you’re morphing between two distinct silhouettes, consider building intermediate keyframes so the transition feels intentional rather than accidental.
Timing matters early. If the morph should feel snappy, keep keyframes closer. If it should feel luxurious (think premium brand motion), give it room and then use easing to create a gentle acceleration and deceleration.
Adjusting path points and handles over time
Once keyframes exist, you can refine the morph by editing vertices at specific times. Scrub to a keyframe, select the path, and adjust points. You’re not just changing the shape-you’re changing the entire interpolation between neighboring keyframes.
Here are practical techniques that make path animation behave:
- Keep point counts consistent: If one path has 4 points and the other has 40, After Effects will still animate, but the mapping will be messy. Aim for similar complexity.
- Match point order: The “first vertex” and subsequent vertex sequence affect how the morph travels around the shape. If the morph twists, you likely need to adjust vertex order.
- Use hold points strategically: Sometimes you want one region to stay stable while another transforms. Add intermediate keyframes where stable areas remain unchanged.
- Edit tangents for character: Bezier handles control curvature; subtle handle changes can turn a stiff morph into something organic.
If your morph looks like it’s rotating or “crawling” around the outline, it’s often because the vertex mapping is misaligned. A common workflow is to set both keyframes, then at each keyframe reposition the “starting” vertex to a comparable location (e.g., top center on both shapes). That alone can fix many ugly twists.
Also, don’t forget the Graph Editor. Path keyframes can be eased like any other property. Even if you don’t obsess over speed graphs, applying Easy Ease and then refining influence can transform the feel from mechanical to polished.
What tools and modifiers enhance shape path animation?
After Effects gives you a generous toolkit for path animation-some of it obvious (Pen tool), some of it quietly powerful (Trim Paths, Merge Paths, expressions). The best animations often combine these: you might morph a path while also trimming its stroke, all driven by a single control slider for easy art direction.
When you’re learning, it’s tempting to animate everything manually. But modifiers exist because manual keyframes don’t scale: they’re hard to revise, hard to art-direct, and easy to break. Operators and expressions make your animation more modular-more like a system, less like a one-off stunt.
Using the pen tool for precise path edits
The Pen tool is your scalpel. It’s how you add points, remove points, convert corner points to smooth points, and fine-tune tangents. For path animation, precision matters because every extra vertex is a potential wobble.
Useful Pen tool habits for animation-friendly paths:
- Use as few points as possible: A curve doesn’t need six points if two will do.
- Prefer smooth points for smooth motion: Corner points can introduce sharp changes that read as jitter during a morph.
- Place points at “meaningful” locations: Peaks, corners, and curvature changes. This helps mapping between keyframes.
If you’re editing a path and it feels like the handles are fighting you, zoom in and adjust tangents deliberately. Micro-movements at 400% zoom can remove a visible kink at 100%. This is the unglamorous craft part-like kerning type-where polish is born.
Finally, remember that you can animate without constantly adding points. Often, a better approach is to design the path with the right point structure first, then animate. Retrofitting point structure mid-animation is possible, but it increases the chance of inconsistent interpolation.
Applying the trim paths animator
Trim Paths is the crowd favorite for a reason: it creates “draw on” and “erase off” animations with minimal keyframes. Instead of morphing the path, you animate how much of it is revealed.
To use Trim Paths:
- Select your shape group (or the specific group containing the path you want).
- Click Add → Trim Paths.
- Animate End from 0% to 100% (or animate Start/End for wipe-like effects).
Trim Paths works best with strokes. If your shape uses a Fill, you can still get interesting results, but the classic “line draws itself” look comes from a Stroke with Trim Paths applied. For extra refinement, adjust:
- Offset to rotate the reveal around the path.
- Trim Multiple Shapes (if available) to control whether paths trim individually or as a combined set.
Combine Trim Paths with a tapered stroke (via Stroke settings) and a little motion blur and you get a lively, calligraphic draw-on that feels hand-made-without actually being hand-made. Which is, frankly, one of the great joys of motion design.
Using path expressions for dynamic animations
Expressions can turn a static path animation into a responsive system. While you can’t always procedurally rewrite complex Bezier paths with a one-liner, you can drive path-adjacent properties (Trim Paths End, Offset, Stroke Width, group transforms) with controls, audio, time, or other layers.
Common expression-driven setups:
- One slider controls many reveals: Link multiple Trim Paths End properties to a single Slider Control for synchronized line animations.
- Looping: Loop a path animation or a Trim Paths cycle for seamless repeats (use looping expressions on keyframed properties).
- Wiggle with restraint: Add subtle organic motion by wiggling group position/rotation rather than wiggling the path itself (path wiggle can look messy fast).
Example: drive Trim Paths End with a slider on a Null layer (conceptually): set an expression on End that references the slider. Now art direction is easy: “Make it 20% faster” becomes “Change one keyframe.”
If you want to go further, explore expressions that respond to time (for continuous motion), markers (for timing beats), or even audio amplitude (for music-driven line reveals). When you’re learning, start small: a single control that affects multiple properties is already a huge upgrade in workflow.
How to create complex animations with multiple shape paths
Single-path animations are great for learning. Real projects, though, often involve multiple paths interacting: outlines, fills, accents, secondary motion, and transitions between icons or scenes. Complexity doesn’t have to mean chaos-as long as you structure layers and groups intentionally.
The key is to think in systems: one group might be “primary stroke,” another “secondary spark,” another “background blob.” Each has its own animation role, and they coordinate via timing and shared controls.
Combining multiple shape layers
You can combine multiple paths in two main ways:
- Multiple groups inside one shape layer: Great for shared operators and fewer layers in the timeline.
- Multiple shape layers: Great for independent transforms, blending modes, track mattes, and easier per-element motion blur control.
For complex animations, consider this workflow:
- Build each element as its own group (or layer) and animate it in isolation.
- Pre-compose or parent to a Null for global motion.
- Add secondary motion (small offsets, scale overshoot, subtle rotation) to avoid everything moving like a marching band.
When coordinating multiple paths, use markers and label colors to keep timing readable. You can also stagger animations with a consistent delay (e.g., 2-4 frames) to create a pleasing cascade.
If you’re building icon morphs (icon A → icon B), it’s often easier to animate separate components (e.g., circle, line, arrowhead) than to brute-force morph a single complex path. Modular pieces are more art-directable and more forgiving when revisions arrive.
Animating path merging and splitting effects
To create “merge” and “split” effects, you can combine a few techniques:
- Merge Paths operator (Add → Merge Paths) to unite, subtract, intersect, or exclude overlapping shapes.
- Trim Paths to reveal or retract segments.
- Path morphing to change silhouettes as if shapes are melting together.
A classic effect: two circles slide together and become one blob. You can do this by animating their positions and using Merge Paths (Unite), then adding a little roundness via shape design and easing. Another approach is to morph a single path from “two-lobed” to “one-lobed,” which gives you finer control over the “liquid” feel.
For splitting, reverse the logic: animate Trim Paths to retract a connecting stroke, or animate a merged shape into two separate shapes by morphing the path and then fading/offsetting components. If you need a crisp split (like UI chips separating), keep corners clean and use faster easing. If you want an organic split, slow the timing slightly and add subtle overshoot on the separating pieces.
One production-friendly tip: if Merge Paths starts behaving unpredictably, simplify the shapes and ensure their group order is correct. Merge operations depend on stacking order inside the same group; when shapes are in different groups, the operator may not affect them the way you expect.
How to optimize shape path animations for performance
Shape layers are efficient-until they aren’t. Complex paths, multiple operators, heavy motion blur, and lots of simultaneous layers can turn previews into a slideshow. Optimization isn’t about sacrificing quality; it’s about choosing where complexity actually shows on screen.
Performance also affects creativity. If previewing takes too long, you’ll iterate less, and the animation will be “finished” before it’s truly polished. So optimizing is not just technical hygiene-it’s part of staying playful and experimental under deadline.
Reducing path complexity
The fastest shape animation is the one with fewer vertices and fewer expensive operations. Practical ways to reduce complexity:
- Simplify imported paths: Illustrator artwork can be point-heavy. Clean it up before importing or reduce points after converting to Bezier (manually, or via careful redesign).
- Avoid unnecessary masks/paths: If a detail is too small to read, remove it.
- Prefer parametric shapes when possible: Animating Size/Roundness is cheaper and cleaner than animating dozens of vertices.
- Minimize nested operators: Repeaters + Merge Paths + multiple strokes can stack up computationally.
Also consider a pragmatic workflow: animate with simplified shapes first (a “proxy” version), then swap in the final detailed paths once timing is locked. This mirrors character animation workflows where you block first, polish later.
If you’re working in a heavy comp, use Solo switches and Region of Interest during preview. It doesn’t change render quality, but it makes iteration faster-especially when you’re fine-tuning a single morph.
Using motion blur and easing for smoother effects
Motion blur can make shape path animation feel dramatically smoother-because it hides tiny imperfections and adds cinematic continuity. But motion blur can also increase render cost. Use it intentionally:
- Enable motion blur on the layers that benefit (fast-moving strokes, morphing shapes).
- Leave it off for elements that are mostly static or already soft.
Easing is the other half of “smooth.” Even a perfectly designed morph can look harsh if it moves linearly. Apply Easy Ease to path keyframes, then refine timing so the motion accelerates and decelerates naturally. If the morph feels like it hesitates, adjust keyframe spacing rather than piling on more keyframes.
When in doubt, let easing do the work before adding extra complexity. A well-eased simple path often looks better than a complicated path with stiff timing. Motion design is full of these small paradoxes.
Common mistakes to avoid when animating shape paths
Most “bad” path animation isn’t caused by a lack of talent; it’s caused by predictable pitfalls: too many points, mismatched point structure, messy anchor points, and a timeline that reads like a ransom note. Avoiding these mistakes makes your work cleaner, faster to revise, and easier to scale into bigger projects.
Consider this section your friendly future-self intervention.
Overcomplicating paths leading to performance issues
The most common mistake is assuming detail equals quality. In path animation, detail often equals noise. Too many vertices create micro-wobbles during interpolation, especially on curves. They also slow down previews and make edits harder.
Signs you’ve overcomplicated a path:
- The outline jitters during a morph, even when keyframes are correct.
- It’s hard to select the “right” point because there are too many.
- Preview performance drops sharply when you enable motion blur or add operators.
Fixes:
- Redraw the path with fewer points (often faster than repairing a messy one).
- Use parametric shapes where possible.
- Break one complex morph into staged transitions with intermediate shapes.
There’s also a creative upside to simplification: minimal shapes read better at speed. If your animation is meant to be seen on social platforms or in UI contexts, clarity beats intricacy almost every time.
Ignoring anchor point placements
Anchor points are the quiet rulers of your animation. If your anchor point is in an odd place, rotations will swing wildly, scaling will feel like it’s slipping, and parenting will behave like a prank.
In Shape Layers, you have anchor points at multiple levels:
- Layer Transform anchor point (the whole layer).
- Group Transform anchor point (within Contents → Group → Transform).
Many artists forget the group anchor point exists and then wonder why rotating a group feels wrong. If you’re animating a path inside a group, set the group anchor point to a logical pivot (center, hinge, baseline, etc.). This is especially important when combining path morphs with rotations or scaling-otherwise, the morph may look like it’s drifting.
A practical habit: before you animate, decide where the “physical” pivot should be. If it’s a clock hand, pivot at the base. If it’s a bouncing blob, pivot near the center. If it’s a UI underline, pivot doesn’t matter much-until it does, when you add a flourish at the end.
How to use pre-made shape path animations and templates
Templates and presets are not cheating; they’re leverage. In professional motion design, you often need to deliver polished results quickly, and starting from a solid base can free you to focus on concept, timing, and brand-specific details. The trick is to customize enough that the work becomes yours, not “that preset everyone recognizes.”
If you’re learning, templates can also be educational. Reverse-engineering a good template teaches you how experienced animators structure shape layers, name groups, and build control rigs. Pair that curiosity with official references-again, Adobe’s learning ecosystem (often labeled Adobe Learn) can help confirm what a feature is supposed to do when a template uses something unfamiliar.
Importing and customizing shape path presets
There are a few common ways to bring in pre-made shape path animation:
- Animation Presets (built-in or third-party): Often applied to shape groups or properties like Trim Paths, Stroke, or Transform.
- Project templates: Full comps with controllers, precomps, and ready-to-render scenes.
- MOGRTs (Motion Graphics Templates): Especially useful if you’re handing off to Premiere Pro users.
Customization checklist (the “make it yours” list):
- Replace shapes: Swap the path but keep the animation system (Trim Paths, easing, expressions).
- Adjust timing: Don’t accept default pacing. Match the rhythm of your project.
- Rework easing: Presets often use generic ease. Tune it to feel intentional.
- Align styling: Stroke width, caps, joins, colors, and blending modes should match brand guidelines.
When replacing paths in a rigged template, be mindful of point structure. If the template expects a single continuous path and you paste in multiple disjoint paths, Trim Paths may behave differently. Sometimes the fix is as simple as reorganizing paths into separate groups with their own Trim Paths operators.
Also: keep an eye on scale. Templates are often built at a specific comp size. If you scale a shape layer too far, stroke widths might need adjustment (or you might need to animate stroke width separately) to maintain visual consistency.
Advantages of using templates for quick animations
Templates shine in a few scenarios:
- Fast turnarounds: Social ads, event promos, internal videos-anything where speed matters.
- Consistency: A template can enforce consistent motion language across multiple deliverables.
- Collaboration: Shared templates help teams stay aligned, especially when different people animate different scenes.
They also encourage better habits. A good template often includes:
- Centralized controls (sliders, color controls).
- Clean naming conventions.
- Separated design and animation logic (precomps or grouped structures).
The hidden advantage is psychological: templates reduce the intimidation of a blank timeline. You can start tweaking immediately, which keeps momentum high-an underrated factor when you’re learning or when you’re juggling multiple projects.
Explore a ready-to-use After Effects widget animation
Conclusion
Once you’re comfortable animating shape paths, you can start thinking beyond “make the shape change” and into “make the motion communicate.” Path animation is a language: sharp corners and snappy timing feel technical; rounded forms and slower easing feel friendly; asymmetry and overshoot feel playful. The same toolset can sell a fintech app’s confidence or a children’s brand’s warmth-just by changing curvature, timing, and restraint.
If you want to level up from here, try giving yourself small briefs: animate a checkmark that feels reassuring, a loading spinner that feels premium, or an icon morph that feels inevitable (as if it always wanted to become the next icon). Limit your tools-maybe only Path keyframes and Trim Paths-and see how much personality you can squeeze out of easing and point placement. Then, when you need a definitive reference for a feature or a panel you haven’t used in a while, cross-check with Adobe’s official learning resources (often grouped under Adobe Learn) to anchor your experiments in the “what it does” while you chase the more interesting question: “what it feels like.”
And one last practical note: save versions. Path animation can be delicate, and sometimes the best creative decision is the ability to go back two versions, steal the timing from one comp, the curvature from another, and stitch together something better than either. That’s not indecision-it’s craft.