
To use Mocha AE for motion tracking, you draw one or more splines around a planar surface (like a sign, screen, wall, or logo), track that plane through the shot, then export the tracking data back into After Effects to drive a corner pin, transform, or insert-so your graphics stick to the footage with convincing perspective and motion.
That’s the whole game in one sentence. The reason it works so well is that Mocha AE isn’t trying to follow a single pixel or a tiny feature point; it’s tracking a surface. If you’ve ever watched a traditional point tracker drift off a blurry cheekbone or lose a highlight as it flickers, Mocha’s planar approach feels like switching from balancing a coin on its edge to setting it flat on a table. This article walks you through the full workflow-from prepping your clip and choosing a trackable area, to refining tricky shots with occlusions, to applying the data in After Effects without the usual “why is my insert sliding?” headache.
📋 Table of Contents
What is Mocha AE and Its Role in Motion Tracking?
What is Mocha AE?
Mocha AE is the version of Boris FX Mocha that ships with Adobe After Effects. It’s integrated as a companion tool, designed primarily for planar tracking and masking tasks that can be frustrating (or time-consuming) inside AE alone. You launch it from within After Effects, track in Mocha’s interface, then send the results back to AE as tracking data.
In practical terms, Mocha AE is your “specialist” for anything that behaves like a flat surface in perspective: phone screens, billboards, posters, walls, tablets, car doors, book covers, even a forehead if you’re doing face-attached graphics. Mocha can also help with rotoscoping via its spline tools and can generate data for stabilizing and match-moving. The key concept is that it understands motion across a plane, not just a point.
Because Mocha AE is tightly linked to After Effects, you’ll often see it used in a loop: track in Mocha, apply in AE, realize you need a better shape or a different reference area, jump back to Mocha, refine, re-export. That iterative workflow is normal-and honestly, it’s where the quality comes from.
What is Motion Tracking in Video Editing?
Motion tracking is the process of analyzing a shot to determine how something moves over time, then using that motion to drive another element. You might track a sign so you can replace it, track a handheld camera move so text feels “in the world,” or track a face so a label follows a person in a documentary.
There are a few common flavors of tracking you’ll hear about:
- Point/feature tracking: follows distinct pixels or features (corners, high-contrast dots). Great when the features are clear and persistent; fragile when they’re not.
- Planar tracking: follows the motion of a flat surface, including translation, rotation, scale, shear, and perspective. This is Mocha’s specialty.
- 3D camera tracking: solves camera movement in 3D space to place 3D objects or text. Different tool, different goal.
Mocha AE’s role is mostly planar tracking-though it can also support tasks like stabilization and masking that benefit from a strong planar solve. If your goal is to attach something to a surface, Mocha is often the fastest path to a stable result.
Why Use Mocha AE for Motion Tracking?
The short version: Mocha AE is used because it stays locked when other trackers slide. The longer version is a list of small advantages that add up to a big quality difference:
- Planar intelligence: it tracks surfaces, so it can handle motion blur, noise, and partial texture loss better than point trackers.
- Better masking tools: Mocha’s splines are built for roto and tracking together-your mask can be your track, and your track can inform your mask.
- Occlusion handling: you can create holdout masks and manage layers so the tracker “ignores” objects passing in front.
- Corner pin workflows: inserting screen replacements or sign swaps is a classic Mocha task, and it’s built to export that data cleanly.
And because it’s part of the After Effects ecosystem, the handoff is well-documented. Adobe’s own help resource on Mocha and After Effects is a solid reference point when you want to double-check the official workflow steps and integration details: https://helpx.adobe.com/mocha-learn/using/mocha-after-effects.html.
One more reason that’s less technical and more psychological: Mocha encourages you to think like a compositor. You stop asking “where’s my tracking point?” and start asking “what surface am I attaching to, and what’s blocking it?” That mindset is half the battle.
How to Prepare Footage for Motion Tracking in Mocha AE
How to Import Footage into Mocha AE
In After Effects, Mocha AE is typically launched as an effect. The common workflow looks like this:
- Place your footage in a composition.
- Select the footage layer.
- Apply the Mocha AE effect (often found under tracking-related categories depending on your AE version).
- In the Effect Controls panel, click Launch Mocha.
Mocha opens with your clip already loaded, which is one of the nicest things about the AE integration: you’re not hunting for files or worrying you grabbed the wrong render. Inside Mocha, your clip appears in the viewer, and you’ll see a timeline with frames and playback controls.
Before you track anything, confirm you’re working at the correct frame range. If your AE layer is trimmed, or if you’re only tracking a portion of a longer shot, it’s worth verifying that Mocha’s timeline matches what you intend to analyze. Tracking extra frames you don’t need isn’t just wasted time-it can invite drift if the surface exits frame later.
Also note: if your footage is heavily compressed (blocky H.264 with macroblocking), consider transcoding to a more edit-friendly codec before tracking. Mocha can track compressed footage, but compression artifacts can “crawl” in a way that looks like texture movement, and that can confuse any tracker.
Watch After Effects motion graphics examples
How to Set Up Your Workspace for Tracking
Mocha’s interface is built around a few key areas: the viewer (where you draw splines), the layer controls (where you manage tracked shapes), and the tracking controls (where you choose parameters and run the track). Setting up your workspace isn’t about aesthetics-it’s about reducing mistakes.
Start with these practical setup moves:
- Zoom and pan so the surface you want to track is large enough to see texture clearly. If you can’t see detail, you can’t judge whether the track is slipping.
- Turn on overlays (surface grid/plane) so you can visually evaluate perspective and drift as you play back.
- Set your starting frame thoughtfully. Choose a frame where the plane is most visible and least occluded, ideally sharp and well-lit.
Then, do a quick “tracking viability check.” Ask yourself:
- Does the area have texture (logos, grain, scratches, patterns), or is it a smooth gradient?
- Is it planar enough? A curved surface can still work if the tracked region is small, but large curvature will fight planar assumptions.
- Will it be occluded by hands, hair, cars, or passing objects?
Finally, decide your end goal in After Effects. Are you doing a screen replacement (corner pin)? Attaching text (transform)? Stabilizing? That decision affects which tracking parameters you prioritize and how you’ll export data later.
Step-by-Step Process of Motion Tracking in Mocha AE
How to Create and Adjust Tracking Splines
In Mocha, you track by creating a layer with a spline (a closed shape) that surrounds the region you want to analyze. The spline defines the pixels Mocha should pay attention to when it solves motion.
Here’s a reliable method that works for most shots:
- Go to the frame where your surface is clean and readable.
- Select the spline tool (commonly X-spline or Bezier, depending on preference).
- Draw a shape around a textured portion of the plane. Include detail; avoid empty areas.
- Close the spline and name the layer clearly (e.g., “Phone_Screen_Track” or “Billboard_Left”).
The biggest beginner mistake is drawing the spline too tightly around the edges of the object. It feels logical-“I’m tracking the screen, so I outline the screen”-but it can backfire if the edges are low contrast, clipped by motion blur, or partially occluded. Often you’ll get a stronger track by drawing a spline that includes interior texture rather than the boundary.
At the same time, don’t draw a huge spline that includes unrelated motion (like a hand moving across the screen or reflections shifting wildly). The spline should capture the plane’s movement, not every chaotic thing happening on top of it.
After drawing, refine the shape:
- Simplify points if the spline is overly complex. More points means more potential for accidental bumps later.
- Feathering is usually not critical for tracking itself, but clean edges help when you reuse the spline for masking.
- Adjust the tracking surface (the perspective plane overlay) so it aligns with the object’s orientation. This helps you judge whether the track is behaving.
If you need to track multiple planes (for example, a box with two visible sides), create separate layers for each plane. Trying to force one spline to represent two different orientations is a classic recipe for drift.
What Are Tracking Parameters and How to Set Them?
Tracking parameters tell Mocha what kinds of motion to solve. While the exact UI labels can vary by version, the conceptual choices are consistent: you can track translation (position), scale, rotation, shear, and perspective. The more complex the motion, the more parameters you may need-but “more” isn’t always “better.” Extra parameters can overfit noise and create jitter.
Use this as a practical starting guide:
- Position (Translation): almost always on. If the camera or object moves at all, you need it.
- Scale: enable if the object changes size (camera moves closer/farther, zoom, dolly).
- Rotation: enable if the plane rotates in frame (handheld tilt, object turning).
- Shear: useful for subtle non-uniform changes; often paired with perspective.
- Perspective: enable when the plane changes angle relative to camera (classic for screens and signs in a moving shot).
If you’re replacing a screen and you see the corners shifting in perspective, you’ll likely want perspective on. If you’re attaching a small label to a mostly front-facing sign with minimal angle change, you might keep it simpler (position/scale/rotation) for stability.
Another important concept is what you’re tracking versus what you’re inserting. If your insert needs to match the plane precisely (screen replacement), you want a robust perspective track. If your insert is forgiving (floating text near an object), you can sometimes get away with fewer parameters and a more stable result.
Finally, consider frame direction. Many artists track forward from a good hero frame, but tracking backward can be equally valid if the plane becomes messy later. Pick the direction that keeps the surface visible for as long as possible.
How to Perform the Tracking and Interpret Results
Once your spline layer is set and parameters are chosen, you run the track. In Mocha, tracking is typically a one-click operation per direction (forward or backward), and you can stop anytime if you see the surface begin to slide.
While tracking, watch the surface overlay (grid/plane) rather than the spline edge. The spline can look like it’s following because it’s attached to the layer, but the surface overlay tells you if the planar solve is truly sticking to the object’s perspective.
After the track completes (or after you stop it), do a disciplined playback check:
- Scrub through the timeline slowly at first, focusing on moments of motion blur, fast movement, or occlusion.
- Look for drift: the surface gradually slides off texture over time.
- Look for pops: sudden jumps that often happen when the tracker gets confused by a cut-like blur or an occluding object.
Interpretation tip: if the track is mostly good but drifts after a certain moment, don’t throw it away. That drift is a clue. It tells you exactly where the plane became hard to read-maybe a reflection blooms, maybe a hand crosses, maybe the camera whip-pan introduces smear. Your fix will usually involve addressing that specific trouble spot with holdouts, re-tracking from a different frame, or splitting the track into sections.
Also, pay attention to whether your tracked region is actually planar. A shirt with folds, a face with changing expression, or a glossy curved car hood can look trackable for a few frames and then betray you. When that happens, reduce the tracked region to a smaller, flatter portion, or switch to a different tracking strategy.
How to Refine Tracking Data for Accuracy
Refining is where Mocha AE earns its keep. A “good enough” track is easy to get; a track that survives scrutiny-especially with a high-contrast insert-is what you refine for.
Common refinement strategies include:
- Adjust the spline to exclude trouble pixels: if a moving reflection or passing object is inside your spline, redraw or animate the spline so the tracker focuses on stable texture.
- Use additional layers for occlusions: create a layer that represents the occluding object and set it up as a holdout so Mocha ignores it during the track.
- Track in chunks: if the shot changes character mid-way (sharp to blurry, clear to occluded), track the clean segment, then start a new track from a later clean frame and blend your approach in AE.
Refinement is also about choosing the right reference area. If you originally tracked the entire screen border and it drifted, try tracking internal details like icons, cracks, smudges, or printed text. Mocha loves stable texture. It doesn’t care if the region is “semantically” the screen, only that the pixels describe a consistent plane.
If your insert will be corner-pinned, spend extra time ensuring the perspective plane is aligned properly. A slightly off plane can still “track,” but it will produce a subtle skew that makes replacements look like they’re floating or rubbery. When you align the surface overlay to the object’s corners and it stays aligned throughout playback, you’re in the sweet spot.
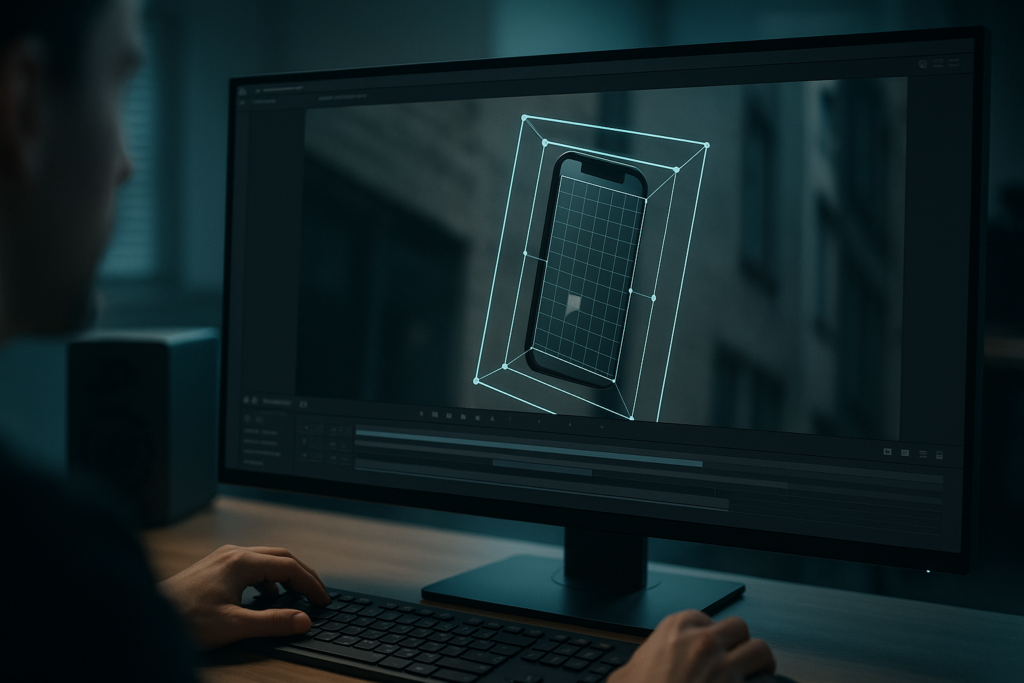
Finally, don’t underestimate the value of a sanity test: export a quick corner pin to AE, slap on a checkerboard or bold grid, and preview. A neutral grid reveals sliding and warping immediately-far more honestly than a subtle graphic does.
See a tracked UI insert example in After Effects
How to Apply Tracking Data from Mocha AE to After Effects
How to Export Tracking Data from Mocha AE
Exporting is where your tracking effort becomes useful. In Mocha AE, you typically copy tracking data to the clipboard in a format After Effects understands, then paste it onto a layer (or into an effect) in AE.
Before exporting, decide what kind of data you need:
- Transform data (position/scale/rotation): best for attaching text, nulls, or simple 2D elements.
- Corner pin / planar corner pin data: best for screen replacements and sign inserts that must match perspective.
In Mocha’s export controls, choose the appropriate After Effects export option (commonly labeled for AE). Then choose the layer you tracked and the data type. Copy it to the clipboard.
If you’re unsure which export type fits your task, think in terms of constraints: if the insert must match four corners over time, use corner pin data. If it just needs to follow motion loosely, transform data is simpler and often more stable.
For official integration notes and step-by-step references, Adobe’s Mocha/After Effects help page is worth bookmarking because it reflects the intended workflow: https://helpx.adobe.com/mocha-learn/using/mocha-after-effects.html.
How to Import Tracking Data into After Effects
Back in After Effects, importing is usually a paste operation, but where you paste depends on the data type.
For transform data, a common approach is:
- Create a Null Object (Layer > New > Null Object).
- Select the null.
- Paste the copied data. AE applies keyframes to the null’s transform properties.
This is a flexible method because you can then parent other layers to the null. It also keeps your track separate from your artwork, which makes revisions less painful.
For corner pin data, you usually:
- Select the layer you want to corner-pin (your replacement precomp, graphic, or solid).
- Paste the data so AE applies it to the appropriate corner pin effect (depending on export type).
Once pasted, scrub the timeline and verify that the insert stays locked. If it doesn’t, don’t immediately assume the track is wrong-sometimes the issue is layer order, precomp sizing, anchor point assumptions, or mismatched aspect ratios. Corner pin workflows are precise: if your insert comp doesn’t match the expected geometry (for example, your replacement is cropped or scaled unexpectedly), the pin can look off even with perfect tracking data.
A reliable troubleshooting move is to apply a temporary grid to the inserted layer and set its blending mode or opacity so you can see both the grid and the underlying footage. Your eyes will spot sliding instantly.
How to Attach Elements to Tracked Motion in After Effects
Once the track data lives in AE, you can attach elements in a few standard ways. The right method depends on what you’re attaching and how “physical” it needs to feel.
Method 1: Parent to a tracked null (best for text, icons, callouts).
Create a null, paste transform tracking onto it, then parent your graphic layers to that null. This gives you an easy control point: you can add secondary animation (like a subtle float or scale) on top without damaging the underlying track. If you need to offset the graphic, you do it on the child layer, not the tracked null.
Method 2: Corner pin a precomp (best for screen replacements).
Precompose your replacement content at a clean resolution, paste corner pin data onto the precomp layer, then color-match and add effects (blur, noise, glare) to integrate it. A replacement that’s perfectly tracked but too sharp and clean will still look fake. Integration is half the illusion.
Method 3: Use the track to drive masking/roto decisions.
Even if your final goal isn’t an insert, the track can help you keep masks aligned, especially for objects that move predictably. You can combine a tracked matte with manual roto tweaks for a hybrid workflow that’s faster than fully hand-animating shapes.
One compositing habit that pays off: keep the tracked data layer (null or pinned layer) separate from your “beauty” adjustments. Do your color correction, grain matching, and light wrap on an adjustment layer or on the precomp, so you can re-track without rebuilding the whole comp.
What Are Common Challenges When Using Mocha AE for Motion Tracking?
How to Handle Occlusions and Tracking Failures
Occlusion is the most common reason a track fails: something passes in front of your tracked plane, and the tracker tries to incorporate that moving object into the solution. The result is often a sudden wobble or a gradual drift that begins exactly when the occlusion starts.
To handle occlusions, think in layers (because Mocha does):
- Create a holdout layer for the occluding object (a hand, a passing car, a person walking by).
- Place the holdout above the tracked layer in the layer stack so it can act as an occlusion.
- Animate the holdout spline so it covers the occluder during the problematic frames.
This tells Mocha, in effect: “Ignore these pixels; they’re not part of the plane.” When done well, it can turn an impossible track into a clean one.
If the track fails catastrophically-like it jumps to a different region entirely-don’t keep tracking and hope it comes back. Stop immediately, undo to the last good frame, and correct the cause. Trackers are like shopping carts: once they veer into the wrong aisle, they rarely glide back gracefully.
Another practical fix is to start tracking from a different frame. If you began on a frame with heavy blur or partial occlusion, the tracker’s initial model is weak. Pick a clearer frame, track backward through the messy part, then forward through the clean part. Mocha often performs better when it “learns” the plane from a strong reference.
How to Manage Complex Movements
Complex movement can mean several things: rapid handheld camera shake, a plane rotating dramatically in 3D, rolling shutter wobble, or a surface that bends (which breaks planar assumptions). Mocha AE can handle a lot, but it’s not magic-it’s math plus pixels.
For fast handheld shots, two tactics help:
- Track a larger, more stable plane if possible (a wall behind the object, the whole sign rather than a small logo). Bigger planes often provide more consistent texture.
- Use a more conservative parameter set if you see jitter. Sometimes turning off a parameter (like shear) reduces overfitting.
For dramatic perspective changes, you may need perspective enabled, and you may need to ensure your spline includes features across the plane (not clustered in one corner). If all your texture is in one area, the tracker has less information to solve perspective reliably.
Rolling shutter is trickier because the “plane” doesn’t move rigidly; it warps line by line. Mocha AE can still produce usable results, but you may need to compromise: track a smaller region, accept minor residual drift, and hide it with integration tricks (motion blur on the insert, slight softness, or blending modes).
If the surface bends-like fabric, flags, or faces during extreme expressions-consider whether planar tracking is the right approach. Sometimes the best solution is to track a flatter sub-region (like a patch of fabric that stays relatively rigid) and design your insert to be forgiving. Or switch to a different technique entirely (mesh warping, manual animation, or a dedicated tool) if the shot demands it.
How to Maintain Tracking Stability in Low-Contrast Footage
Low-contrast footage is the silent assassin of tracking. Everything looks fine at normal playback, but the tracker sees a field of nearly identical pixels and has to guess. That’s when you get slow drift that’s hard to notice until your insert is already composited.
To improve stability in low-contrast shots:
- Choose texture strategically: look for any micro-contrast-scratches, pores, noise, printed patterns, seams, edges with subtle shading.
- Avoid specular highlights: shiny reflections can move independently of the surface, especially on glossy screens or cars.
- Consider preprocessing: in some workflows, artists temporarily increase contrast or apply a sharpening filter for tracking, then apply the track to the original. (Because Mocha AE is launched from AE, your options depend on how you feed it, but the principle stands: give the tracker readable pixels.)
Also, don’t be afraid to track an “ugly” area if it’s stable. A patch of grime on a wall is more valuable to a tracker than a beautiful, smooth gradient. Tracking is not about aesthetics; it’s about information.
When the footage is both low-contrast and noisy, you may see jitter. In those cases, a slightly smaller spline that focuses on the most consistent texture can outperform a large spline that includes noisy, shifting pixels.
What Are Tips and Best Practices for Effective Motion Tracking with Mocha AE?
How to Choose Tracking Areas for Better Results
If you take only one habit from this article, make it this: choose tracking areas like a detective, not like a tourist. Tourists outline the obvious object. Detectives look for evidence-texture, corners, stable patterns, and features that persist through the shot.
Great tracking areas often have:
- High-frequency detail: text, grit, fabric weave, printed graphics, brick patterns.
- Consistency: the pattern doesn’t change appearance drastically due to lighting flicker or reflections.
- Planarity: the region behaves like a flat card moving in space.
Less ideal areas include:
- Pure black/white regions with no texture.
- Reflections on glass or glossy screens (unless the reflection is static relative to the plane, which is rare).
- Motion-blurred edges that smear into the background.
When tracking a screen, a counterintuitive trick is to track the bezel or surrounding phone body if it has more texture than the screen itself. Then you can still corner-pin your insert by aligning the surface to the screen corners-your track doesn’t have to be inside the exact area you replace, as long as it’s the same plane and moves rigidly with it.
And if you have the luxury of planning a shoot: add tracking markers or practical texture. Tiny non-reflective markers on a blank wall can turn a nightmare into a two-minute track. The best tracking is the tracking you don’t have to “fight” later.
When to Use Manual Adjustments vs Automatic Tracking
Mocha’s tracking is largely automatic once you define the spline and parameters, but manual adjustments are not a sign of failure-they’re part of professional tracking. The question is when to intervene.
Use mostly automatic tracking when:
- The plane is clear, textured, and visible throughout.
- There are no major occlusions.
- The motion is smooth and the track holds up in playback.
Lean on manual adjustments when:
- There’s intermittent occlusion (hands, passing objects, hair swipes).
- The plane exits frame and re-enters.
- Lighting changes cause texture to disappear temporarily.
A good hybrid workflow looks like this: track automatically until you hit a problem, stop, fix the cause (holdout, spline adjustment, parameter tweak), then continue. If you try to brute-force through the messy section, you’ll spend more time cleaning up later-and the cleanup will be less predictable.
Also, consider manual intervention at the setup stage, not just after failure. A carefully drawn spline that excludes reflections and includes stable texture is a manual decision that prevents problems. Most “manual fixes” are really “manual prevention.”
In After Effects, manual tweaks can also mean adding subtle offsets or secondary animation on top of the tracked motion. If your insert feels too mechanically locked (especially in handheld footage), adding a tiny amount of follow-through-done tastefully-can make it feel more natural. The trick is to keep the physical relationship believable: the insert should still belong to the plane.
How to Optimize Performance and Speed
Tracking can be fast, but it can also become a time sink if you’re working on long clips, high resolutions, or multiple layers. Optimizing performance is about reducing unnecessary computation and keeping your iteration loop tight.
Here are practical speed wins:
- Track only what you need: trim your work area in AE (or limit the frame range) so Mocha analyzes fewer frames.
- Start with one strong track: don’t create five layers “just in case.” Get one layer solid, then duplicate or branch if needed.
- Use sensible spline complexity: a spline with dozens of points is slower to manage and easier to break. Keep it clean.
- Work at manageable resolution: if your system struggles, consider whether a slightly lower-resolution tracking pass is acceptable for the shot, then test the result in AE. (Be cautious: too low can lose detail and cause drift.)
Speed is also about decision-making. If you’re unsure whether to track the screen or the phone body, don’t debate for twenty minutes-try both quickly. Tracking is empirical. The pixels will tell you which region is more stable.
Finally, build a repeatable checklist so you don’t re-learn the same lesson on every shot:
- Pick the best reference frame.
- Draw a spline around stable texture on a planar surface.
- Enable only the parameters you truly need.
- Track in the direction that keeps visibility longest.
- Playback-check with a surface grid.
- Export to AE and test with a bold grid insert.
That checklist turns tracking from “mystical art” into “repeatable craft,” which is exactly where you want to be when deadlines exist.
Conclusion
Once you’re comfortable with Mocha AE’s planar mindset, you can start using it as more than a “tracker button” and more like a shot-analysis tool. For example, even when you don’t need an insert, a clean planar track can help you diagnose why a composite feels wrong: is the issue perspective, scale drift, or simply that the inserted element lacks the same blur and grain as the plate?
It’s also worth exploring how motion tracking choices affect storytelling. A label that sticks perfectly to a subject can feel clinical; a label that subtly lags (by design) can feel more human and editorial. A screen replacement that’s too perfect can look pasted on; one that inherits the scene’s imperfections-micro blur, slight exposure shifts, and a hint of reflection-feels like it was always there. Tracking is the skeleton, but integration is the voice.
And if you find yourself doing the same kinds of shots repeatedly-phones, signage, laptop screens-build a small library of test inserts (checkerboards, grids, corner markers) and a personal set of “go-to” parameter defaults. The fastest trackers aren’t the ones who never have problems; they’re the ones who recognize the problem type immediately and reach for the right fix without drama.