
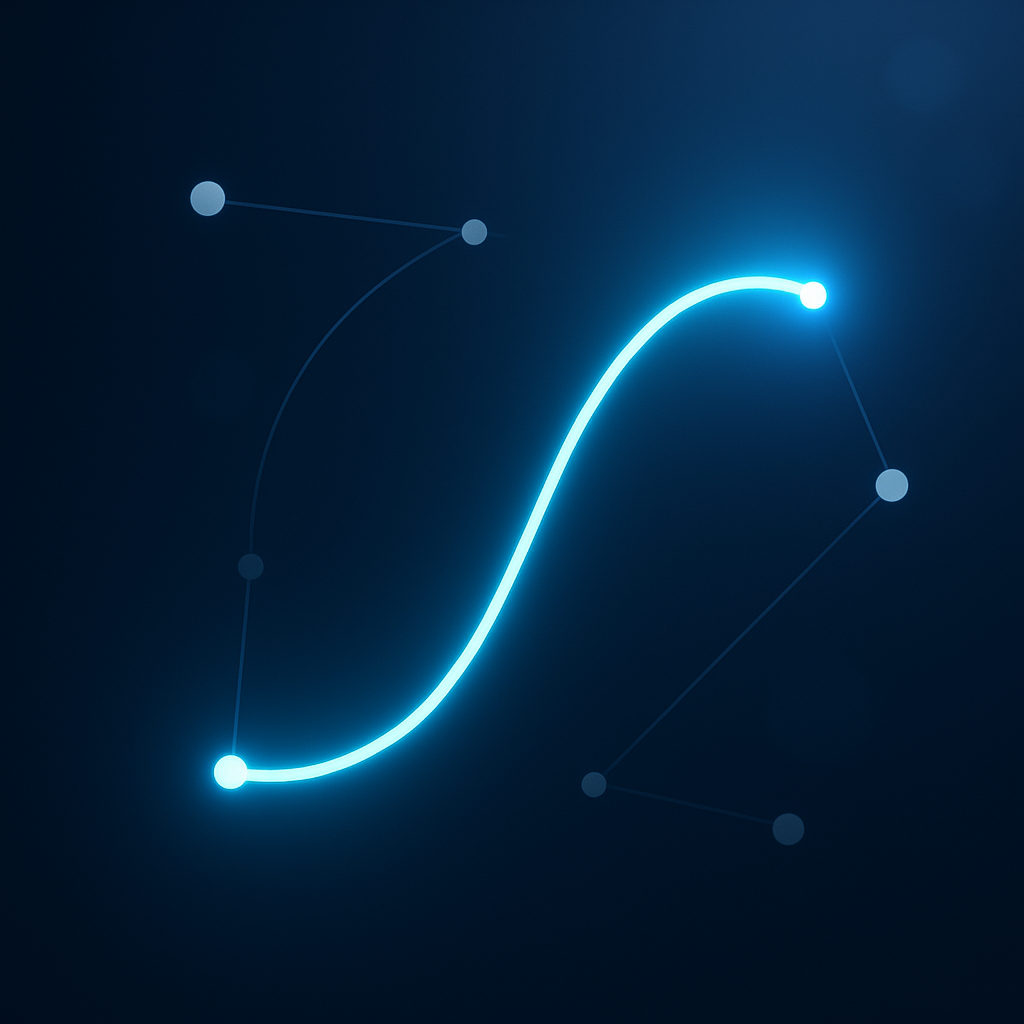
To animate a stroke path in After Effects, you create (or import) a path, then reveal a stroke over time by animating either the Stroke effect (on masks) or the Trim Paths operator (on shape layers). In practice, that means you draw a path, apply a stroke to it, and keyframe parameters like End/Start so the line appears to “write itself” along the route-clean, controllable, and endlessly stylable.
This article walks you through both core methods-Stroke effect and Trim Paths-and then goes further: how to prep paths that behave, how to finesse timing so the draw-on feels intentional, how to add character (variable width, gradients, motion blur), and how to troubleshoot the usual suspects (strokes drifting off-path, odd gaps, overlaps). The goal isn’t just “a line that draws,” but a workflow you can repeat quickly and push creatively.
Watch After Effects motion examples
📋 Table of Contents
What Is Stroke Path Animation in After Effects?
Definition and Uses of Stroke Path Animation
Stroke path animation is the technique of animating a line (a “stroke”) so it progressively appears along a defined path. The path might be a simple curve, a signature-like scribble, a complex map route, or an abstract flourish. The key illusion is that the stroke is being drawn in real time-like an invisible pen is traveling along the path and leaving ink behind.
In After Effects, you’ll typically build this illusion in one of two ways:
- Trim Paths (Shape Layers): The most common, flexible method for vector strokes. You add the Trim Paths operator to a shape layer path and animate Start, End, and/or Offset. As many guides put it, you can animate strokes along a path using the “Trim Paths” feature, and the magic comes from keyframing Start and End to create that drawing effect.
- Stroke Effect (Masks): Great when you already have a mask path (or you want to keep a layer as footage/text and draw along its mask). You apply the Stroke effect, set it to paint on a mask, then animate the effect’s End/Start values.
Both methods can produce professional results. Your choice usually depends on whether your path lives on a shape layer (Trim Paths is native and elegant) or a mask (Stroke effect is direct and convenient).
Common Applications in Motion Graphics
Once you start noticing it, stroke path animation is everywhere. It’s the quiet workhorse behind a lot of “slick” motion design moments, including:
- Logo reveals: A line draws in, then resolves into a mark or wordmark-often paired with a subtle fill fade.
- Handwritten titles and signatures: Especially when paired with variable stroke width or a calligraphy brush look.
- Map routes and travel lines: A path traces from point A to point B, often with a moving dot or arrowhead.
- UI and explainer animations: Lines connect nodes, outline icons, or highlight interface elements.
- Infographics: Chart lines that “grow,” outlines that draw on, or callouts that sketch themselves into place.
- Frame-by-frame style accents: Even if you’re not animating frame-by-frame, you can mimic that energy with textured strokes and jitter.
The underlying principle is consistent: you’re animating visibility along a path. Everything else-brush character, speed changes, overshoots, secondary motion-is where the artistry shows up.
How to Prepare Your Path for Stroke Animation
Creating and Editing Paths with the Pen Tool
A good stroke animation starts before you animate anything. If the path is messy, your stroke will be messy-sometimes charmingly, often tragically. The Pen Tool is your main instrument here, whether you’re drawing a shape path or a mask path.
Best practices for drawing clean, animatable paths:
- Use fewer points than you think you need: Smooth curves come from handles, not point spam. Too many points can create wobbles, uneven speed perception, and awkward corners.
- Prefer long Bezier handles: For elegant curves, pull handles farther and rely on the curve rather than extra points.
- Keep corners intentional: If you want a sharp turn, use a corner point. If you want a smooth bend, use a smooth point. Mixed intent creates “why does it kink there?” moments.
- Check direction: Path direction affects where Trim Paths starts and how Offset behaves. If your animation begins in the “wrong” place, path direction is often the reason.
Editing tips that save time later:
- Use the Convert Vertex Tool (hidden under the Pen Tool) to switch between corner and smooth points.
- Use Selection Tool (V) to move points and Pen Tool (G) to adjust handles.
- If the path came from Illustrator, consider simplifying it in Illustrator first (Object > Path > Simplify) to reduce excessive points.
Finally, think about the story of the stroke: where should it start, where should it end, and where should it slow down? A path that supports that narrative is easier to animate convincingly.
Using Shape Layers vs. Masks for Stroke Animation
In After Effects, paths live in two common places: shape layers and masks. Both can be animated, but they behave differently and lend themselves to different workflows.
Shape layers (recommended for most stroke animations):
- Pros: Trim Paths is built for this; strokes are resolution-independent; you can add multiple strokes/fills; you can stack operators (Trim Paths, Wiggle Paths, Repeater) non-destructively.
- Cons: Some artists find shape layer groups confusing at first; importing Illustrator artwork may require converting to shapes, which can create many groups.
Masks (great when the path is attached to footage or text):
- Pros: Quick to draw on any layer; ideal for “draw around this object” or “trace this silhouette” tasks; the Stroke effect can target a specific mask.
- Cons: Strokes are effect-based rather than native vector strokes; fewer built-in vector operators; managing multiple masks can get cluttered.
A simple rule: if the stroke is the graphic, use a shape layer. If the stroke is an effect applied to something else (footage, a matte, a masked reveal), masks plus the Stroke effect can be faster.
How to Animate a Stroke Path Using the Stroke Effect
Applying the Stroke Effect to a Path
The Stroke effect is a classic: reliable, straightforward, and excellent for animating along a mask path. Here’s a clean, repeatable setup.
- Create a new solid: Layer > New > Solid. (Color doesn’t matter much; you can keep it black.)
- Draw a mask path on the solid: Select the solid, choose the Pen Tool, and draw your path as a mask.
- Apply the Stroke effect: Effect > Generate > Stroke.
- Point the effect to your mask: In the Stroke effect controls, set Path to Mask 1 (or whichever mask you used).
- Choose how it renders: Set Paint Style to On Transparent if you want only the stroke visible (no solid block).
At this point, you should see a stroke sitting on top of your mask path. If you don’t, check that the mask is not set to “None” in a way that conflicts with visibility, and ensure the Stroke effect is targeting the correct mask.
Configuring Stroke Settings for Animation
Before animating, dial in the look. A draw-on animation can feel wrong even with perfect timing if the stroke’s cap, join, or width doesn’t match the style you’re aiming for.
Key Stroke effect settings to consider:
- Brush Size: The thickness of the line. If you’re matching a design system, measure and be consistent.
- Brush Hardness: Higher hardness gives a crisp edge; lower hardness creates a softer, airbrushed edge.
- Spacing: Usually keep it low for smooth lines. If you see dotted artifacts, spacing may be too high.
- Paint Style: “On Transparent” is the usual choice for standalone strokes; “Reveal Original Image” is useful for wipe-on reveals along a path.
- Color: Set a base color now; you can animate it later.
Also decide whether the stroke should feel like a pen, a marker, neon tubing, or a UI line. That decision influences everything you do next-especially easing and motion blur choices.
Animating the End and Start Parameters for Path Reveals
The core animation is simple: animate End from 0% to 100% so the stroke reveals along the mask. This is the same conceptual move you’ll use with Trim Paths later.
- Set the timeline playhead at your starting time.
- In the Stroke effect, set End to 0% and click the stopwatch to create a keyframe.
- Move forward in time (e.g., 1 second).
- Set End to 100%.
That’s your basic draw-on. To create a “traveling” stroke-where the line draws but also disappears behind the leading edge-animate both Start and End. For example, End goes 0→100 while Start goes 0→90, creating a moving segment rather than a full reveal.
This idea mirrors a common Trim Paths workflow: guides often describe how adjusting Start and End keyframes creates the effect of a stroke drawing itself along the path. The mechanics are identical; the UI just lives in a different place.
How to Animate a Stroke Path with Trim Paths
Enabling and Using Trim Paths on Shape Layers
If you’re doing motion graphics in After Effects, Trim Paths is the method you’ll use most often. It’s built for shape layers and feels like it was designed by someone who has actually animated a line for a living.
Basic setup:
- Create a shape layer path: Layer > New > Shape Layer. Then use the Pen Tool to draw a path (make sure you’re drawing a shape, not a mask-select the shape layer and ensure no other layer is active).
- Add a stroke: In the shape layer contents, add a Stroke (if it isn’t already there) and set width/color.
- Add Trim Paths: In the shape layer’s Contents, click Add > Trim Paths.
This aligns with the standard guidance you’ll see in many tutorials: apply the “Trim Paths” operator to a shape layer that contains a path, then animate its parameters. Once Trim Paths is added, you’ll see Start, End, and Offset-the three levers you’ll keep coming back to.
Important structural note: Trim Paths affects the paths within the group it sits in. If you add Trim Paths at the wrong group level, you might trim multiple paths unintentionally-or nothing at all. When in doubt, put the path and its stroke inside a dedicated group (e.g., “Line 01”), then add Trim Paths inside that same group.
See a clean UI line animation example
Adjusting Start, End, and Offset Properties for Animation
Trim Paths gives you a few different animation “flavors,” depending on which property you animate.
1) Classic draw-on (End only):
- Set End to 0% at the start, keyframe it.
- Move forward in time, set End to 100%.
This is the cleanest “line draws itself” reveal. It’s also the method most commonly referenced: animate the “Start” and “End” parameters of the “Trim Paths” property by setting keyframes. Even if you only animate End, the idea is the same-keyframes control how much of the path is visible.
2) Traveling segment (Start + End):
- Animate End 0→100.
- Animate Start 0→100, but delayed so it chases the end.
This creates a moving “dash” of fixed-ish length, perfect for map routes, scanning lines, or energetic accents. You can control segment length by the time difference between Start and End keyframes.
3) Continuous motion (Offset):
- Set Start and End to create a segment (e.g., Start 0%, End 20%).
- Animate Offset from 0→360 (or beyond) to loop the segment around the path.
Offset is especially useful for cyclical animations like loading indicators, orbiting highlights, or “electricity” traveling around a shape.
Gotcha: path direction and where the draw begins
If your stroke starts drawing from the “wrong” end, you can either:
- Reverse the path direction (select the path and use the reverse direction command), or
- Use Offset to rotate the start point to where you want it.
Offset is often the faster fix when you’re already animating and don’t want to disturb anything else.
Combining Trim Paths with Other Animation Techniques
Trim Paths is powerful on its own, but it becomes genuinely fun when you combine it with other shape operators and layer-level animation.
Trim Paths + Repeater: Create one short line segment, repeat it around a circle, then animate Trim Paths to reveal the repeated pattern. This can produce elegant radial bursts, spinners, or “sunray” motifs.
Trim Paths + Wiggle Paths: Add Wiggle Paths to introduce organic jitter. If you reveal a wiggling path, the line can feel hand-drawn or electrically alive. Keep the wiggle subtle unless you’re intentionally going chaotic.
Trim Paths + Transform (within the group): Animate the group’s position/rotation/scale while the stroke draws on. This is a clean way to add secondary motion without affecting the entire layer.
Trim Paths + Track Mattes: Use the drawing stroke as a matte to reveal footage or a texture. For example, a stroke draws on and reveals a watercolor fill beneath it, which can make the line feel like it’s depositing pigment.
Trim Paths + multiple strokes: Duplicate the stroke within the same group: one thick, soft “glow” stroke under a thinner crisp stroke. Both follow the same Trim Paths animation, giving you a polished, layered look with minimal extra keyframes.
How to Control Timing and Smoothness of Stroke Animation
Using Keyframes and Graph Editor for Timing
Stroke animations live or die on timing. A line that draws at a perfectly constant speed can feel mechanical-even when it’s technically “correct.” The Graph Editor is where you turn a simple reveal into something that feels guided by a hand, a camera, or a pulse.
Start with intentional duration: Choose a duration that matches the complexity of the path. A long, intricate path drawn in 10 frames looks like a teleporting worm. A short path drawn over 6 seconds looks like you’re waiting for a printer. As a baseline, try 12-24 frames for short accents, 1-2 seconds for medium reveals, and 2-4 seconds for longer routes or signatures-then adjust to taste.
Use the Graph Editor to shape perceived speed:
- If you animate End 0→100 linearly, the stroke advances at a constant percentage per second, not necessarily a constant visual speed (curves and point distribution can change how it feels).
- In the Speed Graph, you can create a gentle ramp up, a confident cruise, then a subtle settle at the end.
- In the Value Graph, you can craft ease-in/ease-out arcs, though Speed Graph is often more intuitive for “motion along a path” feel.
Work with holds and accents: Sometimes the best timing trick is a tiny pause. For example, a signature might hesitate before a flourish. A map route might slow near the destination. You can create that by adding an extra keyframe around the moment and adjusting the interpolation so the motion briefly lingers.
Don’t ignore audio: If the stroke is syncing to music or VO, place keyframes on beats or syllable accents. A stroke reveal that lands exactly on a word can feel like it was always meant to be there.
Easing Techniques to Improve Animation Flow
Easing is the difference between “a parameter changed” and “something moved.” Even though you’re animating a percentage, the viewer reads it as motion-so it needs motion-friendly easing.
Practical easing approaches:
- Easy Ease as a starting point: Select keyframes and press F9. Then refine in Graph Editor.
- Fast out, slow in (often): Many draw-on animations feel good when they start briskly (the pen commits) and slow slightly near the end (the hand finishes).
- Overshoot-carefully: You can’t overshoot End beyond 100% meaningfully, but you can simulate overshoot by adding a tiny secondary animation (like a stroke width pulse, or a subtle position nudge of the whole group) at the end.
- Match easing to tool: A UI line might be more linear and “engineered.” A marker stroke should breathe and vary.
Speed consistency trick: If your stroke appears to speed up on tight curves and slow on long straights, it may be due to point distribution. Consider simplifying or redistributing points, or precompose and time-remap the reveal if you need extremely even perceived speed.
How to Add Style and Effects to Stroke Path Animation
Using Brush Styles and Stroke Width Variations
A plain stroke is fine-sometimes it’s exactly the point. But when you want personality, stroke styling is where you get it. After Effects gives you a few ways to add “hand” and texture without leaving the app.
Stroke caps and joins:
- Round Cap makes the line feel friendly and organic.
- Butt Cap feels technical and sharp (great for UI).
- Round Join helps corners feel smooth; Miter Join keeps corners crisp but can spike on acute angles.
Width variation options:
- Tapering with shape strokes: Use additional operators or duplicate strokes and animate width to mimic pressure changes.
- Animate stroke width subtly: A tiny width fluctuation (e.g., 6px to 7px) can imply natural hand pressure-especially paired with gentle easing.
- Use dashes strategically: Dashes can look like stitching, road markings, or a stylized “guide” line. Animate dash offset for motion accents.
Remember the context’s practical note: you can customize the stroke to fit the desired animation style by changing stroke color, width, and other properties. That’s not just cosmetic-those choices influence readability, mood, and even how fast the animation feels.
Adding Gradient and Color Animations to Strokes
Color can do more than look pretty-it can help the viewer track direction, emphasize progress, or signal a transition. Gradients and animated color shifts are especially effective on traveling segments.
Ways to add color complexity:
- Animate stroke color: Keyframe the stroke’s color from one hue to another as the line draws. This is simple and works well for brand transitions.
- Use multiple strokes for faux gradients: Stack two or three strokes with different colors and widths, then adjust blending modes and opacity. It’s not a true gradient, but it can feel rich.
- Gradient overlay via effects: Precompose the stroke and apply a gradient ramp, then use blending modes or alpha to keep it confined to the line.
- Traveling highlight: Create a thinner, brighter stroke above the main stroke and animate it as a traveling segment (Start/End chase) to simulate specular shine.
Design tip: If the stroke is communicating information (like a route), keep contrast high and avoid color changes that reduce legibility against the background. Style is great; clarity is non-negotiable.
Applying Motion Blur for Realistic Effects
Motion blur is one of those finishing touches that viewers don’t consciously notice-until it’s missing. If your stroke is drawing quickly, a little blur can help it feel like it’s actually moving rather than simply being revealed.
How to use motion blur effectively:
- Enable Motion Blur for the layer (the little shutter icon) and also enable Motion Blur for the composition.
- If the stroke is generated via shape layer animation, motion blur generally behaves nicely. If you’re using the Stroke effect, results can vary depending on how the effect is rendered and whether the layer itself is moving.
- Consider adding a subtle Directional Blur on a duplicated stroke layer for an exaggerated “speed line” look-especially for energetic UI sweeps.
Realism note: A hand-drawn marker line often has less motion blur than a fast neon streak. Match the blur to the imagined tool and speed.
Common Issues and Troubleshooting in Stroke Path Animation
Fixing Strokes That Don’t Follow the Path Correctly
When a stroke doesn’t follow the path correctly, it usually isn’t “After Effects being weird.” It’s After Effects being literal. Here are the most common causes and fixes.
Issue: Trim Paths isn’t doing anything.
- Cause: Trim Paths is applied at the wrong group level, or the path you want isn’t inside the same group.
- Fix: In the shape layer Contents, place the path and stroke in a dedicated group, then add Trim Paths inside that group.
Issue: The stroke starts from the wrong end.
- Cause: Path direction is opposite of what you expect.
- Fix: Reverse path direction, or animate/adjust Offset to move the starting point.
Issue: The Stroke effect isn’t drawing on the mask.
- Cause: Stroke effect is set to the wrong mask, or Paint Style is hiding the result.
- Fix: Set Stroke’s Path to the correct mask and set Paint Style to On Transparent for standalone strokes.
Issue: The stroke looks offset or misaligned.
- Cause: You’re animating a path inside a transformed group, or the layer is scaled non-uniformly, which can make stroke widths and positions look odd.
- Fix: Reset transforms where possible; use group-level transforms intentionally; precompose if you need to “lock” the look before further transforms.
Issue: The line appears jagged or flickery.
- Cause: Low comp resolution, thin strokes on subpixel positions, or overly sharp corners.
- Fix: Preview at Full when checking quality, increase stroke width slightly, use Round Joins, and consider enabling Continuous Rasterization for vector sources.
Handling Path Overlaps and Gaps
Overlaps and gaps show up when paths double back, intersect, or have discontinuities. They’re not always mistakes-sometimes they’re style-but you should be in control of them.
Problem: Gaps at sharp corners.
- Why it happens: Certain cap/join settings can create visible gaps when the stroke is thick and the corner is acute.
- Fixes: Switch to Round Join, reduce miter limit (if available), slightly adjust the path corner, or add a tiny overlap by extending the path.
Problem: Overlapping strokes look darker at intersections.
- Why it happens: Semi-transparent strokes stack alpha where they overlap.
- Fixes: Set blending mode thoughtfully, reduce opacity, or split the path into separate segments and animate them in sequence so the overlap doesn’t occur simultaneously.
Problem: The draw-on reveals a “pop” at the start.
- Why it happens: Butt caps and thick strokes can make the first frame feel like a chunk appears.
- Fixes: Use Round Cap, start at a slightly negative time with End at 0 (so the first visible frame already has a tiny bit of stroke), or animate stroke width from 0 to full in the first few frames.
Problem: Multiple paths in one group animate together unexpectedly.
- Why it happens: Trim Paths affects all paths inside its group.
- Fixes: Separate paths into different groups, each with its own Trim Paths operator, then stagger their keyframes for a pleasing sequence.
Tips to Optimize Stroke Path Animation Workflow
Using Precompositions for Complex Animations
Once your stroke animation grows beyond “one line,” organization becomes a creative tool. Precompositions help you keep the timeline readable and your effects stack sane.
When to precompose:
- Layered strokes: If you have a base stroke, a glow stroke, a highlight stroke, and a texture matte, precompose them into a single “Stroke Rig” comp.
- Multiple line reveals: If you’re animating a whole system of lines (like a network map), build each line in its own precomp and assemble them in a master comp.
- Heavy effects: Blurs, glows, and grain can get expensive. Precomposing allows you to apply effects once to a combined result.
Workflow trick: build a reusable stroke template
Create a precomp that contains:
- A shape group with Stroke + Trim Paths
- Optional glow/highlight duplicates
- Controls (via Essential Graphics or just effect controls) for color, width, reveal duration
Then duplicate the precomp for each new line. You’ll animate faster, and your project will look more consistent-like it was designed on purpose (because it was).
Leveraging Expressions for Automated Animations
Expressions are your shortcut to consistency: they let multiple strokes share timing, offset, color logic, or even a global “draw-on progress” slider. You don’t need to become an expression wizard-just a few simple patterns can save hours.
1) One slider to control all reveals
Create a Null layer named CTRL, add a Slider Control named Progress (0-100). Then on each Trim Paths End property, use:
Expression (Trim Paths > End):
thisComp.layer('CTRL').effect('Progress')('Slider');
Now you can animate one slider and drive every stroke reveal together-perfect for synchronized builds.
2) Stagger reveals automatically
If you have many similar stroke layers, you can offset their animation based on layer index. For example, if you’re using the same keyframes but want each layer delayed:
Expression idea (applied to End, assuming a base animation exists):
delay = (index-1)*0.05;

valueAtTime(time - delay);
This creates a cascading draw-on without manually nudging dozens of keyframes.
3) Looping traveling segment
Set Start/End to a segment length, then loop Offset:
time*120; // degrees per second
Because Offset is cyclical, it will keep moving smoothly. Adjust the multiplier for speed.
Expression safety note: Keep expressions readable and centralized. If you’re collaborating, name controllers clearly and avoid hiding critical logic in a dozen layers with cryptic names like “Null 37.” Future-you will not be amused.
Context tie-in: Many step-by-step guides boil the process down to “draw a shape, apply Trim Paths, animate Start/End.” That’s the foundation-and it’s true. Expressions simply let you scale that foundation into a system: multiple strokes, consistent timing, and easy revisions when a client says, “Can it be 20% faster?” five minutes before export.
Conclusion
Once you’re comfortable animating a stroke path, you can start thinking beyond the line itself and into what the line implies: a hand, a vehicle, a signal, a connection, a pulse of information. One of the most effective upgrades you can make is to add a subtle “leader” element-like a small dot, arrowhead, or tapered highlight-that travels with the stroke’s front edge. It gives the viewer something to follow and makes the motion feel motivated rather than purely procedural.
If you want to push the craft further, explore mixing stroke animation with texture: matte a paper grain into the stroke, add a slight edge roughness, or composite the line over a background that reacts (a faint glow on nearby elements, a soft shadow that suggests the line sits on a surface). These are small touches, but they elevate the result from “a tutorial effect” to a designed moment. And as After Effects projects get more complex, consider building a personal library of stroke rigs-precomps with controllers, default easing, and styling presets-so every new project starts at a higher baseline than the last.