
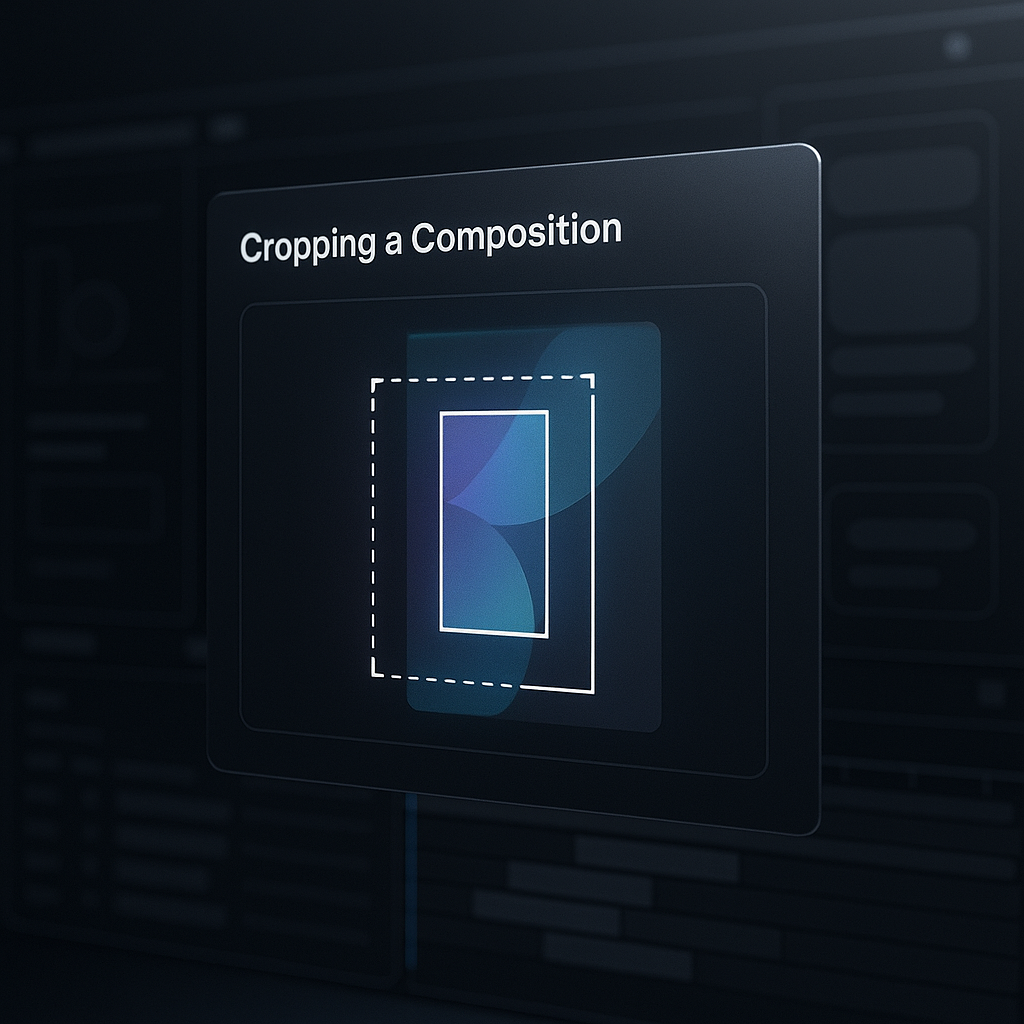
You can crop a composition in After Effects by either (1) using the Region of Interest to define a smaller frame and then resizing the comp to that region, (2) manually changing the Composition Settings (width/height) and repositioning what you need, or (3) “cropping” visually with masks and track mattes when you want to hide parts of layers without changing the comp’s actual pixel dimensions. Which method is “best” depends on whether you want to change the final render size, simply tidy up your workspace, or create a flexible, animated crop.
In other words: After Effects doesn’t treat cropping like a photo editor where you drag handles and permanently trim pixels. Instead, you’re choosing between changing the composition’s canvas (the actual output frame) or constraining what’s visible (a non-destructive visual crop). Once you understand that distinction, cropping becomes less of a mystery and more of a tool you can wield on purpose.
Watch After Effects animation breakdowns
📋 Table of Contents
What is cropping a composition in After Effects?
Definition and purpose of cropping compositions
“Cropping a composition” in After Effects usually means reducing the visible frame-the width and height of the composition-so your final output contains only the area you care about. That might be removing empty space around an animation, converting a landscape layout into a square, or trimming a comp to match a specific deliverable (like a vertical story format).
However, After Effects has a slightly slippery relationship with the word crop. There are two common interpretations:
- Canvas crop (true comp crop): You change the composition’s dimensions, so the output frame is smaller. This affects rendering, export size, and how effects are calculated at the edges.
- Visibility crop (non-destructive): You keep the comp size the same but hide parts of layers using masks, mattes, or precomps. The “extra” still exists; it’s just not shown.
The purpose of cropping is rarely just aesthetic. It’s often practical: smaller frames can render faster, exports match platform requirements, and your viewer’s attention is guided to the right place. Cropping can also be a problem-solver-removing unwanted edges, stabilizing a shaky shot by reframing, or isolating a detail for a punch-in.
One more nuance: After Effects also lets you define a Region of Interest (ROI). ROI can act like a temporary crop for previewing and focusing your work, and it can also be used as a stepping stone to resize the comp to that region. Think of it as a “selection box” for your composition frame.
When and why to crop compositions
You’ll want to crop a composition when the current frame is simply the wrong shape or size for what you’re delivering. Maybe you started with a default 1920×1080 comp, then the client asks for a 1080×1080 square version. Or you animated a logo in a roomy frame and now want it snug, centered, and export-ready without acres of transparent nothingness.
Here are common scenarios where cropping is the right move:
- Deliverable changes: Converting 16:9 to 9:16, 1:1, 4:5, or a custom banner size.
- Removing dead space: Tightening the frame around a subject, product, or title.
- Improving performance: Smaller comps can reduce the number of pixels AE has to process, which can speed previews and sometimes renders.
- Fixing edge artifacts: Cropping out unwanted borders, camera edges, or VFX seams.
- Creating multiple versions: One master animation, several cropped outputs for different platforms.
And here are times when you might not want to crop the comp itself:
- If you need to keep the master at a standard size (say 4K) but want a “window” that animates around inside it-use masks or mattes.
- If you’re collaborating and other comps depend on this comp’s dimensions-cropping can ripple through precomps and break layouts.
- If you’re not sure yet-use ROI or a matte first, then commit to resizing once the framing is locked.
How to crop a composition using the Region of Interest tool
Locating and enabling the Region of Interest
The Region of Interest is one of those After Effects features that feels almost too modest for how useful it is. It lives in the Composition panel toolbar (the area around your viewer). Depending on your workspace and AE version, you may need to click the little “More” or overflow menu to reveal hidden buttons.
To enable it:
- Click inside the Composition panel for the comp you want to crop.
- Find the Region of Interest button (it often looks like a dashed rectangle).
- Click it to activate ROI mode.
If you can’t see it, try these quick checks:
- Expand the Composition panel so the toolbar has more room.
- Look for an overflow menu (often ») and enable the ROI button from there.
- Reset your workspace: Window > Workspace > Reset (useful if buttons have vanished into the UI void).
Once ROI is enabled, you’ll see a rectangular outline you can adjust. This outline is your “proposed crop.” It doesn’t change the comp size by itself-yet.
Drawing the crop area
With ROI active, you can draw or adjust the region directly in the Composition panel. Click and drag to create a rectangle around the area you want to keep. If a region already exists, drag its handles to resize it, or drag inside the rectangle to reposition it.
To make this step smoother, it helps to set up your view:
- Zoom in so you can place the ROI precisely, especially if you’re trimming tight around text or a logo.
- Toggle Title/Action Safe if you’re framing broadcast-style graphics.
- Turn on Grid or Guides if you need symmetrical cropping.
Two practical tips that save time:
First: If you’re cropping to a subject, don’t frame to the very last pixel unless you’re certain nothing will move. Motion blur, glow, drop shadows, and camera shake can all “reach” beyond your visible edges. Give effects a little breathing room.
Second: If you’re cropping to a platform format (like 1080×1920), ROI is still useful, but you’ll likely want to finalize the exact pixel dimensions in Composition Settings afterward. ROI is great for finding the right framing; Composition Settings are where you lock the math.
Applying the crop to the composition
Here’s the key point: the Region of Interest can limit previews to that region, and it can also be used to resize the composition to match it. After you’ve drawn the ROI, you’ll want to convert that region into actual comp dimensions.
To apply the ROI as a comp crop, use the command that sets the comp size to the ROI. In many After Effects versions, you can do this from the menu:
- Composition > Crop Comp to Region of Interest
If you don’t see that menu item, it’s usually because ROI isn’t active or no ROI has been defined. Activate ROI, draw the region, then check the Composition menu again.
Once you crop the comp to the ROI, After Effects changes the composition’s Width and Height to match the ROI rectangle. This is a real crop: your comp’s frame is now smaller. Your layers are not deleted, but anything outside the new frame is no longer visible in that comp.
After applying the crop, do a quick audit:
- Scrub through the timeline and watch for elements that drift out of frame.
- Check effects that extend beyond edges (glows, blurs, particles).
- If you have cameras, confirm the new framing still matches your intent.
If something feels off, you can undo and adjust the ROI, or you can keep the new comp size and reposition layers. ROI is quick, but it’s not magic-it’s a fast way to commit to a new canvas.
How to crop compositions by adjusting composition settings
Changing composition dimensions
The most direct, explicit way to crop a composition is to change its dimensions manually. This is especially useful when you need exact pixel sizes (for social platforms, broadcast specs, or a motion graphics template that must be precise).
To change composition dimensions:
- Select the composition in the Project panel (or make it active in the timeline).
- Go to Composition > Composition Settings (shortcut often Ctrl/Cmd + K).
- Adjust Width and Height.
- Confirm Frame Rate and Duration are still correct (cropping shouldn’t change them, but it’s a good moment to verify).
- Click OK.
If you’re changing aspect ratio (say 1920×1080 to 1080×1920), you’re not just cropping-you’re reframing. The comp will update instantly, and you may see important content pushed off-screen. That’s normal; you’ve changed the “window” through which you’re viewing your layers.
For common deliverables, it helps to keep a small reference table in mind:
| Format | Common Size (px) | Aspect Ratio |
|---|---|---|
| HD (Landscape) | 1920×1080 | 16:9 |
| Square | 1080×1080 | 1:1 |
| Vertical (Story/Reels) | 1080×1920 | 9:16 |
| 4K UHD | 3840×2160 | 16:9 |
Manual resizing is also the cleanest method when you need a comp that is, say, exactly 1000×1000 for a specific pipeline, or exactly 4096×4096 for a texture plate. ROI can get you close quickly; Composition Settings gets you exact.
Repositioning layers after resizing
After you change comp size, you’ll often need to reposition layers so the “important stuff” sits where it should in the new frame. There are a few approaches, and which one you choose depends on how complex the comp is.
1) Move key layers manually. If it’s a simple comp-one background, one logo, one text layer-select the layers and adjust their Position values. Use guides and align tools to keep things tidy.
2) Use the Align panel. If you’re working with 2D layers, the Align panel can snap selected layers to the comp’s center or edges. This is great for quickly re-centering a logo after a crop. Just be mindful: Align uses the layer’s bounding box, which can be influenced by effects, masks, and text bounds.
3) Parent your layout to a controller null. For more complex comps, create a Null Object and parent major elements to it. Then you can reposition the whole layout by moving one null. This is especially helpful when you’re making multiple aspect ratio versions: you can keep the animation intact and just shift the “rig.”
4) Consider “safe” framing with a precomp. If you suspect you’ll need multiple crops, precompose your main animation into a “Master” comp, then place that master into different “Output” comps sized for each format. In each output comp, you can reposition and scale the master layer without touching the original animation. This approach feels professional because it prevents versioning chaos.
One important note: After Effects doesn’t automatically scale or reposition your layers when you change comp size. That’s not a bug-it’s AE being honest. You changed the canvas; it’s your job to decide how the artwork should reflow.
Considerations when manually cropping composition size
Manual comp resizing is powerful, but it comes with a few gotchas that are worth knowing before they bite you during export.
Anchor points and motion paths: Cropping doesn’t change a layer’s anchor point or keyframes. If you have motion paths designed for a wide frame and you switch to a tall frame, the animation may now travel off-screen. You may need to revise keyframes or use a parent null to shift the entire motion.
Cameras and 3D layers: In 3D comps, the “crop” is effectively a change in the camera’s framing relative to the comp. If you’re using a camera, consider whether you should adjust the camera’s position or zoom to preserve the intended composition.
Effects that sample beyond edges: Some effects look at pixels outside the visible frame (blurs, glows, displacement, certain stylization effects). When you crop smaller, you can unintentionally change how those effects behave near the borders. Sometimes you’ll see edges get harsher or clipped. The fix might be to increase effect padding (where available) or precompose with “Move all attributes” so the effect has room to breathe.
Expressions and responsive design: If you’re using expressions that reference thisComp.width or thisComp.height, resizing the comp will change their behavior-often in a good way, sometimes in a surprising way. If you’re building templates, this can be a feature: expressions can make layouts responsive to comp size.
Downstream dependencies: If this comp is used inside other comps, changing its size can cause scaling, cropping, or alignment changes in those parent comps. Before resizing, check where the comp is used (you can often use “Reveal in Project” and search, or simply be mindful of your structure). In a shared project, consider duplicating the comp and making a new “_CROPPED” version to avoid breaking existing scenes.
Using masks and mattes to crop parts of layers
Creating masks for cropping
Masks are the classic After Effects way to “crop” a layer without changing the composition size. You’re not trimming the comp; you’re telling a layer, “Only show this part.” This is ideal when you want to keep the same output dimensions but hide edges, create a window, or animate a reveal.
To crop a layer with a mask:
- Select the layer you want to crop.
- Use a shape tool (Rectangle, Ellipse, Pen) and draw a mask in the Composition panel.
- Press M to reveal mask properties.
- Set the mask to Add (to keep what’s inside) or Subtract (to cut out what’s inside).
Masks can be feathered, expanded, inverted, and animated. That means your “crop” can be soft, organic, and moving-something a comp resize can’t do on its own.
For example, if you’re cropping a video layer to a vertical strip, you can:
- Use a rectangular mask with a slight feather for a gentle edge.
- Animate the mask path to follow a subject.
- Keyframe Mask Expansion to create a breathing vignette-like crop.
One workflow tip: if you’re masking footage and then stacking effects, consider whether the effects should occur before or after the crop. If you blur a layer after masking, the blur may not “bleed” beyond the mask edge as you expect. Precomposing can help you control the order of operations.
Using track mattes for dynamic cropping
Track mattes are a more flexible cousin of masking, especially when your crop needs to be driven by another layer-like text, a moving shape, or even animated footage. With track mattes, one layer defines the visibility of another.
A typical dynamic crop setup looks like this:
- Create a Matte layer (often a shape layer). This layer defines the visible area.
- Place the matte layer above the layer you want to crop.
- In the Timeline, set the lower layer’s TrkMat (Track Matte) to Alpha Matte (or Luma Matte).
Alpha Matte uses transparency: opaque areas reveal, transparent areas hide. Luma Matte uses brightness: white reveals, black hides. This is incredibly useful for sophisticated crops:
- Use a gradient layer as a luma matte for a smooth, variable crop.
- Use animated typography as an alpha matte to reveal footage through letterforms.
- Use a moving shape as a “window” that pans across a larger scene.
Track mattes also make it easier to reuse a crop across multiple layers. Instead of drawing the same mask five times, you create one matte and point several layers to it (often by precomposing a group and applying a single matte at the group level).
If you’re working in a newer After Effects version, you may also encounter Set Matte (an effect) or more modern matte workflows that don’t require strict layer stacking. But the classic track matte remains a dependable, readable technique-especially when you’re handing a project to another artist.
Pros and cons of cropping with masks vs composition size
Choosing between masks/mattes and resizing the composition is less about right vs wrong and more about intent. Here’s a practical comparison:
- Resizing composition (true crop)
-
Pros: Changes final output size; can reduce pixel processing; aligns with delivery specs; simpler exports.
Cons: Can break dependent comps; may require repositioning/retiming; edge-sensitive effects may change; less flexible for animated framing.
- Masks and mattes (visual crop)
-
Pros: Non-destructive; animatable; great for reveals; keeps master comp intact; easy to iterate.
Cons: Output size stays the same unless you also resize comp; can add complexity; stacking order and precomps can get confusing; may not speed renders if comp remains large.
A common professional workflow is to combine them: use masks/mattes during creative exploration, then commit to a final comp resize once the framing is approved. That way, you get flexibility early and efficiency at the finish line.
Best practices for cropping compositions in After Effects
Maintaining aspect ratio and resolution
Cropping is often really an aspect ratio decision disguised as a technical step. If you crop without thinking about aspect ratio, you can end up with outputs that look “almost right” but feel subtly off-like a poster hung slightly crooked.
Best practices:
- Decide the target first: Know whether you need 16:9, 9:16, 1:1, or something custom. Cropping becomes straightforward when the destination is clear.
- Use exact pixel dimensions: Platforms are forgiving, but pipelines aren’t. If the spec is 1080×1920, don’t deliver 1078×1920 because your ROI was eyeballed.
- Watch scaling artifacts: If you crop and then scale up to fit a new size, you might introduce softness. If quality matters, consider reworking at higher resolution or using vector assets where possible.
If you’re creating multiple versions, consider building a master comp at a comfortable “production resolution” (often 4K or at least 1920×1080), then create output comps for each aspect ratio. That way you’re cropping from abundance rather than stretching from scarcity.
Also remember: aspect ratio isn’t just about width and height. It’s about composition-where the subject sits, where text breathes, and how motion flows. A vertical crop often wants different staging than a horizontal one. Treat it like a redesign, not merely a trim.
Preserving layer quality and effects
After Effects is happiest when you treat it like a compositing environment rather than a destructive editor. Cropping can interact with layer quality in a few ways, so it’s worth being deliberate.
Keep vectors vector: If you’re using Illustrator layers or shape layers, enable continuous rasterization where appropriate so scaling and reframing don’t soften edges.
Mind your precomps: If you precompose layers and then scale the precomp layer, you may be scaling a rasterized result. Sometimes that’s fine; sometimes it’s a recipe for blur. If quality matters, consider resizing inside the precomp or using collapse transformations (where appropriate) to preserve fidelity.
Be cautious with heavy effects at the edges: Glow, blur, drop shadow, and particle systems can get clipped when you reduce comp size. Solutions include:
- Precompose the affected layer with extra padding and apply effects inside the precomp.
- Increase effect settings that control edge behavior (some effects have “Repeat Edge Pixels” or similar options).
- Enlarge the crop slightly to give the effect room.
Check motion blur: Motion blur can extend beyond an object’s core shape. A crop that’s too tight can make fast-moving elements look chopped. If your animation relies on speed, test your crop during the fastest moments, not just at a still frame.
Avoiding common cropping mistakes
Cropping mistakes in After Effects are usually not dramatic-they’re the quiet kind that show up during export review when you’re already tired. Here are the common ones and how to avoid them.
- Cropping too tight: Leave room for glows, shadows, and motion blur. If you’re unsure, add a safety margin.
- Forgetting about animation: A crop that looks perfect at frame 0 may fail at frame 120. Scrub the entire timeline.
- Breaking precomp relationships: Resizing a comp used elsewhere can cause unexpected scaling/cropping in parent comps. Duplicate before you commit.
- Misinterpreting ROI: ROI can limit previews, but unless you crop the comp to ROI, your render/export may still be full size.
- Ignoring pixel aspect ratio: Most modern workflows use square pixels, but if you’re in legacy broadcast territory, double-check pixel aspect ratio so your crop doesn’t distort.
A helpful habit is to create a “delivery checklist” for yourself: verify comp size, verify frame rate, verify safe margins, verify no unintended borders, and do a quick test render. Cropping problems are easiest to fix when they’re found early.
Troubleshooting common issues when cropping compositions
What to do if cropped area appears cut off
If your cropped result looks like it’s cutting off content you expected to see, the cause is usually one of these: the comp is smaller than you realized, layers have moved relative to the new frame, or an effect is being clipped by the new boundaries.
Try this sequence:
- Confirm comp size: Open Composition Settings and verify the width/height match your intention.
- Check layer positions: Select key layers and look at their Position values. If the comp center changed, your layout may need re-centering.
- Look for clipped effects: Temporarily disable effects like blur/glow to see if the “cut off” is actually an effect boundary issue.
- Inspect masks/mattes: If you used a mask or track matte, make sure it’s not unintentionally hiding content (for example, a matte layer moved or got scaled).
If the cut-off happens only during fast motion, it may be motion blur or an effect extending beyond the crop. Increase margins or restructure the effect inside a padded precomp.
In 3D comps, a “cut off” feeling can also be a camera framing issue. Cropping changes the viewing window; you might need to adjust camera zoom or position to restore the intended framing.
How to fix black bars or unexpected borders
Black bars usually mean one of two things: either your footage/layer doesn’t fill the new comp size, or you’ve changed aspect ratio and the content is being fit incorrectly. Unexpected borders can also be caused by effects, scaling methods, or background layers you forgot existed.
Fixes to try:
- Scale to fill (carefully): Select the footage layer and scale it until it fills the frame. This can crop the footage (which may be fine) but can also reduce quality if you scale up too much.
- Reposition instead of scale: If the layer is already large enough, you may only need to move it to cover the frame.
- Replace background: If you’re seeing black because there is no background, add a solid, gradient, or blurred duplicate layer behind your subject.
- Check layer order and blending: A border can be a layer with a stroke, a shape layer outline, or a masked edge that’s now visible due to reframing.
If the black bars appear only in the export but not in the comp viewer, double-check your export pipeline: you may be rendering a different comp than you think, or your encoder may be scaling/padding to a different aspect ratio. Ensure the render target matches the comp size exactly.
Addressing layer overflow after cropping
“Layer overflow” is the polite way of saying: your layers are now too big, too far off-center, or generally misbehaving after the crop. The good news is that overflow is often easy to manage once you decide what your crop is supposed to achieve.
Practical strategies:
- Use a master precomp: Put your animation into a master comp and then place it into an output comp. In the output comp, you can reposition/scale the master layer without rewriting the animation.
- Parent to a null: If multiple layers need the same shift, parent them to a null and move one control.
- Animate the reframing: Sometimes overflow is not a problem but a creative opportunity. If you’re converting to vertical, you might animate the framing to follow the action.
- Use guide layers and guides: Create safe-area guides so you can quickly see what must remain visible across the timeline.
If overflow happens because you used ROI and it cropped too aggressively, undo and redraw ROI with more margin. ROI cropping is fast, but it’s also easy to be a little too confident with it.
How cropping affects rendering and export in After Effects
Impact of cropped composition size on render times
In many cases, cropping to a smaller comp size can reduce render times because After Effects has fewer pixels to process per frame. A 1920×1080 frame contains about 2.07 million pixels; a 1080×1080 frame contains about 1.17 million. That’s a meaningful drop in pixel workload.
But render time isn’t only about pixel count. Cropping may or may not help depending on what’s happening in your comp:
- Pixel-heavy effects: Blurs, glows, noise, certain plugins, and heavy compositing often scale with pixel count. Smaller comps can help.
- 3D rendering: 3D layers, lights, shadows, and ray-traced calculations can still be expensive; smaller output helps, but complexity remains.
- Footage decoding: If you’re using large, highly compressed footage, decoding can be a bottleneck regardless of comp size.
- Expressions and scripts: Expression-heavy rigs can be CPU-bound; cropping won’t necessarily fix that.
Also note the difference between cropping the comp and masking. Masking a layer does not automatically reduce the comp’s pixel processing; After Effects still thinks in terms of the full comp frame for many operations. If performance is your main goal, resizing the comp is usually the more effective lever.
That said, a smart hybrid workflow is common: keep a large master for flexibility, then create smaller output comps for final renders. You get the best of both worlds-creative breathing room and efficient deliverables.
Export settings to match cropped composition
Once you crop a comp (either via ROI-to-comp or Composition Settings), your export should follow that new size-provided you’re exporting the correct comp and not overriding dimensions downstream.
To keep exports aligned with your crop:
- Render the right comp: Add the cropped comp to the Render Queue (or send it to Adobe Media Encoder). It’s surprisingly easy to export the pre-crop version by accident.
- Avoid unintended resizing: In your export module/encoder settings, ensure you are not scaling to a different resolution unless you mean to.
- Check pixel aspect ratio: Most modern exports are square pixels; confirm this if you’re delivering to broadcast or legacy specs.
- Mind alpha channels: If your cropped comp has transparency and you need it preserved, choose a codec/format that supports alpha (and enable RGB+Alpha where applicable).
If you’re exporting multiple aspect ratios, it’s worth creating clearly named comps like:
- Spot_MASTER_1920x1080
- Spot_OUT_1080x1080
- Spot_OUT_1080x1920
This naming habit prevents mix-ups, especially when deadlines tighten and you’re exporting three versions back-to-back.
Finally, remember that some platforms add their own UI overlays or safe zones. If you’re cropping for social, consider building guides that reflect real-world UI (captions, buttons, profile icons). Cropping to the correct pixel size is necessary-but cropping to the correct usable area is what makes the final video feel professionally composed.
See a real After Effects workflow example
Conclusion
Cropping in After Effects is less like trimming a photograph and more like choosing the rules of a stage: where the proscenium arch sits, what the audience can see, and how much offstage space you want to keep for tricks, lighting, and last-minute changes. Once you start thinking in those terms, cropping stops being a one-time fix and becomes part of your design process.
If you want an extra edge in real-world workflows, consider building a small “format lab” inside your project: a folder of output comps for common aspect ratios, each with guides and safe areas already set up. Drop your master animation in, reframe as needed, and you’ve turned cropping from a stressful late-stage scramble into a repeatable, almost boring step-which is exactly what you want when delivery day arrives.
And if you’re working with clients who can’t decide (a timeless tradition), keep your master comp roomy, keep your crops as separate output comps, and treat framing like a creative choice you can revise without breaking your animation. After Effects rewards that kind of calm, modular thinking-especially when the inevitable “Can we also get a vertical version?” email arrives five minutes before you were going to log off.