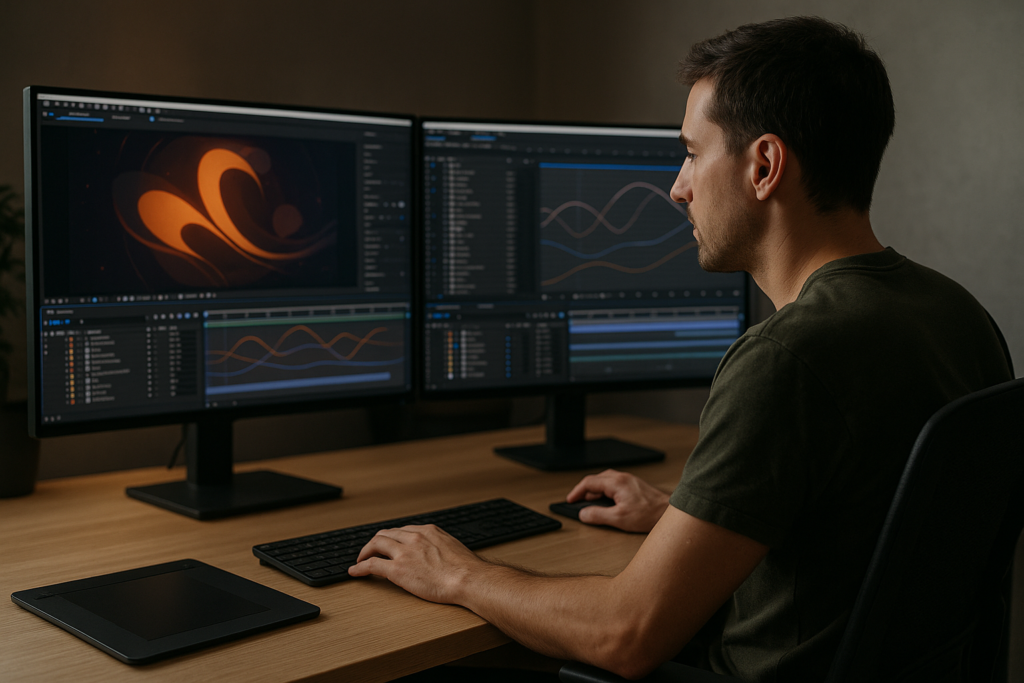
Speed in After Effects is not just about hardware; it is about making a hundred small workflow decisions that save minutes every hour. This guide walks through how to speed up After Effects workflow using concrete, repeatable systems you can apply to any project, from short social edits to complex commercial work.Explore faster AE templates
Why speeding up your After Effects workflow matters
Speeding up your After Effects workflow means reducing friction between idea and final render. It is the combination of how you organize projects, prepare assets, use shortcuts, and structure compositions so you spend more time making creative decisions and less time clicking around.
When editors and motion designers talk about speed, they are not just chasing quick renders. They want:
- Snappy previews that do not stall every time you scrub the timeline.
- Projects that stay clean and understandable, even weeks or months later.
- Reusable systems for titles, transitions, and layouts that keep work on brand.
- Confidence that last-minute client changes will not break the project.
This matters to solo creators on YouTube, editors working on tight agency deadlines, and teams delivering recurring series or templates at scale. Efficient setups let you:
- Deliver more videos per week without burning out.
- Maintain higher visual quality because you keep mental energy for design decisions.
- Collaborate smoothly, since others can open your project and understand it.
If you are new to After Effects, learning how to speed up After Effects workflow early prevents bad habits that slow you down later. If you are experienced, refining these systems can easily save you hours per week, especially on repeatable work like intros, lower thirds, and product promos.
Core After Effects productivity tips for everyday projects
After Effects productivity tips are most useful when they fit into your daily work: social clips, explainers, client revisions, and exports. The goal is to standardize everything you repeat so you think less about setup and more about timing, animation, and storytelling.
Build reusable starting points
Keep a small library of ready-made project files and compositions for common jobs:
- Series intros and outros.
- Lower thirds for hosts and guests.
- Call-to-action end screens for platforms like YouTube layouts.
- Common transitions for reels, shorts, and ads.
Instead of rebuilding from scratch, duplicate and adapt. A well-organized template can turn a 2-hour build into a 10-minute tweak.
Organize timelines before animating
Drop footage, audio, and key graphics into comps and name them clearly before touching keyframes. Use color labels to organize:
- Warm colors for footage.
- Cool colors for text.
- Neutrals for adjustment layers and controllers.
Clear timelines directly increase speed because you can find what you need almost instantly, even in a complex sequence like a multi-shot product explainer animation.
Leverage prebuilt motion systems
If your work includes recurring animation styles—such as UI pop-ups, pins, or location callouts—turn them into modular comps you can drop into any project. A single prebuilt callout can serve everything from a map-based sequence to a corporate walkthrough.
Streamline client iteration
Create master control layers for colors, fonts, and main timings. That way, a client asking for color changes or faster pacing becomes a matter of adjusting a small set of controls rather than chasing keyframes across dozens of layers. The more you centralize changes, the faster you move through revisions.
Common workflow mistakes that slow editors down
Many After Effects users struggle with speed not because of hardware, but because of patterns that make every project heavier than it needs to be. Fixing these pain points immediately boosts your day-to-day efficiency.
Messy projects and timelines
- No folder structure in the Project panel, making assets hard to find.
- Compositions named “Comp 1” or “Precomp 5” with no context.
- Dozens of unused layers left turned off instead of cleaned up.
Consequence: You waste minutes hunting for assets and risk breaking things by editing the wrong layer. On big jobs, this compounds into hours.
Heavy, unoptimized previews
- Working at full resolution for simple timing checks.
- Leaving motion blur, depth of field, and expensive effects enabled during layout stages.
- Using many particle systems or glows before locking timing.
Consequence: RAM previews crawl, making it painful to refine animation and easing.
Poor use of precomps
- Precomposing every small group of layers, creating deep nesting.
- Or never precomposing, leaving huge comps with 100+ layers.
- Precomps with mixed frame rates or resolutions that do not match the main comp.
Consequence: You lose track of where changes live and increase the chance of inconsistent animation or scaling artifacts.
Graph Editor guesswork
- Randomly dragging handles without a consistent easing style.
- Mixing different easing approaches on similar elements.
- Not using value graphs for precise motion, especially for UI moves.
Consequence: You spend more time tweaking and re-tweaking movement because it never quite feels right.
Overusing third-party plugins
- Relying on heavy plugins for simple effects that could be built natively.
- Using multiple versions of similar plugins across different comps.
- Not tracking license or version compatibility, causing issues when handing off projects.
Consequence: Longer renders, compatibility headaches, and fragile projects that break on other machines.
No system for revisions
- Duplicating comps for every revision with no naming convention.
- Making destructive changes instead of keeping an earlier version.
- Not documenting changes requested by clients or producers.
Consequence: You spend time trying to remember what changed and risk redoing work that was already approved.
Eliminating these problems sets the stage for a sustainable, fast workflow that you can rely on across client work, personal projects, or ongoing series.
Choosing the right workflow for each type of project
Different projects demand different workflows. A snappy social reel should not be built like a complex title sequence. Choosing the right approach at the start is one of the strongest After Effects productivity tips you can apply.
Short social clips and reels
For vertical stories, reels, and shorts:
- Design a master 9:16 comp with guides for safe areas.
- Use prebuilt text, emoji, and sticker animations that you can swap content into.
- Keep effects light so you can iterate quickly on pacing.
Once a solid layout is in place, you can reuse the same core structure for series-based content like recurring lyric edits or music moments, similar to a dedicated lyric video format.
Ads and product promos
For ads, start with structure:
- Hook (first 3 seconds).
- Problem or context.
- Feature highlights.
- Call to action.
Use modular scenes so you can quickly swap out product shots and copy without breaking animation. Template-driven setups shine here, since you can lock in your motion language once and reuse it across multiple clients or campaigns.
YouTube and long-form content
For episodic or long-form series, prioritize consistency:
- Build a shared toolkit of intros, lower thirds, subscribe prompts, and end screens.
- Centralize colors and fonts in one control comp so you can update branding globally.
- Keep timelines lightweight so they are easy to update when episodes change late in production.
Cinematic and design-heavy edits
More stylized or cinematic sequences often require custom motion, but you can still systematize:
- Lock in aspect ratio, frame rate, and grain strategy from the start.
- Design a small set of re-usable camera moves (pans, reveals, parallax moves).
- Prebuild a few transition systems to glue scenes together.
Leveraging templates as a speed multiplier
For recurring formats, a high-quality template can remove much of the setup work while preserving creative control. Instead of spending hours designing lower thirds, you load a project where typography, motion language, and responsive layouts are already solved. With an Unlimited After Effects Templates Subscription, the real value is not just variety but the ability to pull from a reliable library whenever you start a new campaign or series.
For deeper technical tuning—cache behavior, multiprocessing, and GPU settings—refer to the official guidance at After Effects performance documentation, and combine those optimizations with the structural decisions covered here to get the best of both worlds.See subscription options
Practical template based workflow checklist for editors
Working from templates does not mean locking yourself into generic designs. Used well, templates are structured blueprints that let you focus on timing, storytelling, and polish. This chapter gives you a practical template workflow, step by step.
Step 1 Plan your output before opening After Effects
Clarify where the video will live and what you need:
- Aspect ratios: 16:9, 9:16, square, or a mix.
- Frame rates: 23.976/24 for cinematic, 25/30 for broadcast, 50/60 for snappy UI or gameplay.
- Duration: hooks vs long-form sequences.
Pick templates that match or can easily adapt to those specs. For example, when building a clean corporate opener or interface sequence, starting from a UI-oriented project like meeting-style screen layouts can save you layout time.
Step 2 Check version and project compatibility
When downloading a template, verify:
- Minimum After Effects version and whether you are on Mac or Windows.
- Project color space and bit depth settings.
- Composition resolution and frame rate.
Align your own master comp settings before importing footage. This avoids surprises with timing, motion blur, or flickering gradients later.
Step 3 Understand the structure before editing
Open the template and explore:
- Main render comps (usually labeled “Render” or “Final”).
- Control comps for colors, fonts, and logos.
- Asset folders for placeholders (images, video, audio).
Spend a few minutes clicking through. Identify where global changes live. Some templates use master controllers, others rely on expression-driven controls or adjustment layers.
Step 4 Organize footage and assets
Before replacing placeholders:
- Create folders: “Footage”, “Audio”, “Logos”, “Exports”.
- Rename files descriptively (e.g., “Interview_A_Cam”, “Product_Closeup_01”).
- Import into matching folders in the Project panel.
This structure is especially important on multi-segment edits like case studies or presentation-style videos, similar to how complex widget-based sequences such as automotive UI demos are organized.
Step 5 Customize colors, typography, and branding
Most modern templates provide color and text controls. Work top-down:
- Set brand colors first (primary, secondary, accent).
- Apply brand fonts or close matches while keeping hierarchy intact.
- Adjust stroke widths, corner radiuses, and shadows briefly to match the brand feel.
Test these changes in a few different scenes before committing so you avoid redoing work later.
Step 6 Adjust keyframes and timing
Templates provide safe defaults, but you should still refine:
- Use the Graph Editor to align easing with the tone of the edit (snappy for tech, smoother for corporate).
- Trim or extend in/out animations to hit beats in the soundtrack.
- Adjust overlap between scenes to avoid dead air.
A good template will group related elements into precomps, making timing changes easier. Some projects even centralize timings in a “master timing” comp, as seen in modular sequences like dual-screen layouts.
Step 7 Optimize previews and performance
Even with a clean template, you can bog down performance. To stay fast:
- Preview at 1/2 or 1/4 resolution for timing checks.
- Solo key layers when you only need to see text or UI.
- Disable motion blur and heavy effects until animation is locked.
- Use proxies for large footage files, especially 4K+ or RAW.
Configure your preview region to only cache what you are currently refining. This makes each iteration faster.
Step 8 Watch out for plugin dependencies
Know which effects are required:
- Identify all third-party effects used in the Effect Controls panel.
- Check if the template includes fallback setups for users without specific plugins.
- Decide whether to keep, replace, or bake in heavy effects before handoff.
If you are collaborating, note required plugins in a simple text layer or README so others do not run into missing-effect errors.
Step 9 Build a simple revision system
For client or internal review:
- Duplicate main render comps with version numbers (“v01”, “v02”).
- Leave a quick annotation layer summarizing what changed.
- Remove unused earlier versions once the project is approved.
Keeping revisions deliberate reduces confusion and stops your project from becoming an unmanageable stack of slightly different comps.
Step 10 Prep for export with future tweaks in mind
Before rendering:
- Ensure text fields have room for longer translations or last-minute copy changes.
- Check all animations at 100 percent scale for aliasing or jitter.
- Verify audio sync with a full-quality preview of key sections.
Templates become truly powerful when you can rapidly re-export variants—different languages, aspect ratios, or offers—without touching core animation again. That is where an Unlimited After Effects Templates Subscription compounds your speed gains across campaigns and clients.
Advanced systems for long term workflow speed
Once your basics are solid, you can build systems that keep you fast across entire seasons of content and multiple clients. This is where experienced editors and motion designers save the most time.
Create reusable animation languages
Instead of designing motion from scratch every project, define a small set of rules:
- Standard easing curves for UI elements, titles, and transitions.
- Preferred distances for moves (e.g., 80–120 pixels for slide-ins).
- Consistent motion directions that support your visual story.
Package these into a “motion kit” project you duplicate whenever starting something new. Over time, this makes your work feel cohesive and drastically reduces decision fatigue.
Work modular across an entire edit
Break longer pieces into sections:
- Openers and hooks.
- Chapters or topic cards.
- Lower thirds and callouts.
- End cards and CTAs.
Each module lives in its own comp and can be rearranged on a master timeline. This is especially valuable for recurring formats like video podcasts, product walk-throughs, or series featuring embedded widgets similar in complexity to pieces on motion collections.
Use styleframes and references early
Lock in look and feel through 2–4 styleframes before animating everything:
- Define spacing, grid, and hierarchy.
- Test how key UI or text elements behave in motion.
- Confirm color and typography are approved.
This avoids heavy rework later and keeps the animation phase focused on nuance rather than structural changes.
Keep projects lightweight
Over time, projects tend to bloat. To stay lean:
- Regularly purge unused footage and solids.
- Consolidate and reduce duplicate precomps when they share the same content.
- Archive older assets externally and keep the live project focused only on what is needed.
Use Collect Files when delivering to clients or collaborators so they receive exactly what the project needs—no more, no less.
Smart export and render strategies
Rendering can be a major bottleneck if handled poorly. Consider:
- Rendering high-quality intermediates (e.g., visually lossless codecs) for later compression in a dedicated encoder.
- Batching multiple deliverables from a single master render where possible.
- Scheduling long renders overnight or during downtime.
Test shorter sections at your final delivery codec before committing to long overnight renders so you catch banding or artifact issues early.
Handle integrations and handoffs carefully
Dynamic linking with editing applications can be powerful but heavy. For speed:
- Use dynamic link for sections that will change frequently.
- Bake stable sequences into rendered files to reduce load.
- Document the pipeline so collaborators know where masters live.
For teams working worldwide, clarity in naming, versioning, and folder structures is one of the simplest ways to keep everyone moving quickly with minimal confusion.
Search driven micro tips for faster motion design
Editors and motion designers often search for highly specific workflow questions. Here are concise answers to some of the most common, all centered around how to speed up After Effects workflow.
- How do I make previews faster? Lower preview resolution, reduce the preview area, disable heavy effects, and use proxies for big footage files.
- How can I keep my timeline clean? Color-label layers, precomp related elements, name everything descriptively, and delete unused assets regularly.
- What is the fastest way to reuse titles? Build a master title comp with expression-driven text and color controls, then duplicate it for each new video.
- How do I avoid breaking templates? Only edit designated placeholder comps and control layers, and avoid changing core expression setups unless you understand them.
- Can I speed up audio-synced animation? Use markers to flag beats and sync keyframes to markers instead of scrubbing blindly through the audio.
- How do I keep branding consistent? Centralize colors, fonts, and logo treatments in one control comp or master file used across all episodes or assets.
- What is a quick way to polish motion? Use the Graph Editor for key moments, standardize easing curves, and add subtle motion blur where it supports realism.
- How do I manage frequent client changes? Keep text and key content in clearly labeled precomps, and avoid baking important elements into rasterized footage too early.
- Is it worth building my own template library? Yes; even a small personal library of lower thirds, transitions, and end screens can dramatically reduce build time for each new project.
- How do I keep render times under control? Limit heavy effects to what the viewer will actually notice, pre-render complex sections, and match your output settings to the platform requirements.
Bringing it all together for a faster After Effects workflow
Speed in After Effects comes from stacking many small advantages: clear project structures, smart use of templates, consistent motion systems, and deliberate performance settings. Together, these approaches help you deliver cleaner motion, faster timelines, and more reliable results for every client or personal project.
Keep refining your own playbook of After Effects productivity tips—shortcuts, presets, and project templates that reflect how you like to work. Over time, you will spend far less effort on setup and far more on craft.
When you are ready to lean even more on proven structures, an Unlimited After Effects Templates Subscription can give you a constantly available starting point for intros, transitions, widgets, and full edits, so you can focus on the story and client goals rather than rebuilding the same systems from scratch.
Build once, refine often, and let your workflow do the heavy lifting so you can concentrate on designing motion that stands out, project after project.Get started with faster workflows
Conclusions
A fast After Effects workflow is the result of clear structures, repeatable systems, and smart template use. Apply these habits consistently and you will ship more polished motion in less time, with a process that stays stable and scalable as your client demands and creative ambitions grow.
FAQ
What is the quickest way to speed up After Effects workflow for beginners?
Start by organizing projects with clear folders and names, using lower preview resolutions, and working from well-structured templates instead of blank comps.
How do templates improve After Effects productivity?
Templates remove repetitive setup work. Layouts, titles, and transitions are prebuilt, so you only customize content, branding, and timing to fit each project.
Will using templates limit my creative control?
No. Good templates act as a starting framework. You can adjust timing, easing, colors, typography, and composition to match your own style or client brand.
How can I keep After Effects projects lightweight over time?
Regularly delete unused assets, consolidate duplicate precomps, use proxies for heavy footage, and pre-render complex sections before final assembly.
What settings matter most for faster previews?
Working at half or quarter resolution, shortening the preview range, disabling heavy effects until needed, and increasing RAM allocation have the biggest impact.
Is an Unlimited After Effects Templates Subscription useful for small teams?
Yes. Small teams benefit from having consistent, ready-to-use motion systems that cut setup time and keep branding aligned across recurring content.