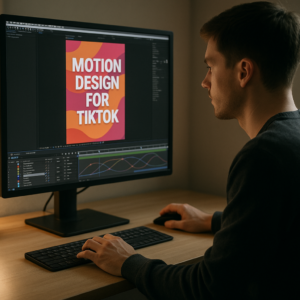
Cinematic motion design is more than smooth keyframes and lens flares. It is about mood, pacing, and visual decisions that feel intentional from frame one. This guide walks through practical cinematic animation techniques in After Effects so your next sequence can hold up on the big screen as well as in a vertical reel.Explore templates now
What Cinematic Motion Design Really Means
Cinematic motion design is the combination of animation, editing, sound, and visual language that feels like it belongs in film or high-end streaming content. It is not a single effect; it is a way of planning timing, framing, and motion so every move feels deliberate.
For After Effects users, this usually shows up in:
- Thoughtful camera moves that support the story.
- Layered depth using parallax, fog, and lighting.
- Controlled, motivated transitions instead of random wipes.
- Typography that feels integrated in the scene, not floating above it.
Cinematic motion design matters because audiences are used to film-level visuals. Viewers swipe away from anything that feels cheap or generic. For editors, motion designers, and creators, that means your work competes against feature films, trailers, and top-tier title sequences—even if you are delivering for YouTube or a brand campaign.
This approach is for anyone working in After Effects who wants:
- Social videos that feel more like trailers than simple edits.
- Brand visuals that look at home on high-end websites or streaming intros.
- Title sequences and lyric videos that feel designed for the big screen.
Once you understand the fundamentals, cinematic motion design becomes a repeatable process: from reference and storyboards to keyframing, polish, and export. The rest of this guide builds a workflow you can reuse on client work and your own passion projects.
Core Cinematic Animation Techniques in After Effects
Cinematic animation techniques are the building blocks behind every polished sequence. They decide whether your motion feels like a trailer or like a basic slideshow. In After Effects, these techniques fall into a few practical categories you can combine in any project.
Camera driven storytelling
Instead of moving layers randomly, think like a virtual camera operator:
- Use 3D layers and a camera to create depth and parallax.
- Animate camera position and point of interest with clean easing.
- Limit moves to a few strong, motivated directions per scene.
Cinematic widgets or UI-inspired layouts, like a location-focused HUD sequence, benefit a lot from subtle camera drifts and carefully staggered layer motion.
Timing and pacing
Cinematic pacing is rarely linear. It uses contrast:
- Quiet, minimal motion to build tension.
- Bursts of fast cuts synchronized to music hits.
- Hold frames on key moments to let the viewer absorb information.
Think of contrast between stillness and motion as your main storytelling tool.
Layered depth and atmosphere
Create a more filmic feel by stacking multiple subtleties:
- Foreground and background elements with different blur levels.
- Light leaks, particles, or fog used sparingly.
- Soft vignettes to guide the eye.
You can study how subtle atmospheric layers enhance UI-driven scenes in projects like the minimal fintech animation or the video platform dashboard layout.
Typography as part of the scene
Cinematic titles and lyrics feel anchored:
- Match text motion to camera or subject movement.
- Use overshoot and settle animations to convey weight.
- Introduce and remove text with motivated moves: entering from screen edges, tracking with a subject, or fading through light flares.
You can see this mindset in stylized lyric concepts such as a neon-inspired piece like rap lyric motion graphics, where timing and type integration sell the mood.
Sound driven motion
Cinematic design is almost always tied to sound. Even if you design silently, plan key hits to align with:
- Downbeats and snare hits.
- Risers and whooshes.
- Pauses or drops in the track.
Mark audio beats in the timeline and use them as anchors for core moves. Visual impact comes from how you sync—not how complex your keyframes are.
Common Problems That Break Cinematic Feel
Even experienced editors run into issues that make cinematic motion design fall flat. Most problems come from workflow habits rather than lack of creativity. Fixing these early keeps your projects flexible and client-ready.
Checklist of frequent mistakes
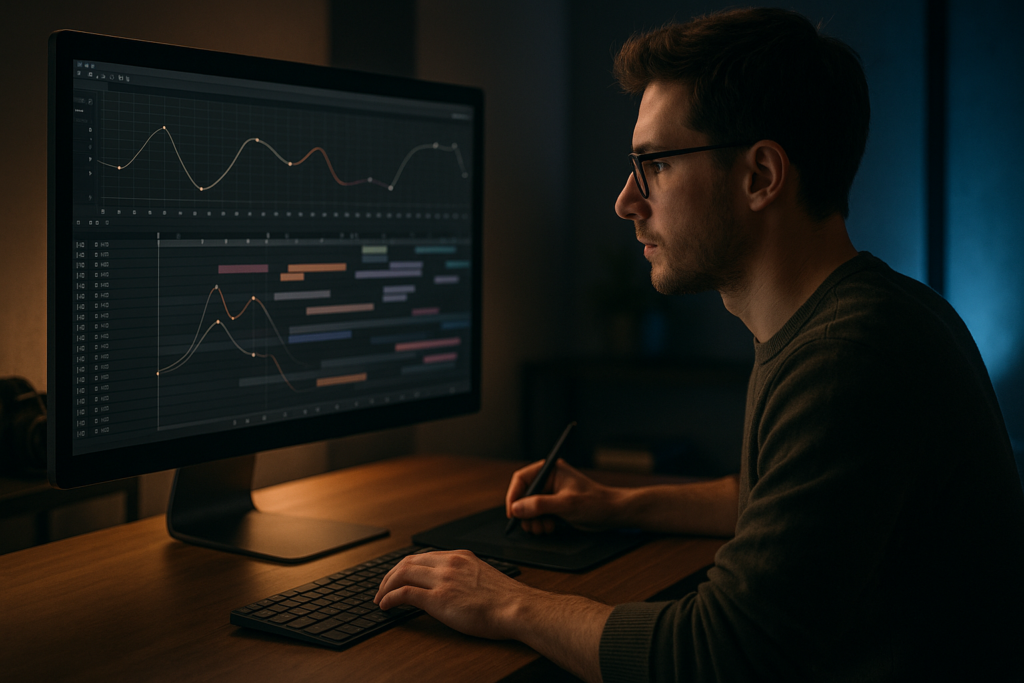
- Linear, robotic easing – Leaving keyframes at default linear or overusing Easy Ease only. Result: motion feels stiff or floaty. Solution: sculpt arcs and velocity with the Graph Editor.
- Ignoring the Graph Editor – Avoiding speed and value graphs leads to generic motion. Solution: keep curves clean, with clear acceleration and deceleration.
- Overdone motion blur – Cranking motion blur to hide rough animation. Result: smeared, messy frames and heavy renders. Solution: moderate shutter angle; fix timing first, blur later.
- Messy comp structure – Dozens of unlabeled layers and nested comps. Result: painful revisions and broken renders. Solution: use clear naming, label colors, and logical precomps (titles, backgrounds, FX).
- Overloading with heavy plugins – Throwing multiple glows, particle systems, and 3D plugins on top. Result: laggy previews and missed deadlines. Solution: bake effects when needed, use simpler built-in tools or pre-rendered elements.
- Wrong frame rate and resolution – Starting at arbitrary settings. Result: jittery motion or scaling issues across platforms. Solution: define delivery first (24/25/30 fps, 9:16 vs 16:9) and build your comp accordingly.
- Unmotivated transitions – Random wipes and zooms between shots. Result: viewer distraction instead of immersion. Solution: tie transitions to camera moves, light changes, or scene elements.
- No hierarchy or focal point – Everything moves at once with equal weight. Result: visual noise and fatigue. Solution: choose one hero element per moment; support it with subtle secondary motion.
How these issues show up in real projects
- A lyric sequence feels cheap because every word flies in with the same preset transition.
- A product intro looks chaotic because the camera and UI elements move in unrelated directions.
- A brand opener stutters during playback since every layer has heavy glow and particles.
To keep cinematic quality, think like an editor first: decide what the viewer should feel at each beat, then use effects and motion only in service of that intention. Everything else is polish.
Choosing the Right Approach for Each Edit
Cinematic motion design is not one-size-fits-all. A TikTok bumper, a YouTube intro, and a streaming-style title sequence need different levels of detail and pacing. Deciding your approach before animating saves hours in After Effects.
Define your delivery first
- Social reels and shorts – Prioritize punchy motion, fast hooks, and legible text at small sizes. Use bold, simple shapes, clear contrast, and quick reveals.
- YouTube and long-form content – Focus on consistent visual language for intros, lower thirds, chapter cards, and end screens. Viewers will see your design for longer, so subtle polish matters.
- Cinematic trailers and title sequences – Spend more time on atmosphere, camera moves, and sound-driven pacing. Expect more layers, more precomps, and longer renders.
- Corporate and explainers – Aim for clarity first, style second. Motion should guide understanding, not show off technique.
When to build from scratch vs. use templates
- Build from scratch when you are prototyping a new look, working on a passion project, or exploring a unique brand language.
- Use templates when you need speed, consistency across multiple videos, or a proven structure to customize. A solid template gives you a tested camera system, text layouts, and transitions you can adapt quickly.
For inspiration and understanding what high-end motion feels like in the wild, study curated digital experiences on sites like Awwwards. Note timing, transitions, and typography, then adapt ideas to your After Effects timelines.
Decision guide for your next project
- If you are delivering a series (episodes, ads, regular content), prioritize reusable systems and template-based workflows so every piece feels like part of one universe.
- If you are designing a one-off hero piece, give yourself more time to customize micro-timing and camera moves.
- If deadlines are tight, lean on proven layouts and motion systems so you can focus creativity on the most important beats, not on rebuilding the basics.
Cinematic motion design is about choices. Decide the mood, pace, and level of complexity before you add your first keyframe. That way, every animation decision builds toward a clear goal, instead of fighting to fix things in the last hour of the render window.Get cinematic-ready assets
Template Based Cinematic Workflow in After Effects
Working from a solid template does not limit creativity; it frees you to spend more time on the parts that actually feel cinematic: pacing, camera, and story. Think of templates as pre-built rigs you can adapt to different briefs.
Project setup and compatibility
Before anything else, confirm the basics:
- After Effects version – Check the minimum version listed in the template. Opening advanced projects in older versions can break expressions and effects.
- Frame rate and resolution – Align the template to your deliverables. If the base comp is 1920×1080 at 29.97 fps but you need 4K 24 fps, duplicate the master comp, update settings, and preview for timing differences.
- Safe margins – Turn on action and title safe guides, especially if the project might be repurposed for broadcast or multiple platforms.
Organizing precomps and keyframes
A cinematic motion design template should have a clear structure:
- Master scenes or shots as top-level comps.
- Nested precomps for titles, backgrounds, FX, and controls.
- Global control layers for colors and typography.
Adopt these habits when you customize:
- Rename key comps with project-specific labels (e.g., 01_Intro_Title, 02_Product_Hero).
- Group related layers with label colors (titles, controls, footage, FX).
- Keep keyframes for major movements on as few layers as possible, so you can adjust pacing quickly.
You can see how well-defined structures help in interface-heavy scenes like a dashboard-style project similar to the payment widget animation, where repeated layouts are controlled from a few key comps.
Performance and preview tips
Cinematic work often means heavier comps. To stay responsive while you refine timing:
- Drop preview resolution to Half or Quarter during layout and rough timing.
- Use Region of Interest to preview only the active part of the frame.
- Solo important layers when tweaking animation curves.
- Enable disk cache and purge only when performance really drops.
- Create proxies for heavy footage or 3D renders.
Plugin dependencies and safe alternatives
Before committing to a template, confirm which plugins it relies on:
- If a project uses third-party glows or lens effects, check if there is a built-in alternative (Glow, Camera Lens Blur, Fractal Noise) you can swap in.
- If 3D elements depend on specific plugins, consider replacing them with pre-rendered passes or simpler layered comps.
- Keep a “lite” version of each scene without heavy effects for quick client previews.
Customization workflow
Approach template customization like a color grade: consistent, deliberate, and system-based.
- Colors – Start with global control layers or adjustment layers. Decide on a palette that supports your mood (cool for tech, warm for lifestyle, mixed for dramatic contrast).
- Typography – Replace placeholder fonts with brand or project-appropriate choices. Adjust tracking and line length to keep titles readable on phones and large screens.
- Transitions – Use existing transitions as a base, then tweak duration and easing to match the music and pacing.
- Timing – Once content is in place, go scene by scene through the Graph Editor, adjusting curves so main moves align with beats and visual cues.
Use cases across platforms
A single cinematic-ready template can cover many needs:
- Reels and shorts – Use the boldest scenes and tightest cuts. Prioritize vertical layouts and close crops on text or subjects.
- Ads and product promos – Pair hero shots with dynamic data or feature callouts, similar to UI-driven layouts like a crypto dashboard concept.
- Cinematic edits and lyric visuals – Lean into atmospheric backgrounds, controlled camera moves, and rhythm-focused type animation.
Practical checklist for each project
- Confirm version, fps, and output resolution.
- Relink or import your own footage, logos, and color palette.
- Update typography and hierarchy (titles, subheads, body text).
- Preview each major scene at low resolution to lock timing.
- Refine keyframes with the Graph Editor for your most important moves.
- Only after motion feels right, add or refine motion blur, grain, and subtle FX.
By treating templates as structured starting points and following a consistent checklist, you can keep a cinematic look across multiple videos while protecting your deadlines and render times.
Advanced Cinematic Workflow and Long Term Optimization
Once your basic scenes look good, the difference between decent and truly cinematic motion design comes from how you manage an entire project over time. This is especially important when you are producing series, campaigns, or recurring content.
Designing reusable animation systems
Instead of reinventing every title or transition, build systems:
- Create a “master toolkit” comp that includes your default title animation, lower third, transition, and overlay styles.
- Drive key properties with expression controls (timing offsets, colors, blur amounts) on a single controller layer.
- Use precomps for recurring elements so updates propagate across the project.
For series-based work, this approach ensures every episode or video feels like part of one cinematic universe.
Consistency through styleframes and references
Start complex projects by building 3–6 styleframes: static frames that define composition, color, type, and FX for key moments. Use them as benchmarks while animating:
- Check each scene against the relevant styleframe before adding extra elements.
- Maintain consistent contrast ratios so key information is always readable.
- Reuse lighting and color grades so sequences cut together smoothly.
Modular transitions instead of one-offs
Design transitions that can work between many kinds of shots:
- Simple shape wipes with customizable directions.
- Light-based transitions (flares, glows) tied to camera direction.
- Blur or parallax-based transitions using camera moves.
Keep transition modules in a dedicated folder or comp, ready to drop between scenes instead of building new ones every time.
Quality control workflows
Cinematic work often fails in the details: flickering edges, inconsistent blur, or off-brand colors. Create QC passes:
- Do a “silhouette pass” by disabling textures and colors, focusing only on shapes and readability.
- Watch muted to check if motion and pacing still feel engaging without sound.
- Scrub slowly through cuts to find popping keyframes or unintended overlaps.
Export and render considerations
Even the best design can fall apart at export.
- Render high-quality masters (ProRes, DNx, or a visually lossless equivalent) before compressing for platforms.
- Use the Render Queue for stable, predictable output; reserve dynamic link workflows for light graphics or quick updates.
- Test exports at native resolution and at any platform-specific sizes you plan to deliver.
Keeping projects lightweight
Heavy cinematic comps can slow you down over weeks of revisions. To keep projects manageable:
- Pre-render heavy FX or 3D sequences as image sequences or high-quality video and replace complex layers with these renders.
- Clean unused assets and hidden layers after locking a version.
- Version your project files (v01, v02, etc.) when making structural changes.
Long-term library mindset
For recurring work, save your best cinematic motion design assets as a library:
- Favorite easing curves and camera rigs.
- Go-to text reveal systems.
- Color grades and grain overlays that consistently look good.
A small, well-organized library lets you move faster on every new project while improving quality over time.
Cinematic Motion Design Search Intents You Should Know
Understanding what editors and creators actually look for helps you plan projects and assets that align with real-world needs. Below are common search intents around cinematic motion design and cinematic animation techniques, with quick guidance for each.
- “How to make cinematic text in After Effects” – Focus on type hierarchy, overshoot, and easing. Use subtle camera moves and light interaction to integrate text into the scene.
- “Cinematic title sequence templates” – Look for projects that offer multiple title layouts, camera systems, and modular scenes so you can build entire sequences, not just one logo sting.
- “Cinematic transitions for reels” – Prioritize short, bold transitions that still feel filmic: blur passes, whip pans, and light hits synced to music, optimized for vertical format.
- “Cinematic color grading in After Effects” – Use adjustment layers, curves, and selective saturation. Add soft vignettes and light pollution, but keep skin tones natural.
- “Best frame rate for cinematic animation” – 24 fps is the classic film look, but consider 25 or 30 fps for platforms that expect smoother playback. Choose once and stick with it project-wide.
- “Cinematic UI animation examples” – Study dashboard and widget animations like calendar, finance, or media panels. Look at how camera, depth, and subtle micro-movements create a premium feel.
- “Lyric videos that look cinematic” – Combine atmospheric backgrounds, rhythmic type animation, and foreground elements with parallax. Keep lyrics readable even during complex motion.
- “How to avoid laggy cinematic comps” – Rely on proxies, pre-renders, and organized precomps. Limit heavy FX to the layers that truly need them.
Whether you are animating a minimal widget concept like the clean streaming tile layout or building full lyric experiences akin to narrative-driven text visuals, aligning your workflow with these intents keeps your work both discoverable and practical for clients worldwide.
Bringing It All Together for Cinematic Results
Cinematic motion design in After Effects is not about throwing every effect at the timeline. It is about planning your story, using clear animation techniques, and managing projects so revisions are fast and consistent.
Across this guide you have seen how fundamentals, cinematic animation techniques, template workflows, and advanced optimization all connect. Start each project by defining mood, frame rate, and structure, then refine keyframes with purpose. Use templates and modular systems to keep quality high across entire campaigns, from social edits to longer cinematic intros.
If you keep your comps organized, your pacing intentional, and your design decisions grounded in story, your work will feel at home next to high-end trailers, title sequences, and premium brand visuals—whether your audience is on phones, laptops, or theater screens worldwide.
Start building cinematic edits
Conclusions
Cinematic motion design thrives on clear structure, deliberate timing, and efficient workflows. Treat every project as a system: define mood and pacing first, then use templates and reusable setups to support them. With organized comps, thoughtful keyframes, and smart export habits, you can deliver film-level motion for clients and personal work on any platform.
FAQ
What is cinematic motion design in After Effects
It is an approach to animation that focuses on film-like pacing, camera moves, depth, and typography, using After Effects as the tool to build sequences that feel like trailers or premium title scenes.
How do I make my animations look more cinematic
Plan your shots, use 24 or 25 fps, add subtle camera moves, control easing with the Graph Editor, keep a clear focal point, and apply restrained color grading, blur, and grain.
Do I need plugins for cinematic animation techniques
No. Plugins help with speed and specific looks, but core cinematic qualities come from timing, composition, and camera work, all achievable with built-in After Effects tools.
What frame rate should I use for cinematic projects
Use 24 fps for a classic film feel or 25 fps in some regions. For platform consistency or mixed-use projects, 30 fps can work, but pick one and keep it consistent project-wide.
Are templates useful for cinematic motion design
Yes, well-built templates provide structured comps, proven timing, and reusable systems so you can focus on story, pacing, and customization instead of rebuilding fundamentals each time.
How can I keep heavy cinematic projects running smoothly
Organize precomps, use proxies and pre-renders for complex effects, reduce preview resolution, keep the disk cache healthy, and only enable high-quality FX when you are ready for final passes.