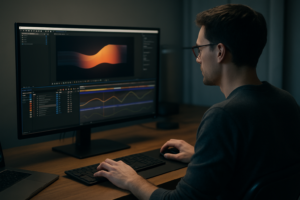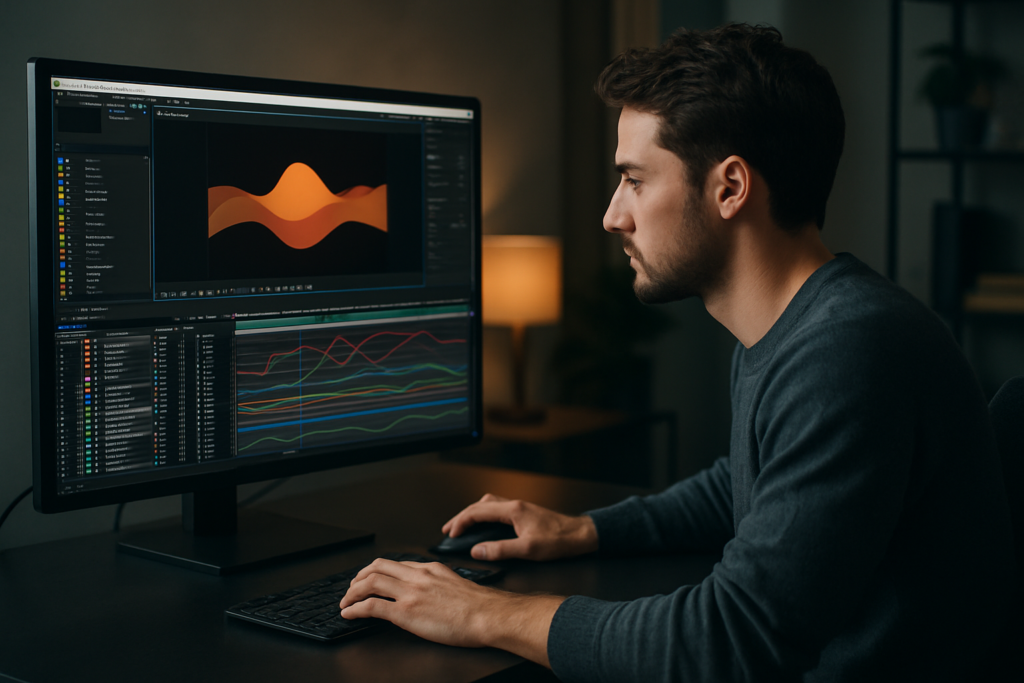
Smooth, confident motion is what makes an edit feel professional instead of amateur. Whether you are cutting social clips, building UI widgets, or animating lyrics, learning how to make motion design smoother in After Effects is a direct upgrade to every project you deliver, for any client and any platform. Explore AE template access
Understanding What Makes Motion Look Smooth
When editors ask how to make motion design smoother, they usually mean one thing: animation that feels intentional, fluid, and easy to read. In practical terms, smooth motion is the combination of clean timing, clear spacing between keyframes, and motion that supports the story rather than distracting from it.
Smooth motion matters because viewers instantly feel the difference between a stiff move and a polished one. Jerky keyframes and random easing make your work look cheap; well‑planned motion makes even simple graphics feel premium. For YouTube editors, social creators, or motion designers on client work, this can be the difference between a video people trust and one they skip.
In After Effects, smooth motion comes from how you set, space, and manage keyframes over time. It affects UI widgets, lyric videos, product promos, and subtle overlays just as much as big logo animations. The good news is that it is a skill, not a talent: if you can read a timeline and tweak a curve, you can learn to make motion feel smooth and professional.
Whether you are an editor branching into motion, a motion designer building complex sequences, or a creator trying to level up your overlays, the same fundamentals apply. The rest of this guide will stay focused on practical, step‑by‑step techniques you can apply directly in your current After Effects projects, without theory overload.
Core Smooth Animation Techniques in After Effects
The phrase smooth animation techniques AE usually points to a handful of concrete skills: easing, spacing, arcs, overlap, and timing. If you combine these correctly, even simple moves feel polished.
Easing and interpolation
Default linear keyframes move at a constant speed, which almost never looks natural. Smooth motion usually needs ease‑in and ease‑out, shaped in the Graph Editor.
- Use Easy Ease (F9) as a starting point, not a final setting.
- Open the Graph Editor and adjust influence handles for custom curves.
- Aim for soft S‑shaped curves for UI and text, and slightly sharper curves for snappier motion.
Spacing and timing
Timing is when something happens; spacing is how far it moves between frames. For smooth animation:
- Break long moves into shorter segments with holds where the viewer needs to read.
- Use more keyframes near the start and end of a motion, fewer in the middle, to create natural acceleration and deceleration.
- Test different durations: a 12‑frame move vs. a 20‑frame move will feel completely different.
Arcs and paths
Even in UI‑style motion, arcs can help:
- Switch to the motion path view and adjust Bezier handles to create gentle arcs.
- For camera pans or object moves, avoid dead‑straight, robotic paths unless it is a deliberate style choice.
Overlap, offset, and follow‑through
One of the fastest ways to make things smoother is to avoid moving everything at once:
- Offset layers by 2–4 frames to create a cascade effect.
- Animate child elements slightly after the parent (for example, icons after a panel slides in).
- Add small follow‑through moves at the end: a subtle overshoot and settle.
Using templates to study timing
Watching polished timelines is often more educational than any tutorial. Exploring complex widget designs like the Google Maps‑style location widget or lyric‑driven pieces such as a dynamic typography edit helps you reverse‑engineer speed, overlap, and spacing decisions. Scrub through these kinds of projects frame by frame and pay attention to where keyframes cluster, where holds appear, and how elements are staggered.
As you build your own library of smooth animation techniques AE, you will start to recognize patterns: similar easing shapes for similar motions, consistent offsets, and predictable durations. That repeatability is what makes your motion feel cohesive across multiple edits.
Common Issues That Make Motion Feel Janky
Before going deeper into smooth animation, it helps to recognize what breaks motion first. Many editors and designers know roughly what they want, but a few workflow habits in After Effects create jittery, uneven results.
Checklist of typical problems
- Everything is linear – No easing, no curve adjustments, just default keyframes.
- Overusing Easy Ease only – Hitting F9 on everything without shaping curves still looks generic and sometimes mushy.
- Random keyframe timing – Moves have no consistent duration, so motion feels erratic from shot to shot.
- Graph Editor confusion – Working in the wrong graph (speed vs. value) or pulling handles too far, causing weird speed spikes.
- Uncontrolled motion blur – Turning on motion blur globally without checking shutter angle or distance makes some elements smear too much while others barely blur.
- Messy comps and layers – No precomps, no naming, dozens of layers on top of each other, making it hard to manage offsets and timing.
- Heavy effects on animated layers – Stacking glows, blurs, and particle systems directly on moving layers causes laggy previews and discourages fine‑tuning.
- Inconsistent frame rates – Mixing 23.976, 25, and 30 fps comps or dropping 60 fps footage into low‑fps timelines produces unexpected stutter.
Why these issues hurt smooth motion
- Viewer fatigue – Jerky or unpredictable motion makes it harder to follow the message, especially for UI and data widgets.
- Time sink – Messy timelines slow you down, so you spend more time hunting keyframes than improving motion.
- Inconsistent brand feel – If easing and timing change every time, your client’s brand energy feels unstable from video to video.
How to avoid the worst offenders
- Adopt a limited set of go‑to durations, like 8, 12, and 16 frame moves for specific types of transitions.
- Decide when to use motion blur and standardize shutter settings per project.
- Immediately precomp grouped elements (like a button with icon and text) so you animate one master layer.
- Keep effects on adjustment layers or precomps when possible to reduce timeline clutter.
Being able to diagnose these issues quickly turns you into the person on the team who can “fix the motion,” even when someone else did the original layout or edit.
Choosing the Right Approach for Each Type of Edit
Not all smooth motion looks the same. A corporate explainer, a music‑driven lyric video, and a YouTube widget overlay each need different pacing and energy. The key is learning which smooth animation techniques AE to prioritize for each context.
Short social clips and reels
Here the priority is clarity at high speed.
- Use slightly sharper easing for punchy moves.
- Keep transitions fast but readable: 6–10 frames is common.
- Limit how many elements move at once so the viewer knows where to look.
Ads and product promos
You want a balance of style and legibility.
- Give hero product moves more time and softer easing.
- Use controlled camera moves and parallax for depth.
- Reserve bouncy overshoot for secondary details so the main product feels stable.
YouTube overlays and widgets
Overlays must feel supportive, not distracting.
- Use subtle sliding or scaling for panels and lower thirds.
- Aim for consistent animation presets across the whole channel.
- Look at structured UI projects like the YouTube‑style widget animation to understand pacing choices for on‑screen stats and buttons.
Cinematic and music‑driven edits
With music, the beat defines your timing.
- Map important keyframes to kick, snare, or melodic hits.
- Use more organic curves and arcs; avoid purely mechanical movement.
- Leave intentional stillness between big moves for contrast.
When to lean on templates and presets
Motion designers and editors working worldwide often handle tight deadlines and multiple brands at once. In those cases, using templates can be a smart decision, not a shortcut:
- Templates encode proven timing, easing, and layer organization, so you start from a smooth baseline.
- Studying a well‑built project structure teaches you how pros group, precomp, and name layers.
- An Unlimited After Effects Templates Subscription becomes a time saver when you need to quickly match a style across multiple videos, while still customizing colors, typography, and timing for each client.
Linking back to core skills
Whichever path you choose—custom animation or template‑based—the fundamentals do not change. You still adjust curves in the Graph Editor, manage offsets, and plan durations. Even official learning resources like Adobe After Effects documentation and tutorials emphasize getting comfortable with keyframes and interpolation before anything else.
As you decide your approach per project, consider the deadline, platform, and how much custom motion is truly needed. Strategic choices here keep your motion smooth without overbuilding.
Practical Template and Workflow Guide for Smoother Motion
To make your motion design smoother at scale, you need a reliable workflow, especially when you are working with digital templates or building your own reusable systems in After Effects.
Check your After Effects version and project settings
- Confirm the template’s minimum AE version and open it in a compatible release.
- Match the composition frame rate to your delivery format (23.976, 25, or 30 fps are common). Changing fps after animating can ruin timing.
- Set the correct resolution (1080p, 1440p, 4K). Higher resolutions affect performance, so plan proxies if needed.
Standardize a timing baseline
Before touching keyframes, decide:
- Default transition lengths you will use (for example: 8 frames for small moves, 12–16 for major onscreen changes).
- How long elements stay fully visible before animating out.
- Which beats or markers in the audio will anchor key moments.
Keyframe organization and naming
- Immediately rename important layers (BTN_Main, ICON_Play, BG_Panel, etc.).
- Group related layers into precomps (e.g., a notification card with text and icon).
- Keep animation keyframes on as few master layers as possible so timing adjustments are quick.
Looking into organized projects like an editor‑style widget layout is helpful to see how professional timelines stay readable even when many elements animate together.
Using precomps for smoother control
- Precomp UI elements, titles, and lyric lines so you can animate their in/out as one block.
- Apply main motion (position, scale, rotation) to the precomp, not each child layer.
- Nest complex animations into higher‑level compositions for scene changes, camera moves, or transitions between sections.
Performance tips while refining motion
- Lower preview resolution (Half or Quarter) when blocking timing.
- Use Region of Interest to preview only the relevant part of the frame.
- Enable Fast Draft or turn off heavy effects while adjusting curves.
- Cache work area and avoid constantly changing comp length during fine‑tuning.
Plugin dependencies and safe alternatives
- Check if the template needs third‑party plugins; if so, decide whether to install them or replace that part of the effect.
- When possible, recreate simple effects (glows, blurs, light sweeps) with native tools to reduce breakage across machines.
- If a plugin animates motion (for example, specialized easing tools), make sure those settings are clear to anyone else opening the project.
Customization workflow step by step
1. Lock structure before styling
First, ensure all animations feel smooth in grayscale or simple colors. Check:
- Easing curves for each main transition.
- Offsets and delays between elements.
- Whether any move feels too slow or too rushed.
2. Then apply colors and typography
Once motion feels right, customize:
- Color controls or adjustment layers for brand palettes.
- Text styles for titles, labels, lyrics, and captions.
- Stroke widths and corner radii for consistent UI style.
3. Final timing polish
With visuals in place, do a last timing pass:
- Align important moves with audio markers.
- Adjust overshoot and settle durations for key elements.
- Add or remove small delays to reduce clutter when many objects animate.
Use cases and specific setups
Reels and shorts
- Keep moves snappy and bold. Short attention spans reward strong, clean motion.
- Test on a phone screen to ensure small text and animations still read.
- Phones often show UI overlays; design motion that remains visible behind or around them.
Ads and product focus
- Use controlled, smoother camera‑like moves for hero products.
- Limit color changes; too much visual noise kills smoothness even if timing is good.
- When featuring interfaces such as a payment or finance UI, consistency of motion between screens is crucial. Projects in the style of a clean card widget, for example, demonstrate how slight easing differences change perceived quality.
Music videos and lyric animations
- Sync phrase‑level motion to lyrics, not every syllable, to avoid visual overload.
- Use subtle background motion with more expressive motion on the main text.
- Study how lyric‑driven animations pace their lines and transitions to keep reading comfortable while still feeling rhythmic.
Corporate explainers and dashboards
- Prioritize legibility; smooth motion should guide the eye between key metrics.
- Use consistent animation patterns for recurring elements (charts, tags, lower thirds).
- When dealing with many panels and stats, a structure similar to a dashboard widget comp can help you control multiple animations from master controllers.
Final checklist before delivery
- Play back in real time. Any stutter that is not creative needs fixing.
- Toggle motion blur on and off to confirm it enhances, not hides, motion.
- Scrub frame by frame around transitions to catch unwanted jumps.
- Confirm your render settings match project fps and resolution.
A disciplined template workflow like this lets you reuse and adapt smooth animation across many different clients and platforms without rebuilding from scratch each time.
Advanced Tips for Consistent and Efficient Motion
Once your basic motion is smooth, the next step is keeping that quality across entire edits, series, and client campaigns, while still working efficiently in After Effects.
Build reusable animation systems
- Create master comps for intros, lower thirds, and transitions, then duplicate and tweak for each video instead of rebuilding.
- Use adjustment layers or expression controls (sliders, checkboxes) to centralize timing and style tweaks.
- Keep a small library of pre‑tested easing presets so similar elements always animate the same way.
Styleframes and motion tests
- Before building an entire sequence, design 1–2 styleframes and a short motion test.
- Lock in easing, colors, and spacing here so you are not redesigning during the longest part of the project.
- Share a short preview with clients or collaborators to confirm pacing early.
Modular transitions across edits
- Create a set of transitions that work both as scene changes and section headers.
- Use precomps with placeholders so you can swap footage without touching the animation.
- Ensure all transitions share similar durations and easing shapes to maintain a consistent “feel.”
Quality control processes
- Watch your render at 1x speed and 0.5x speed. Half‑speed reveals uneven motion and bad easing.
- Check motion on different screens (desktop monitor and phone or tablet) to catch readability issues.
- Ask someone unfamiliar with the project to view it; if their eye does not know where to look, simplify the motion.
Export and render basics for smooth playback
- Render at the same frame rate as your timeline; avoid unnecessary conversions in your NLE.
- Use high‑quality intermediates (for example, visually lossless codecs) for complex projects, then compress separately for delivery platforms.
- In the Render Queue, double‑check that Motion Blur and Frame Blending options match what you saw in previews.
Dynamic Link and project weight
- Dynamic Link with editing software is powerful but can slow previews. For heavier comps, consider rendering intermediate files and cutting those instead.
- Keep separate AE project files per major sequence to avoid bloated, slow‑loading projects.
- Regularly clean unused solids, footage, and compositions from the Project panel.
Long‑term consistency across brands and channels
- Document your motion decisions: typical durations, easing curves, and motion “rules.”
- Save reference comps that show best‑practice motion for a given brand or series.
- When working with multiple recurring styles, keep each in its own folder structure with labeled comps, color controls, and text setups.
These advanced habits ensure that smooth motion is not just something you achieve on one hero project, but a standard across everything you deliver, even when deadlines are tight.
Common Motion Design Questions and Quick Answers
Editors and motion designers often search for very specific answers about smooth animation techniques AE. Here are concise responses to common intents you can apply immediately.
- How do I fix choppy motion in After Effects?
Check that your comp and footage frame rates match, enable motion blur where appropriate, and adjust keyframe spacing so moves are not cramped into too few frames. - What are the best easing settings for UI motion?
Soft ease‑in and ease‑out with S‑shaped speed curves usually works best. Avoid harsh overshoot for serious, data‑driven interfaces. - How many frames should my transitions be?
For most UIs and text, 8–12 frames is a good starting range. For slower corporate or cinematic transitions, 16–24 frames can feel more elegant. - How can I quickly make multiple elements animate smoothly together?
Precomp them, animate the parent, then offset layers or use staggered keyframes so they do not all move at the exact same time. - What is the fastest way to keep motion consistent across episodes?
Build master transition and lower‑third comps, save them in a template project, and always start new episodes from that file so timing and easing stay identical. - How do I avoid overdoing motion blur?
Set a moderate shutter angle and preview critical moves with blur on and off. If blur hides important details or creates smeared edges, lower it or turn it off for that layer.
Use these quick answers as checkpoints when reviewing your own projects or mentoring editors who are just starting to refine their motion.
Bringing It All Together for Smoother Motion
Smoother motion design in After Effects comes from a clear process: solid keyframe basics, thoughtful easing, organized timelines, and a repeatable workflow that fits your type of work. When you combine those skills with well‑structured projects and templates, every new edit starts closer to a professional finish.
Focus first on cleaning up your timing and curves, then refine offsets, arcs, and motion blur. From there, keep your comps tidy, reuse proven systems, and document the motion rules that fit each brand or series. Over time, this approach gives you cleaner motion, faster delivery, and more consistent results across everything you create.
If you want a practical head start, pairing these techniques with an Unlimited After Effects Templates Subscription lets you study and reuse polished motion structures instead of rebuilding from scratch on every job.
Conclusions
Smooth motion design is a stack of simple decisions applied consistently: clean timing, clear easing, smart organization, and workflows that respect your deadlines. When you master those fundamentals and support them with reliable templates, you can deliver polished work for any client, platform, or format while keeping your After Effects projects manageable and efficient over the long term.
FAQ
What is the easiest way to make motion look smoother in After Effects?
Start by replacing linear keyframes with Easy Ease, then shape your curves in the Graph Editor. Small changes to easing and timing often give the biggest improvement.
Why does my animation look choppy even at 60 fps?
Choppy motion usually comes from inconsistent spacing or mismatched frame rates, not just low fps. Align comp and footage fps, then spread keyframes more evenly over time.
Should I always use motion blur for smooth animation?
No. Motion blur helps fast moves feel natural, but too much can smear details. Use it selectively on key elements and adjust shutter angle to taste.
How can templates help improve my motion design skills?
Well‑built templates expose you to professional timing, easing, and project organization. Studying and customizing them teaches you proven motion choices faster than guessing alone.
What Graph Editor mode should I use for smoother motion?
Most animators prefer the speed graph when shaping motion feel. It makes acceleration and deceleration clearer so you can create smooth S‑curves for your keyframes.
How do I keep motion consistent across multiple client videos?
Create master comps and a small library of presets for transitions, lower thirds, and overlays. Reuse these elements and stick to fixed durations and easing curves for each brand.