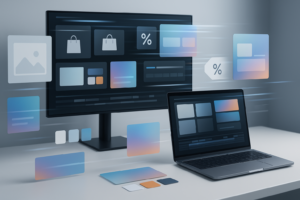
UI motion design in After Effects connects static interface layouts with clear, functional movement. Whether you animate app prototypes, dashboards, or on-screen graphics for video, a solid workflow keeps your files clean and deadlines realistic. This tutorial walks through fundamentals, common issues, and a practical template-based approach you can reuse on every project. Explore AE template access
📋 Table of Contents
Understanding UI Motion Design in After Effects
What is UI motion design
UI motion design is the art of bringing user interfaces to life with meaningful movement. In After Effects, that means animating layouts, buttons, cards, charts, menus, and notifications in a way that feels intentional, readable, and aligned with product behavior.
Why motion matters for interfaces
Motion in UI is not just decoration. It helps users understand cause and effect, system status, and navigation. For editors and motion designers, it also helps explain how a product works inside promos, tutorials, and explainers.
- Clarity: Motion shows what just happened and what will happen next.
- Hierarchy: Animated focus guides the eye to the most important element.
- Delight: Subtle easing and micro-interactions make products feel polished.
- Brand: Timing and style reflect a product’s personality.
Who UI motion design in After Effects is for
UI motion in AE is useful for:
- Video editors who need on-screen UI graphics that match live-action edits.
- Motion designers building explainer videos and product walkthroughs.
- Product and UX teams who want higher-fidelity motion prototypes than static tools provide.
- Creators making YouTube, social, or course content with embedded app and web UI.
Why use After Effects for UI animation
After Effects is ideal when you need precise control, compositing, and export-ready UI animations:
- Layer-based control over every element.
- Keyframe graph editing for polished easing.
- Ability to composite UI over footage, screens, or mockups.
- Reusability through precomps and templates.
This foundation sets you up to build a repeatable UI animation workflow in AE, instead of starting from scratch every project.
Building a UI Animation Workflow in After Effects
What ui animation workflow ae really means
A UI animation workflow in After Effects is the repeatable set of steps you follow from importing designs to exporting final motion. When you standardize this, you speed up every project and avoid messy timelines.
Core stages of a UI motion workflow
- Preparation: Import Figma/Sketch/PSD exports, organize folders, set composition presets.
- Structure: Group elements in precomps (e.g., header, cards, navigation) to mirror app architecture.
- Animation: Add keyframes, easing, and staggered timing to guide attention.
- Refinement: Use the graph editor, motion blur, and subtle secondary motion.
- Delivery: Render as image sequences, alpha video, or embedded inside a larger edit.
Variations of UI motion work in AE
Depending on the project, your workflow shifts slightly:
- Widget-style overlays: Small UI cards and stats placed over footage or backgrounds, similar to a battery status widget animation.
- Full-screen dashboards: Complex data or fintech UI, comparable to a financial app UI sequence.
- Product walkthroughs: Step-by-step screens where each transition highlights a new feature.
- Content UI frames: Media players, maps, and social components, like a map widget with location pins.
Choosing between building from scratch vs. templates
You can build every interaction manually or base your workflow on pre-built UI motion systems:
- From scratch: Full control over animation curves and structure; slower but highly custom.
- Template-driven: Faster setup, consistent animation language, easier for teams to share and update.
Supporting different outputs
Your ui animation workflow ae should adapt to where the UI will be used:
- Standalone UI shots: Longer, more detailed sequences with subtle transitions.
- Overlays for video edits: Shorter, punchy movements that match music and cuts.
- Social content: Vertical compositions, bold timing, and readable graphics on small screens.
Once you understand these variations, you can build one core workflow and tweak it per project instead of reinventing everything.
Common UI Motion Design Problems in After Effects
Relying on default linear keyframes
Linear motion makes UI feel robotic. Elements start and stop abruptly, which looks unpolished and harder to read. Fix this by always adjusting easing in the graph editor so elements accelerate and decelerate naturally.
Ignoring hierarchy and focus
Without a clear plan for what appears first, UI animations become noisy. Too many things move at once, so nothing stands out.
- Always decide the primary focus per shot.
- Animate that element first, with the largest motion.
- Stagger secondary elements slightly later.
Messy precomps and layer naming
Many projects fall apart because of disorganized comps:
- Layers named “Shape Layer 1” or “Layer 27”.
- Huge main comps with dozens of unrelated UI elements.
- No separation between screens, widgets, and overlays.
Result: editing, versioning, and client changes become painful. Use clear layer names and separate screens and components into precomps.
Overusing motion blur and heavy effects
Applying motion blur to every layer and stacking glows and blurs can destroy playback performance, especially on complex UI. Symptoms include:
- Slow previews that block creative decisions.
- Missed timing issues because you cannot watch real-time.
Use motion blur selectively and keep effects purposeful. Consider pre-rendering heavy elements.
Incorrect timing for UI expectations
UI motion that is too slow feels laggy; too fast feels glitchy. Common mistakes include:
- Long fades for elements that should snap in.
- Animations detached from the expected product behavior.
Match durations to interaction types: micro-interactions are usually fast (150–250 ms), while full screen transitions can be slightly slower (250–400 ms) but still snappy.
Not planning for multiple aspect ratios
Designing only for 1920×1080 causes trouble when the same UI needs vertical or square formats. You may have to rebuild layouts late in the process.
Checklist to avoid the biggest issues
- Rename layers and comps before you animate.
- Turn on motion blur only where it adds clarity.
- Use the graph editor on all key UI movements.
- Design for at least one horizontal and one vertical comp.
- Precomp interface sections logically (tabs, cards, nav bars).
Choosing the Right UI Motion Approach for Each Project
Match motion style to content type
Different projects call for different UI motion strategies. A hyper-fast social edit and a calm product walkthrough should not share the same timing or animation intensity.
Social reels and shorts
For vertical social content:
- Use bold, quick animations that align with jump cuts.
- Keep UI elements large and legible on small screens.
- Use short in-and-out transitions (150–250 ms) to match the pace.
Ads and performance creatives
For paid ads, especially where UI needs to communicate a benefit quickly:
- Focus on clear before/after shots.
- Use smooth but assertive transitions between key features.
- Keep animation focused on the main conversion message, not gratuitous flourishes.
YouTube explainers and tutorials
Here, viewers expect clarity and a bit more time to read. You can use:
- Slower reveals of panels and dashboards.
- Highlight states or animated outlines to guide attention.
- Layered UI that appears step-by-step with voiceover.
Cinematic or brand films
For cinematic work, integrate UI more subtly into the frame:
- Use parallax, depth-of-field, and more analog camera moves.
- Create UI that behaves like an in-world hologram or screen.
- Keep animations elegant and fluid rather than snappy.
When templates and libraries make sense
When you handle recurring content—weekly content series, recurring product promos, consistent dashboards—a reusable system speeds you up and guarantees consistency. This is where an Unlimited After Effects Templates Subscription can be practical: instead of rebuilding the same card reveals, chart transitions, and overlays, you adapt an existing UI system to each new brief.
Reference and inspiration
Before committing to a motion style, collect UI motion references. Platforms like https://dribbble.com/ are useful to spot timing trends, easing styles, and modern UI layouts. Translate those observations into your After Effects curves and layer organization.
When you align project goals, audience, and output format with your UI motion approach, you spend less time guessing and more time refining details. Get UI motion-ready AE assets
Practical UI Template Workflow and Checklist in After Effects
Start with version and project settings
Before touching keyframes, align your environment with the UI template you are using:
- After Effects version: Confirm the project opens in your AE version without missing features.
- Frame rate: Match the template’s fps or your edit’s master fps (commonly 23.976, 25, or 30).
- Resolution: Set main comps for the final delivery (1920×1080, 1080×1920, 1080×1350, etc.).
Import and organize UI assets
Whether you use a pre-built UI motion template or your own library:
- Create folders for UI_Screens, Components, Icons, Text, and Renders.
- Drop design exports into clearly named precomps.
- Map each precomp to a story beat (e.g., “Home”, “Analytics”, “Payment”).
Studying a focused UI element, like a video player-style widget animation, can help you see how small reusable components are structured.
Keyframe organization and naming
A clean ui motion design in After Effects project is easy to edit:
- Name animated layers descriptively (e.g., “BTN_Primary”, “Card_01”, “Nav_Tab_Active”).
- Color-label related layers (all cards one color, all buttons another).
- Use markers on the timeline to label interaction moments (“Tap”, “Load”, “Success”).
Precomps as UI building blocks
Think of precomps as reusable building blocks:
- Put each major screen in its own precomp.
- Create separate precomps for recurring components (cards, notification toasts, progress bars).
- Keep animation logic inside the component precomp whenever possible so you can duplicate it safely.
Performance tips for smooth previews
UI-heavy comps can get dense. Keep them responsive:
- Use Half or Quarter resolution for previews while you block timing.
- Disable motion blur until the animation is nearly approved.
- Solo only the active section you are working on.
- Use proxies or pre-renders for heavy backgrounds or footage.
Handling plugins and dependencies
Some UI templates rely on plugins for extra control. To avoid issues:
- Check which plugins are required before starting (e.g., for graph animations or glows).
- If you need a plugin-free version, duplicate the comp and replace plugin effects with native AE alternatives (shape layers, trim paths, gradients).
- Test-render the heaviest shots early to ensure no hidden errors.
Customization workflow for colors and typography
Most well-built UI templates centralize style controls:
- Look for a Controls or Styles comp that exposes color and font settings.
- Connect layer colors to control layers via expressions where possible.
- Keep text in point text layers rather than paragraph text when you need flexible layout.
For richer scenes, you might combine multiple UI cards and widgets, similar to how a set of vehicle-related UI widgets can be mixed into a dashboard-style sequence.
Timing and transitions between screens
For a natural UI prototype feel:
- Use short, snappy slide/fade transitions for navigation.
- Use scale and opacity together for modals and popups.
- Offset child elements slightly (20–60 ms) to avoid everything landing at once.
Use cases and quick setups
- Reels and shorts: One hero UI card animated in and out with strong overshoot and bounce, timed to music or cuts.
- Ads: A sequence of 3–4 key screens with clear feature callouts and simple transitions.
- Product promos: Full screen UI with layered explanations, progress indicators, and data highlights.
- Cinematic edits: Soft motion, parallax, and camera moves around your UI, possibly composited into a mock device frame.
Final checklist for a UI template-based AE project
- Project settings match target fps and resolution.
- All UI components organized into logical precomps.
- Key color and typography controls set once, applied everywhere.
- Plugin requirements verified or replaced with safe alternatives.
- Timing checked at real speed with sound/music.
- At least one test render exported and reviewed before final delivery.
Advanced UI Motion Tips and Long-Term Workflow Optimization
Build a reusable animation language
Instead of reinventing timing and easing for every project, define a small set of motion rules:
- Standard in/out durations for primary elements.
- Consistent easing curves for position, scale, and opacity.
- Rules for how different elements respond to user input (taps, hovers, loads).
Apply these across your comps so the entire edit feels cohesive.
Use styleframes and motion tests
Before animating full sequences, create a single detailed styleframe with a few animated tests:
- One hero state of the UI.
- One transition between two screens.
- One micro-interaction (e.g., button press or toggle).
Lock these in as references, then replicate their behavior in the rest of the project.
Modular transitions and UI systems
Make modular comps for transitions you reuse often:
- Tab change animations.
- Card appear/disappear presets.
- Notification toast in/out.
Store these in a separate project or library so you can import them into new timelines quickly.
Quality control passes
Before render, do targeted review passes:
- Timing pass: Watch at 1x speed, focus solely on durations and overlaps.
- Readability pass: Confirm text, charts, and values are legible at intended size.
- Consistency pass: Check colors, easing, and transitions match your defined motion language.
Export and render considerations
For UI graphics that will be composited elsewhere:
- Render with alpha if you overlay UI on footage.
- Use visually lossless codecs for intermediate renders.
- Keep bit depth and color management consistent between AE and your editing software.
Dynamic link and project weight
Dynamic linking UI comps directly into NLE timelines is convenient but can slow editing:
- Use dynamic link for shots that change frequently in early stages.
- Once approved, render final UI shots and replace dynamic links with video files.
- Periodically clean unused comps and layers to keep the AE project responsive.
Long-term library building
If you frequently work with UI motion:
- Save polished shots and components into a dedicated UI library project.
- Group them by theme: dashboards, payments, media players, maps, and so on.
- Include notes on preferred timing and easing in a reference comp.
Over time, this gives you a personal catalog similar in spirit to a curated collection like specialized motion design projects, letting you start future jobs from a proven base rather than a blank timeline.
Search-Based UI Motion Questions and Quick Answers
How long should UI animations be in After Effects
For basic interactions, aim for 150–250 ms per movement. For full-screen transitions, 250–400 ms usually feels responsive but not rushed.
What easing is best for UI motion design in After Effects
Use ease-in-out with slightly stronger ease-out for elements entering the screen. Refine using the graph editor; avoid extreme bounces for functional UI.
Do I animate UI in separate comps or one master comp
Animate each main screen or widget in its own comp, then assemble them in a master sequence to keep timelines lighter and easier to manage.
How do I sync UI animations to music
Place markers on beats in the audio layer, then align key moments (screen changes, key reveals) to those markers. Keep micro-interactions slightly offset for natural flow.
Can I reuse UI motion across different brands
Yes, if your system is built modularly. Swap colors, typography, and icon sets while keeping timing and base motion curves consistent.
What is the fastest way to prototype a UI flow in AE
Use pre-built cards and transition comps, arrange them as a storyboard in the timeline, then refine timing and easing only after the sequence order feels right.
How do I avoid choppy previews when animating many UI layers
Lower preview resolution, disable motion blur and heavy effects while blocking, and work on soloed sections. Only enable full quality at the polishing stage.
Bringing Your UI Motion Workflow Together
Recap the core ideas
UI motion design in After Effects works best when you treat it as a system, not one-off shots. Clear hierarchy, consistent easing, and clean project structure let you build sequences that feel like real products, whether you are designing dashboards, overlays, or app walkthroughs.
Focus on clarity, speed, and consistency
By defining a repeatable ui animation workflow ae, organizing comps and components, and using reusable templates, you save time while keeping interactions intuitive and on-brand. Each new project then becomes a variation on a stable foundation instead of a stressful rebuild.
Next steps for your projects
Apply these principles to a small UI sequence first, refine your timing and structure, then expand them into full series, social packs, or product explainers. Over time, your library of motion-ready UI elements will make every new brief faster to execute and easier to maintain. Start building with AE templates
Conclusions
UI motion design in After Effects becomes much easier once you standardize how you structure projects, time animations, and reuse components. With a clear workflow and a flexible template library, you can deliver polished, readable UI sequences on tight deadlines while keeping edits and revisions manageable for clients and teams.
FAQ
What is UI motion design in After Effects used for?
It is used to animate app and web interfaces for product demos, explainers, ads, tutorials, and on-screen graphics in video edits.
Do I need plugins for UI motion design in After Effects?
Not necessarily. Many UI animations can be built with native shape layers, masks, and the graph editor, though some templates may use plugins.
What frame rate is best for UI animations?
Match your final video or platform: 23.976 or 25 fps for film-style work, 25 or 30 fps for most online content and product explainers.
How can I keep UI projects organized in After Effects?
Group each screen or widget in its own precomp, name layers clearly, color-label categories, and use markers for key interaction moments.
Can I reuse the same UI motion across different aspect ratios?
Yes. Design with safe areas, then duplicate comps and adjust layout for horizontal, vertical, and square formats while keeping timing identical.
How do templates help with UI motion design workflows?
Templates give you pre-built animations, structure, and controls, so you adjust content and style instead of rebuilding every transition from zero.