Per character 3D text animation in After Effects is one of the fastest ways to give titles, lower thirds, and lyrics a premium motion design feel. This guide walks through practical setups, common issues, and editor-friendly workflows you can reuse across multiple projects worldwide.Explore motion templates
📋 Table of Contents
Understanding per character 3D text animation basics
What per character 3D text animation is
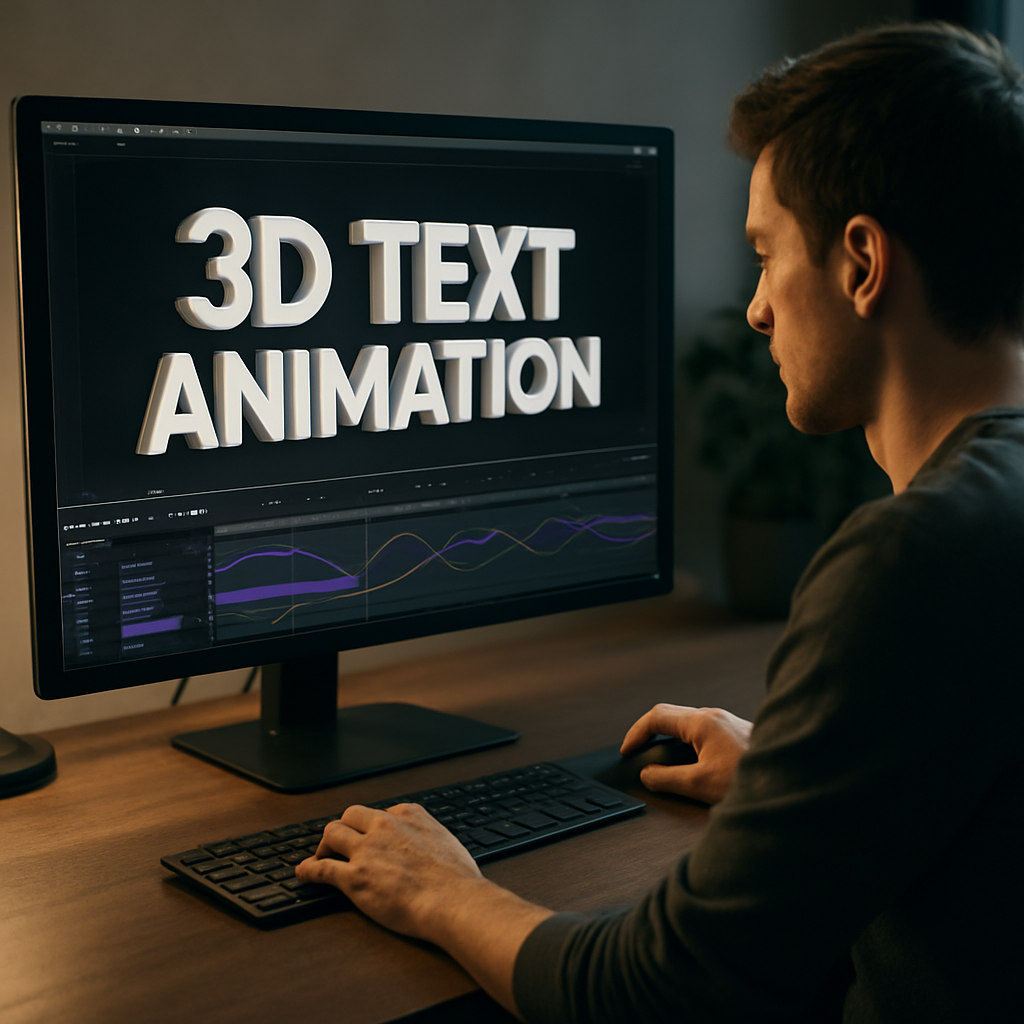
Per character 3D text animation in After Effects is a workflow where each letter of a text layer animates independently in 3D space. Instead of moving the whole word or line together, you animate properties like position, rotation, and opacity on a per-character basis using text animators.
This gives you fine control over how letters appear: they can flip in, scatter, rotate, or cascade through depth, while still staying editable as normal text.
How it works under the hood
After Effects text layers have a special system called Animators. When you add an Animator (for example for Position or Rotation), you also get a Range Selector. The Range Selector defines which characters are affected over time, making it ideal for per-character reveals.
By enabling 3D for the text layer, or by using 3D in the composition (Classic 3D or Cinema 4D renderer), those same animators can move characters in X, Y, and Z, creating depth and parallax.
Why per character 3D text animation matters
Per character 3D text animation After Effects workflows are powerful because they:
- Keep text fully editable for last-minute client changes.
- Allow highly detailed animation without hand-keyframing every letter.
- Scale easily from social posts to full broadcast packages.
- Integrate nicely with cameras, lights, and depth of field for cinematic looks.
Who this technique is for
This technique is especially useful if you are:
- An editor adding simple but polished titles to timelines.
- A motion designer building branded graphics or lyric videos.
- A content creator producing recurring intros, reels, or shorts.
You do not need to be a character animation expert. If you are comfortable with keyframes and basic 3D layer toggles, you can build reliable per-character text setups that you reuse across projects.
Where it fits in your workflow
Per character 3D text animation is best treated as a reusable system:
- Create one well-built text comp.
- Hook it up to controls for timing, color, and depth.
- Duplicate and re-type for each title, lower third, or lyric line.
This mindset will matter when we move into templates and broader motion systems later.
Working with 3D text animator variations in After Effects
3D text animator in After Effects explained
The term 3d text animator After Effects usually refers to the text Animator controls combined with 3D properties. You can animate:
- Position on X, Y, Z for fly-ins, flips, and depth.
- Rotation around X, Y, Z for card flips or spinning letters.
- Opacity for fades per character.
- Scale for popping or overshoot effects.
Each Animator can use one or more Range Selectors to control which characters animate and in what order.
Main variations for different projects
- Character-by-character cascades – Great for intros and outros. Characters slide in or rotate in sequence.
- Word-based emphasis – Animate words instead of individual letters for cleaner corporate or UI-focused motion.
- Line-based lyrics – Useful for music and lyric video templates, where each line animates consistently.
Linking 3D text to cameras and environments
Once your text is 3D, you can:
- Add a camera and animate simple pushes or orbits.
- Use lights and shadows for more depth.
- Combine with background comps like maps, UI screens or mockups.
If you work with UI-inspired scenes, a per-character 3D text animation can complement widget animations similar to those in map-style motion graphics.
Template-based workflows for 3D text animators
Instead of rebuilding each animation from scratch, many editors prefer pre-built text rigs. A reusable 3D text animator can include:
- Expression-driven delay for cascading letters.
- Sliders to control in and out timing.
- Dropdown controls for animation style (slide, rotate, scale).
This approach is especially efficient when you are producing multiple variants of similar content, such as lyric-driven visuals or recurring widgets like those in music-inspired motion projects.
Choosing the right renderer
For most per-character text work, Classic 3D is enough and renders quickly. If you need extruded shapes or more detailed 3D, you can switch to the Cinema 4D renderer but keep in mind the increased render cost and some restriction on effects.
Common problems and mistakes with per character 3D text
Relying only on default presets
Built-in text presets can be useful, but dropping them on without adjustment often leads to generic results. The motion may not fit your music, pacing, or brand. Always tweak timing, easing, and depth to match the edit.
Messy compositions and naming
Common issues:
- Multiple text comps named “Comp 1 copy 4”.
- Controls buried deep inside layers.
- Camera and lights left at default names.
This slows you down when the client asks for a title adjustment. Build a habit of:
- Naming comps clearly (e.g., TITLES_Main_03).
- Color-labeling control layers.
- Keeping cameras, lights, and adjustment layers at the top.
Ignoring motion blur and easing
Without motion blur and proper easing, 3D text can look mechanical. Typical mistakes are:
- Disabling motion blur to “speed up” previews and never re-enabling it.
- Leaving default linear keyframes, making animation look stiff.
Use Easy Ease and refine in the Graph Editor. Turn motion blur off only during heavy previews, then re-enable it before final renders.
Over-complicating with too many plugins
Stacking unnecessary 3D or particle plugins on top of text rigs can cause:
- Slow preview performance.
- Render failures on deadline.
- Version mismatches between machines.
Where possible, lean on native text animators and simple effects. Reserve heavy plugins for when they clearly elevate the result.
Bad precomp strategy
Two opposite mistakes appear often:
- No precomps – Everything is in one comp, hard to manage.
- Too many nested precomps – Hard to track where text is coming from.
A practical approach is:
- One master comp per sequence (e.g., Main Edit, Title Pack).
- Subcomps for reusable text rigs (Intro Title, Lower Third).
- Clear naming like TXT_Intro_01, TXT_LowerThird_Left.
Timing that ignores the edit
Another common issue is animating text without listening to the music or considering cuts. Consequences:
- Titles feel late or early relative to beats.
- 3D rotations cross-cut edits awkwardly.
- Text overshoots extend beyond where the viewer’s eye is looking.
Scrub audio, mark beats, and align per-character cascades so that key moments land on cut points, snare hits, or lyric accents.
Not planning for different aspect ratios
If vertical, square, and horizontal versions are needed, designing a single wide-screen layout may cause letter cropping or unreadable stacks later. Plan safe areas and test per-character animations in 9:16, 1:1 and 16:9 early.
Choosing the right per character 3D text approach
Matching 3D text style to content type
Different formats call for different per-character 3D strategies:
- Social reels and shorts – Fast timing, bold movement, high contrast. Short, punchy cascades with simple Z-depth are usually enough.
- YouTube intros and explainers – Slightly slower, more readable animation. Use smooth 3D rotations, camera moves, and softer easing.
- Ads and product promos – Clean, brand-aligned type. Subtle 3D, restrained motion blur, and careful tracking with product shots.
- Cinematic or music videos – Larger use of depth, lights, and cameras. Per-character lyrics can fly through depth or interact with foreground and background elements.
Deciding between custom builds and reusable systems
Ask yourself:
- Will I reuse this style for multiple videos or a whole series?
- Do I need non-designers or clients to update text easily?
- Is the deadline tight enough that hand-building from scratch is risky?
If the answer is yes to any of these, a reusable text rig or template-based workflow will save you time and keep your motion consistent.
Leveraging reference and learning resources
Before committing to a complex rig, look at how text animators are structured in official examples, such as the text animation resources on Adobe Help Center. Studying these setups makes it easier to customize professional-looking animations without guesswork.
When templates make more sense
If you are handling multiple recurring series—like weekly recaps, promo cards or lyric posts—building every 3D text animation from zero is rarely efficient. A curated library of reusable scenes, with ready-made per-character 3D behaviors, can:
- Provide consistent pacing and style across episodes.
- Reduce the risk of last-minute technical issues.
- Allow editors who are less technical to still deploy complex text motion.
Using a high-quality library also pairs well with broader widget-based projects, similar to how a consistent design language is kept across pieces like the YouTube-style widget layouts.
Balancing quality, render time, and delivery
For tight client deadlines, prioritize:
- Shorter text durations with focused messaging.
- Limited but meaningful camera moves.
- Optimized preview quality to keep working quickly.
Per-character 3D animation can still feel premium with simple setups if timing and spacing are well considered.
Building a reusable per character 3D text template workflow
Start with the right composition settings
Before animating, align your comp with your main delivery platform:
- Resolution – 1920×1080 or 3840×2160 for landscape; 1080×1920 for vertical.
- Frame rate – Match your edit (often 23.976, 24, 25, or 30 fps).
- Duration – Allow extra time before and after the intended animation range so you can adjust later.
Lock these choices so all text comps in the project follow consistent settings.
Create the base 3D text rig
1. Add a Text layer and type a neutral word or placeholder title.
2. Toggle the 3D switch for the text layer.
3. Add an Animator for Position and another for Opacity (or use one Animator with multiple properties).
4. In the Range Selector, set Offset to control the animation sweep across characters.
Animate the Offset from -100 to 100 (or the reverse) to create a left-to-right or right-to-left cascade. Adjust the Position to move letters from behind or in front in Z-space, and use Opacity to fade them in or out.
Organize with precomps and naming conventions
To keep the project clean:
- Name your main rig comp something like TXT_3D_PerChar_Master.
- Precomp the Text layer only if you need to add specific effects or 2.5D layers around it.
- Color-code the main control layers (e.g., Nulls with sliders) to stand out.
When building larger packs, a consistent structure makes it easy to extend across sequences, similar to how modular scenes are structured in projects like liquid-style title animations.
Set up control layers for editor-friendly use
Create a Null object and add Expression Controls:
- Sliders for In Duration and Out Duration.
- Angle controls for Rotation Intensity.
- Color controls for main text and highlight colors.
Link your text Animator properties and layer styles to these controls via expressions. This turns the rig into a mini system that editors can adjust without digging into the text layer hierarchy.
Performance tips and preview strategy
Per-character 3D text can be heavy if you stack effects. To keep previews fluid:
- Drop Preview Resolution to Half or Quarter while animating.
- Use Region of Interest to preview only the text area.
- Enable Fast Draft or lower the viewport quality temporarily.
- Use proxies for heavy background footage or 3D elements.
Clear your disk cache periodically, especially on longer series where many iterations build up.
Handle plugin dependencies carefully
If your per-character template uses third-party plugins (e.g., for glows or camera effects):
- Document these plugin requirements in a text layer or comment.
- Offer a “lite” version using native effects where possible.
- Test the project on a different machine to verify compatibility.
This is especially important if multiple editors, or clients, will open the project worldwide.
Customization workflow for repeated use
When reusing your rig for many titles:
- Duplicate the master comp rather than building from zero.
- Change only the text content and timing controls.
- Keep animation style, easing, and 3D depth consistent.
This approach lets you update whole campaigns quickly. If you rely on multiple scenes, a library of dedicated comps—intro, lower third, end card—will behave similarly, similar in spirit to modular widget collections like the editor-focused widget animation setups.
Use cases by format
- Reels and shorts – High-contrast titles popping toward the camera in Z, with quick in and out transitions.
- Ads and product promos – More subtle rotations and controlled depth, with type aligned to product frames.
- Product walkthroughs and UI demos – Clean, linear cascades to highlight key features in sync with on-screen steps.
- Music and lyric projects – Per-syllable or per-word cascades tied to audio, often stylized with glow, blur, and camera moves.
Quality control checklist before delivery
Before exporting or handing the project to another editor, run through this checklist:
- All text layers spelled correctly and easy to edit.
- Controls clearly labeled and grouped.
- Motion blur enabled for final render.
- Graph Editor curves clean and intentional.
- No unused comps or heavy, hidden layers bloating the file.
Advanced techniques and long term optimization
Build reusable animation systems
Instead of treating each title as a one-off, think of per character 3D text as part of a system:
- Define one primary in-anim and one out-anim for the whole series.
- Keep camera and lighting behavior consistent.
- Use the same easing and overshoot amount across all titles.
This system-based thinking is what allows entire series or channels to keep a recognizable style over time.
Keep styleframes and references handy
Create a styleframe comp that shows the final look of the text: color, depth, lighting, and background. Duplicate this comp at the start of new projects and update only what is needed, while keeping the per-character animation behavior consistent.
Modular transitions and sequencing
Per-character 3D text works well as a bridge between scenes:
- Use quick Z-push text to hide a cut to the next shot.
- Let letters fly out toward the camera to transition to black or a branded background.
- Combine text movement with subtle blurs or light leaks for smoother transitions.
Build these as separate modules that you drop between clips rather than rebuilding from scratch.
Consistency across longer edits
For episodes or playlists, prepare a design bible that defines:
- Typefaces and backup fonts.
- Color values and contrast rules.
- Animation durations (e.g., 12 frames ramp in, 8 frames settle).
Apply the same decisions to all per-character 3D text comps. This consistency keeps everything feeling cohesive even when multiple editors contribute.
Export and render considerations
To keep renders predictable:
- Use the Render Queue or a dedicated encoder with lossless or mezzanine codecs while you are reviewing.
- For final delivery, export according to platform needs (e.g., H.264 for web, ProRes or DNx for further editing).
- Test short segments first to confirm that motion blur and 3D depth read well on smaller screens.
Per-character 3D text often includes fine details that can get crushed by aggressive compression, so avoid extreme bit-rate reductions.
Dynamic link and project weight
When using dynamic link from your NLE, be mindful:
- Heavy 3D text rigs and long comps may cause lag during timeline playback.
- Consider pre-rendering key text sequences as alpha-channeled clips.
- Organize your AE project so that text scenes are easy to queue and update.
To keep projects lightweight, regularly prune unused assets and precomps, and consolidate footage when the cut is locked.
Template evolution over time
Once your per-character 3D template is in use, collect notes:
- Which parameters get changed most often?
- Where do editors get confused?
- Which styles or angles receive the best feedback?
Use these notes to refine the next version of your rig: simplify controls, optimize expressions, and pre-bake complex looks when possible. This continuous improvement is where a well-crafted 3D text system becomes a long-term asset rather than a single project solution.
Search driven ideas for per character 3D text workflows
Common search intents around 3D text animators
Many editors and designers search for specific problems or ready-to-use solutions. Below are frequent intents and quick answers.
- “How do I make letters animate one by one in 3D?” – Use a text layer, add an Animator for Position, adjust Range Selector based on Characters, and animate the Offset property over time with 3D enabled.
- “Why is my 3D text not casting shadows?” – Check that the renderer supports shadows, enable Casts Shadows on the text layer, and ensure the light and material options are set correctly.
- “Best way to sync 3D text animation to music?” – Add markers on beats in the timeline, then align key Offset or Rotation changes to those markers for precise sync.
- “How can I reuse per-character 3D text for multiple episodes?” – Turn your rig into a master template: clean controls, clear naming, and duplicate the comp for each new title while preserving the same animator setup.
- “How to make 3D lyrics for music videos?” – Create a dedicated lyric template with per-word or per-syllable timing, and keep line lengths manageable so text remains readable, similar to structured lyric projects like lyric-centric motion scenes.
- “How do I avoid jittery or shaky 3D text?” – Smooth your camera keyframes, adjust motion blur settings, and avoid extreme focal lengths that exaggerate small position changes.
- “What is the easiest way to change text color across the project?” – Use a global control layer (with Color Controls) and link all text color properties via expressions, so one change updates the entire series.
Questions about performance and compatibility
- “Does per-character 3D text work in older After Effects versions?” – Yes. Text animators have been around for many versions. Just be cautious with newer renderer features or specific effects not supported in older builds.
- “Can I preview heavy 3D text faster?” – Lower Preview Resolution, use shorter work areas, and temporarily disable certain effects or lights while animating.
- “How do I adapt a landscape 3D text animation to vertical?” – Duplicate the main comp, change size to vertical, and reposition text to safe areas. Keep the per-character animator behavior but adjust camera and alignment.
Bringing it all together for efficient 3D text projects
Recap of the core workflow
Per character 3D text animation in After Effects combines text Animators, Range Selectors, and 3D layers to produce flexible, editable titles. By building a clean rig once—complete with controls for timing, depth, and styling—you can reuse it across intros, lyric lines, promos, and more.
Main benefits for your daily editing work
When structured well, these systems:
- Keep projects organized and easy to hand off.
- Provide consistent motion language across multiple videos.
- Reduce time spent on repetitive title building.
- Deliver more polished results without complex character animation.
Next steps to strengthen your toolkit
Focus on refining one dependable per-character 3D rig, documenting how to use it, and gradually evolving it as you learn what your clients and audiences respond to. Combined with a reliable library of scenes and widgets, this gives you a solid foundation for any title-heavy project, from social reels to long-form edits.
Conclusions
Per character 3D text animation in After Effects becomes far more manageable once you treat it as a reusable system, not a one-off trick. With clean rigs, thoughtful timing, and consistent styling, you can deliver sharper titles, faster turnarounds, and more cohesive edits across any client or personal project.
FAQ
What is per character 3D text animation in After Effects?
It is a method where each letter of a text layer animates independently in 3D space using text animators, range selectors, and 3D layer settings.
Do I need plugins for 3D text animators in After Effects?
No. Native text animators and the built in 3D renderer are enough for most per character 3D text animations, though plugins can add extra styling.
How do I make letters appear one by one in 3D?
Add a text Animator for Position or Opacity, set the Range Selector to Characters, enable 3D, then animate the Offset property over time.
Why is my 3D text animation preview so slow?
High resolution, complex lights, and heavy effects can slow previews. Lower preview resolution, shorten the work area, and simplify effects while working.
Can I reuse my per character 3D text setup for other projects?
Yes. Save a master comp with clear controls and naming, then duplicate it and change only the text and timing for each new project.
Is per character 3D text suitable for social media videos?
Yes. Short, bold 3D cascades work very well for reels, shorts, and stories, especially when aligned with beats and designed for vertical layouts.