
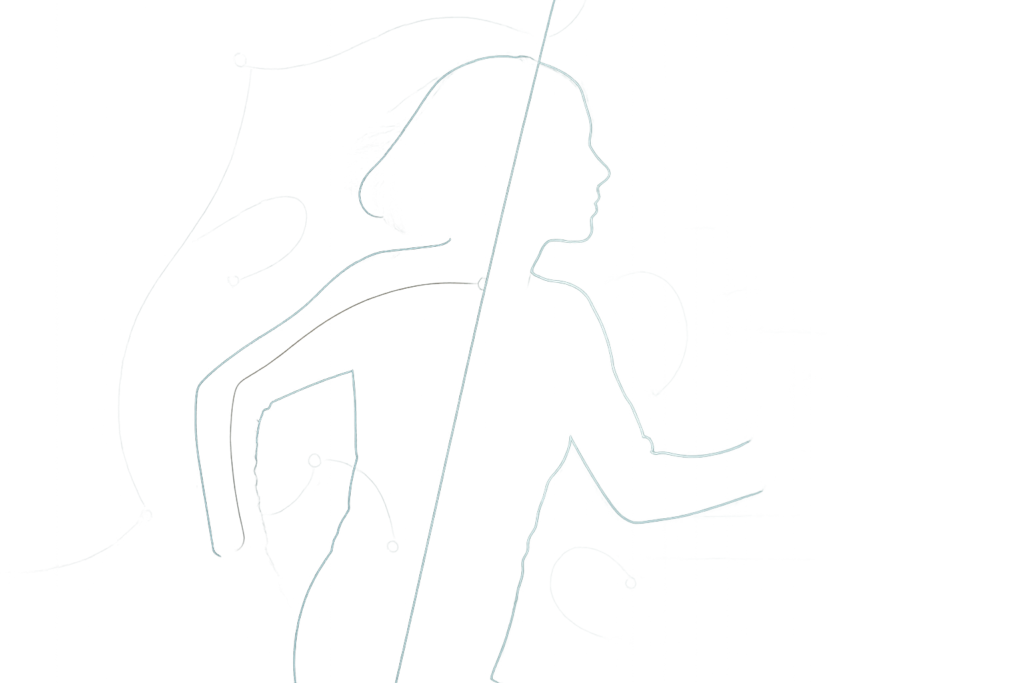
To remove backgrounds with rotoscoping in After Effects, you isolate your subject by creating a moving matte-either by painting a smart selection with the Roto Brush (and refining edges as the clip progresses) or by animating masks frame-by-frame-then you use that matte to make the background transparent and composite the subject over something new. In practice, it’s part craft, part patience: you guide After Effects toward the right pixels, correct it when it guesses wrong, and polish the edges until the cutout looks like it belonged there all along.
This guide goes deep on the real-world workflow: how to prep footage so rotoscoping doesn’t turn into a late-night endurance sport, how to use Roto Brush 2 effectively, how to tackle hair, motion blur, and semi-transparent fabrics, and how to composite the result so it doesn’t scream “cutout.” Along the way, we’ll also address a very modern problem: sometimes the “official tutorial link” you found leads to… a dead end. (More on that later.)
📋 Table of Contents
What is Rotoscoping and Background Removal in After Effects?
Rotoscoping is the process of separating a subject from its background by tracing or selecting it over time-frame after frame, or with tools that track and propagate your selection across frames. In After Effects, rotoscoping is most commonly done with the Roto Brush (now significantly improved with Roto Brush 2), though traditional mask animation is still a key skill, especially for tricky shots.
Background removal is the practical goal: you want the subject isolated with transparency (an alpha channel) so you can replace the background, add effects behind them, or integrate them into a composite. The “background” might be a green screen, a messy room, a city street, or a moving handheld shot-rotoscoping doesn’t care. It just asks one question: Can we define what’s subject and what’s not, consistently over time?
Unlike one-click “remove background” features in some apps, rotoscoping in After Effects is designed for professional motion footage where lighting changes, camera movement, and complex edges make automation imperfect. It’s the tool you use when you need control, not just a quick guess.
How does rotoscoping differ from other background removal techniques?
The big difference is that rotoscoping is shape- and motion-driven, not color-driven. Techniques like chroma keying rely on background color separation (green/blue screens). Luma keying relies on brightness differences. AI-based segmentation relies on trained models making educated guesses. Rotoscoping, on the other hand, is essentially you saying: “This is the subject,” and then ensuring that statement stays true as the subject moves.
Here’s how it stacks up in everyday terms:
- Chroma keying: Fast when shot well. Painful when it isn’t. Great for controlled sets.
- Difference matte / luma key: Useful in specific lighting setups. Often brittle with changing exposure.
- AI background removal: Surprisingly good for simple shots, but can wobble, hallucinate edges, or fail on fast motion and fine detail.
- Rotoscoping: Slower, but most reliable when you need accuracy on real footage, complex motion, or non-uniform backgrounds.
In After Effects, you’ll often combine methods. For example, you might pull a decent key from a green screen, then rotoscope only the areas where the key fails (hair, motion blur, translucent fabric). Or you might roto the main subject and use color-based techniques to clean up leftovers.
Think of rotoscoping as the “manual transmission” of background removal. It’s not always the easiest, but when the road gets steep, it’s the one that still climbs.
When should you use rotoscoping for background removal?
Use rotoscoping when the background isn’t designed to be removed-or when other methods fall apart. If you’re dealing with a documentary shot, a wedding video, a handheld smartphone clip, or a scene with a busy background (trees, crowds, patterned walls), rotoscoping is often the only way to get a clean isolation.
It’s also the right choice when you need selective separation, not full removal. Maybe you only want to isolate a person’s hands for a glow effect, separate a product from a tabletop to add a shadow, or isolate a car to change its color while keeping reflections intact.
That said, rotoscoping is not a moral virtue. If a clean chroma key will do the job in 20 minutes, don’t roto for six hours out of pride. The best workflow is the one that finishes on time and looks good.
How to Prepare Your Footage for Rotoscoping in After Effects
Rotoscoping begins before you open After Effects. The quality of your footage-sharpness, compression, motion blur, lighting consistency-directly affects how well tools like Roto Brush can understand edges. Preparation isn’t glamorous, but it’s the difference between “this took an afternoon” and “I now know the sound my computer makes when it’s disappointed in me.”
Even if you didn’t shoot the footage yourself, you can still prep it inside After Effects: interpret frame rates correctly, precompose, denoise, stabilize, and manage color so edges are easier to track. A little preflight work can dramatically reduce the number of corrections you’ll paint later.
Best practices for footage quality and shooting for rotoscoping
If you have any control over the shoot, you can make rotoscoping far easier with a few practical choices:
- Higher shutter speed (within reason): Less motion blur means clearer edges. Too high, though, can look stuttery; you can reintroduce motion blur in post.
- Good separation: Wardrobe that contrasts the background helps. Avoid same-color clothing and walls unless you enjoy edge ambiguity.
- Clean lighting: Consistent exposure and fewer flickering practical lights reduce frame-to-frame changes that confuse selections.
- Less compression: Highly compressed footage (blocky macroblocking, mushy edges) is harder to roto. ProRes, DNxHR, or camera originals are kinder.
- Stable focus: If the subject drifts in and out of focus, edges become soft and unpredictable. That can be artistic-just know it’s rotoscoping tax.
- Keep limbs visible: If hands repeatedly cross the body or disappear behind objects, you’ll need more manual intervention.
If the footage is already shot, look for the “worst moments” first: fast turns, hair flips, arms crossing, and heavy motion blur. Those are the frames that will determine your schedule.
Also, don’t underestimate the value of planning the composite. If the final background is dark and soft, you can often get away with slightly softer edges. If it’s a bright white studio background, every edge mistake becomes a neon sign.
How to import and organize footage in After Effects
Organization sounds like something you’ll do “later,” right before you don’t. A clean project structure makes rotoscoping safer because you’ll likely create precomps, duplicates, and test comps as you refine.
Suggested workflow:
- Import footage via the Project panel (File > Import). Keep footage in a dedicated folder.
- Interpret footage (right-click > Interpret Footage) to confirm frame rate, alpha (if any), and field order.
- Create a main comp at delivery settings (resolution, fps, duration).
- Duplicate and precompose the roto layer: keep one “clean original” and one “roto work” version.
- Name layers clearly: e.g., SHOT_03_roto_v01, SHOT_03_plate, SHOT_03_bg_replace.
One more practical tip: rotoscoping is performance-heavy. Put your project and cache on fast storage if possible, and allocate enough disk cache in After Effects preferences. The less you wait for previews, the more accurate your eyes become-because you’re not judging edges on a single frozen frame.
What Tools in After Effects Are Used for Rotoscoping?
After Effects gives you multiple ways to create mattes: classic masks, the Roto Brush, and supporting tools for refining edges and fixing temporal problems. The modern roto workflow typically revolves around the Roto Brush, but professionals still use masks for cleanup, holdouts, and precision on rigid shapes.
In other words: Roto Brush is your fast sculpting tool; masks are your fine chisels; and edge refinement is the sanding and polishing that makes the final piece feel real.
Using the Roto Brush tool effectively
The Roto Brush is designed to separate a subject by letting you paint “include” strokes on the subject and “exclude” strokes on the background. After Effects analyzes texture, edges, and motion to propagate that selection forward (and backward) in time within a span.
Key concepts to understand before you start:
- Base frame: The frame where you define the initial selection. Choose a frame with clear edges and minimal motion blur.
- Propagation: After Effects extends your selection across frames. The better your base frame and strokes, the less correction you’ll need.
- Span: The range of frames the roto is calculated for. You can extend it as you go, rather than trying to solve the entire shot at once.
- Freeze: Locks the roto calculation so it doesn’t change unexpectedly when you tweak something later.
Roto Brush is most effective when you treat it like a conversation: you propose a selection, it replies with a guess, and you correct it. If you try to paint everything perfectly on frame one, you’ll likely overwork it-and paradoxically make it less stable.
Also, the Roto Brush works best in the Layer panel (double-click the footage layer), not the Comp panel. This matters because the tool is designed for layer-level analysis, and you’ll see the propagation controls more clearly.
Watch After Effects roto & compositing breakdowns
How to use the Refine Edge tool to improve selection
Fine details-hair, fur, feathers, semi-transparent fabric, motion-blurred fingers-are where roto shots either look expensive or look like a sticker. The Refine Edge tool (paired with Roto Brush) is meant for these borderline regions where a hard matte fails.
Instead of trying to define every hair strand with include/exclude strokes (a classic path to despair), you paint Refine Edge strokes along the problematic boundary. After Effects then builds a more nuanced edge matte in that region, often preserving partial transparency and fine detail.
Practical guidance:
- Use Refine Edge sparingly and only where needed. Overuse can introduce shimmer.
- Paint along the boundary, not deep inside the subject.
- Zoom in and check at 100% (or higher) when making decisions about hair and fabric.
Refine Edge is not magic, but it’s often the difference between “acceptable” and “convincing,” especially when the replacement background is bright or high-contrast.
Advantages of the Rotobrush 2 vs legacy tools
Roto Brush 2 (introduced in recent versions of After Effects and now the standard) improves the quality and stability of propagation compared to older behavior. In practical terms, it tends to hold edges more consistently, especially when the subject moves quickly or when the background changes.
Some real advantages you’ll feel in workflow:
- Better edge adherence: Less “drifting” off the subject over time.
- Improved temporal consistency: Fewer frame-to-frame jitters when the selection is mostly correct.
- More usable results on real-world footage: Especially handheld shots and compressed clips.
Legacy mask rotoscoping is still valuable for certain tasks-hard-edged objects, mechanical parts, or shots where you need absolute predictability. But for most human subjects, Roto Brush 2 is the fastest route to a production-quality matte.
How to Remove Backgrounds with the Roto Brush Tool
This is the core workflow: isolate the subject, refine the matte, freeze it, then output transparency and composite. The secret is to work in small, controlled passes rather than trying to roto an entire minute-long shot in one go.
Rotoscoping is like grooming a hedge: you don’t hack at it once and hope. You trim, step back, check the silhouette, and trim again. Your eyes need that rhythm.
Step-by-step process to create and refine rotoscoped selections
- Open the layer in the Layer panel: In the timeline, double-click your footage layer. You’ll enter the Layer view.
- Select the Roto Brush tool: It’s in the toolbar (looks like a little brush). Set a comfortable brush size with Ctrl/Cmd + drag (or bracket keys) depending on your setup.
- Choose a strong base frame: Pick a frame where the subject is clearly visible, not mid-whip-pan, not half-occluded, and ideally not heavily blurred.
- Paint an “include” stroke: Draw a short stroke inside the subject. After Effects will expand the selection outward to find edges.
- Correct with “exclude” strokes: Hold Alt/Option and paint strokes on areas that were mistakenly included (background, gaps between limbs, holes inside shapes).
- Check the matte view: Toggle views (e.g., Alpha Boundary, or a matte overlay). Look for holes, missing fingers, or background patches clinging to the subject.
- Propagate forward: Move forward a few frames. After Effects will attempt to follow the subject. Fix errors as soon as they appear-don’t let mistakes snowball for 200 frames.
- Propagate backward (if needed): If your base frame is in the middle of the clip, you can propagate both directions for stability.
- Refine edges where necessary: Use Refine Edge on hair or semi-transparent boundaries.
- Freeze the roto: When satisfied, click Freeze so After Effects locks the analysis. This prevents “helpful” recalculations later.
Once frozen, return to the Comp view and confirm that the layer now has transparency where the background used to be. You can verify by placing a solid color layer beneath it or turning on the transparency grid (if you’re previewing in a context that supports it).
If you need to deliver an alpha channel, you’ll later export with a codec that supports alpha (like ProRes 4444) or render a matte sequence. More on compositing and output later.
Tips for painting and refining masks frame-by-frame
Even with Roto Brush 2, you’ll occasionally need to do manual, frame-specific corrections. The trick is to make those corrections strategically so they stabilize the next frames rather than creating new problems.
Practical tips that save hours:
- Use short strokes: Long strokes can cross multiple textures and confuse the segmentation. Short, purposeful strokes tell the tool what matters.
- Correct early: If the edge slips on frame 20 and you ignore it until frame 80, you’ve now roto’d 60 frames of wrongness.
- Zoom and pan like a surgeon: Work at 100-200% for edge decisions, then zoom out to check silhouette and overall believability.
- Think in silhouettes: View the alpha matte often. If the silhouette reads cleanly, the composite will usually feel right.
- Use masks for cleanup: If there’s a persistent background region that keeps getting included (like a high-contrast pole near the subject), it can be faster to add a simple animated mask as a holdout.
Frame-by-frame mask work is still relevant, especially for hard objects. If you’re animating masks manually, aim for fewer points with smooth curves, and use keyframes only when the shape truly changes. Let interpolation do some of the work, and adjust tangents rather than adding more points.
Also, don’t forget: you can roto in passes. For example, roto the body first, then separately roto the hair region with a different approach, then combine mattes. Complex shots often become manageable when you stop insisting on a single “perfect” matte.
How to handle difficult edges and motion blur
Difficult edges are where rotoscoping becomes less like “cutting out” and more like “recreating how the camera saw the world.” Hair isn’t a solid shape; motion blur isn’t a crisp boundary; smoke and glass are basically philosophical questions.
For hair and fine detail:
- Use Refine Edge along the hair boundary, not across the entire head.
- Consider softening the edge slightly, then adding subtle grain/noise to match the plate so it doesn’t look airbrushed.
- If the replacement background is very different in brightness, you may need a little color correction at the edge to avoid a cutout halo.
For motion blur:
- Accept that the matte may need to be slightly expanded and softened in blur-heavy frames so it doesn’t “chatter.”
- Sometimes it’s better to roto a cleaner, slightly tighter subject and then add motion blur back to the subject layer to match the original.
- If the blur is directional (fast lateral movement), check that the edge doesn’t create a sharp “slice” through what should be a smeared blur trail.
For semi-transparent objects (veil, sheer fabric):
- Roto Brush may struggle because the background shows through. Consider separating the problem area into its own layer and using a combination of soft mattes and blend modes.
- Sometimes a luma key inside the roto region can preserve translucency better than trying to force a binary matte.
The guiding principle: a matte is not always “on/off.” The more your subject contains partial transparency, the more you should think in terms of edge behavior rather than strict cut lines.
How to Improve Rotoscoping Results and Workflow
Rotoscoping has two currencies: quality and time. You can spend one to buy the other, but the goal is to be smart so you don’t overspend either. Improving results is partly about better mattes, and partly about preventing the kinds of problems that force endless micro-fixes.
This section focuses on stabilizing footage, matching motion blur, and building a workflow that stays fast even when the shot isn’t friendly.
How to stabilize footage before rotoscoping
Camera shake is a double tax: it makes the subject move more relative to the frame, and it makes the background change constantly, which complicates edge detection. Stabilizing before rotoscoping can make propagation more reliable and reduce edge jitter.
Common approach:
- Duplicate the footage (or precompose it) for stabilization.
- Apply Warp Stabilizer (or another stabilizer) to reduce shake.
- Rotoscope the stabilized version (easier tracking, calmer edges).
- If needed, reapply the original motion by parenting or using reverse stabilization techniques, depending on the shot and pipeline.
Be cautious: Warp Stabilizer can introduce warping artifacts, especially on rolling-shutter footage or wide-angle lenses. If the subject bends unnaturally, you may be trading one problem for another. In those cases, a lighter stabilization (or none) might be better, and you’ll rely on careful roto corrections instead.
Another tactic is to stabilize only for the roto process (a “roto assist” precomp), then use that matte back on the original footage via track data. This is more advanced, but it’s a lifesaver on shaky shots.
Using Motion Blur and Edge Adjustments
Once you’ve isolated your subject, the next challenge is making the edges feel like they were captured by a camera, not cut by scissors. Two things help enormously: motion blur consistency and edge shaping.
Motion blur: If your subject layer loses natural blur because of the matte, reintroducing motion blur can restore realism. Depending on your workflow, you might:
- Enable composition motion blur and layer motion blur if you’re generating motion through transforms.
- Use a dedicated motion blur effect (built-in or third-party) when the motion comes from the footage itself and needs enhancement.
Edge adjustments: After Effects provides edge controls in the roto/matte refinement settings (exact names vary by version), typically including:
- Feather: Softens the edge. Use lightly; too much looks like a glow.
- Shift Edge: Expands or contracts the matte. Great for removing halos or reclaiming thin details.
- Reduce Chatter: Helps with flicker/jitter along edges over time.
- Decontaminate edge colors (where available): Helps remove background color contamination from the subject edge.
A useful habit: evaluate edges against multiple backgrounds. A matte that looks fine over a mid-gray solid might reveal halos over white, or crunchy edges over a detailed background. Test early, not at the end.
Best practices to speed up rotoscoping processes
Speed doesn’t come from rushing; it comes from avoiding rework. These practices keep your roto sessions efficient:
- Work in chunks: Roto 30-60 frames, refine, freeze if appropriate, then move on. Long spans increase error accumulation.
- Choose smart base frames: If the subject changes pose dramatically, set new base frames for new motion phases rather than forcing one base frame to do everything.
- Lower preview resolution while painting: Use half/quarter resolution for navigation, then check edges at full resolution before freezing.
- Cache strategically: Let After Effects cache the span you’re working on. Don’t constantly jump to random frames and flush your cache.
- Use garbage mattes: A simple mask to remove irrelevant background areas reduces what the Roto Brush has to consider.
- Pre-denoise if needed: Noise can cause edge chatter. Light denoising before roto can stabilize selections.
And a slightly philosophical tip: set a “quality target” based on the final use. A 4K beauty composite for a commercial needs a different level of edge perfection than a quick social video with motion graphics on top. Rotoscoping can expand to fill the time you give it-so give it the right amount of time.
What Are Common Challenges and How to Fix Them in Rotoscoping?
Rotoscoping problems tend to fall into a few predictable categories: the matte is incomplete, edges flicker, background color contaminates the subject, or the selection jitters as the tool tries to keep up with motion and texture changes. The good news is that these issues are common enough that there are established fixes-and often, the fix is a small adjustment rather than a full redo.
This section focuses on the most frequent pain points and the practical ways to correct them inside After Effects.
Addressing incomplete mattes and color spill
Incomplete mattes show up as missing pieces of the subject: a hand disappears, a shoulder gets shaved off, or the matte has holes in areas that should be solid. This often happens when:
- The subject and background share similar color/texture.
- Motion blur reduces edge contrast.
- Compression artifacts confuse the segmentation.
Fixes:
- Add include strokes on the missing region on the frame where the error begins, then propagate forward again.
- Use a holdout/garbage mask to remove distracting background regions that keep getting included.
- Split the roto into parts: roto the torso and arms separately, for example, then combine. This reduces confusion when limbs cross.
Color spill (or edge contamination) is when the old background’s color remains on the subject’s edges-common when the original background is bright or saturated. Even without a green screen, any strong background hue can contaminate edges via lens blur, motion blur, or compression.
Fixes:
- Edge decontamination (if available in your matte refinement controls) to neutralize edge colors.
- Light edge color correction: duplicate the subject, blur it slightly, and use it as an edge color source; or use a subtle hue/saturation adjustment masked to the edge region.
- Match grain and sharpness after compositing. Sometimes “spill” is actually a mismatch in texture that makes the edge stand out.
One trick compositors love: place your new background behind the subject early and judge contamination in context. Spill is often invisible over similar tones and painfully obvious over contrasting ones.
Fixing jitter and edge flicker in rotoscoped footage
Edge flicker (also called chatter) is when the matte boundary vibrates subtly from frame to frame. It’s especially noticeable on hairlines, shoulders against high-contrast backgrounds, and any thin detail like fingers.
Why it happens:
- Noise and compression change pixel patterns frame-to-frame.
- The subject rotates, changing edge appearance.
- The tool alternates between two “interpretations” of the edge.
Fixes and mitigations:
- Use Reduce Chatter in matte refinement. Increase gradually; too much can smear detail.
- Denoise before roto (or apply a very light temporal denoise). Cleaner edges are more stable edges.
- Feather slightly + contract/expand to find a stable edge position that doesn’t pop.
- Refine Edge only where necessary. Over-refinement can create shimmering detail that looks “busy.”
- Manual correction on key frames where the edge changes most. A few well-placed fixes can stabilize long spans.
Also consider the viewer’s attention. If the shot is fast, or the subject is small in frame, you can often trade microscopic edge detail for stability. A stable, slightly softer edge usually looks more professional than a razor-sharp edge that flickers.
How to Composite Rotoscoped Footage After Background Removal
Rotoscoping isn’t the finish line-it’s the admission ticket to compositing. Once the background is removed, the real question becomes: does the subject look like they belong in the new scene? That’s where light, color, perspective, and subtle imperfections do the heavy lifting.
A clean matte with a bad composite still looks fake. A slightly imperfect matte with excellent integration often looks real. The goal is believability, not purity.
What background options can replace the removed background?
After Effects gives you plenty of replacement options, ranging from simple to cinematic:
- Solid colors or gradients: Great for corporate, explainers, and motion design. Easy to match and art-direct.
- Still images: Quick environment swaps, posters, or stylized backdrops.
- Video plates: Real moving backgrounds (streets, skies, interiors) that add realism.
- 3D scenes: Using After Effects’ 3D layers, Cinema 4D integration, or imported renders from Blender/C4D.
- Procedural backgrounds: Fractal noise, animated shapes, particles-useful when realism isn’t the goal.
Choose based on the shot’s perspective and lighting. If your subject was filmed with a wide lens and strong depth cues, a flat background image may feel pasted-on unless you add camera movement, depth of field, or parallax.
Also think about interaction: should the subject cast a shadow? Should there be light wrap from the new background? Should reflections or ambient color affect the subject? These details sell the composite.
How to blend rotoscoped subjects into new backgrounds
Blending is where you stop thinking like an editor and start thinking like a cinematographer. A few key techniques make a huge difference:
1) Color match and contrast match
Match black levels, midtones, and highlights between subject and background. If the background is low-contrast and hazy but the subject is crisp and contrasty, the subject will float. Use Curves or Lumetri (if in your workflow) to align contrast and color temperature.
2) Light wrap (subtle)
Light wrap is the effect where bright background light seems to bleed around the subject edge. You can fake it by duplicating the background, blurring it, and compositing it over the subject edges with a mask/matte. Keep it gentle-too much looks like a glow sticker.
3) Grain and sharpness consistency
Footage has texture. If your subject is clean and your background is noisy (or vice versa), they won’t match. Add grain to the cleaner element, or reduce noise on the noisier one, and ensure sharpness levels are consistent. This is one of the most underrated realism boosters.
4) Contact shadows and grounding
If the subject stands on a surface, add a soft shadow where feet meet the ground. Even a simple blurred shape with low opacity can anchor the subject. If the scene has directional light, match the shadow direction and softness.
5) Depth cues
Background blur, atmospheric haze, and slight color shifts with depth can make composites feel cinematic. If your background is deep and the subject is sharp, consider adding subtle depth of field or atmospheric perspective to align them.
Finally: watch the shot at full speed. Many edge issues are invisible in motion and glaring when paused. Your audience watches motion. You should, too.
See a real compositing example in After Effects
Are There Alternatives or Supplements to Rotoscoping in After Effects?
Rotoscoping is powerful, but it’s not always the fastest or smartest first move. Often the best results come from combining techniques: keying where possible, rotoscoping where necessary, and using plugins or AI tools to accelerate the boring parts.
In a professional pipeline, “pure roto” is rare. The job is to get the matte and make it stable-not to prove you can do it the hard way.
When to use chroma keying vs rotoscoping
Use chroma keying when the footage was shot for it: evenly lit green/blue screen, enough separation between subject and screen, minimal spill, and clean exposure. A good key is faster than roto and often preserves semi-transparent detail better (like fine hair) when the screen is clean.
Use rotoscoping when:
- There is no uniform background color to key.
- The background is complex or moving.
- The screen is poorly lit, wrinkled, or contaminated.
- You only need part of the subject isolated (hands, face, product).
Use both when you can. A common hybrid workflow:
- Pull the best key you can for the main body and soft detail.
- Rotoscope to fix areas the key can’t handle (holes, edges, props).
- Combine mattes (add, subtract, intersect) to create a final, stable alpha.
This hybrid approach often yields higher quality in less time than either method alone.
Using third-party plugins to enhance rotoscoping
Third-party tools can help with denoising, motion blur, edge refinement, and sometimes even AI-assisted matting. While After Effects is capable on its own, plugins can speed up specific steps-especially for high-volume work.
Categories worth exploring:
- Denoisers: Reduce noise to stabilize edges and reduce chatter.
- Motion blur tools: Add or enhance blur for better integration.
- Keyers and matte tools: Even on non-green footage, advanced matte extraction tools can help create supplemental mattes.
- AI matting tools: Useful for quick first-pass mattes that you then refine with roto and masks.
Be mindful of version compatibility and pipeline requirements. If you’re collaborating with others, a plugin-based solution may not be portable unless everyone has the same tools installed. In many cases, the safest approach is to use plugins for creation, then render out a matte or precomp so the rest of the project remains stable.
What Resources Help You Learn and Improve Rotoscoping Skills?
Rotoscoping is one of those skills where learning never really ends-you just keep encountering new edge cases (sometimes literally). The best way to improve is to practice on varied footage and build a personal toolbox of fixes: what to do when hair is backlit, when sleeves are motion-blurred, when compression turns edges into soup.
It also helps to have reliable resources. And yes, sometimes you’ll click a promising link and land on a dead page. That’s not a reflection on you-it’s the internet being the internet.
Recommended tutorials and courses for After Effects rotoscoping
Start with official documentation and reputable training platforms, then supplement with project-based tutorials where you see the messy parts, not just the highlight reel.
Good places to look:
- Adobe Help Center and After Effects documentation: Often the most accurate for current tool behavior and settings.
- Adobe’s tutorials and learning portal: Great for structured learning paths.
- Established training platforms: Look for courses that include downloadable practice footage and cover troubleshooting, not just “happy path” demos.
- Professional compositing channels: Seek instructors who discuss matte stability, edge treatment, and integration-not just selection creation.
A quick note, because it happens: sometimes the “source URL” you were counting on is simply gone. You might see something like “404. Page not found.” and a gentle nudge: “Page not found. For help, visit Adobe Support.” When that happens, don’t waste an hour refreshing the page like it owes you money. Use the search function on Adobe’s site, check the Internet Archive for older versions, or jump to community resources where working artists share updated workflows.
To practice effectively, pick three types of shots:
- Easy: static camera, clear subject, minimal blur (build confidence).
- Medium: walking subject, mild shake, some occlusions (build workflow).
- Hard: hair in wind, fast motion, similar background tones (build problem-solving).
Progress comes from variety, not from doing the same easy shot ten times.
Community forums and support for troubleshooting
When you hit a weird issue-Roto Brush propagation behaving unpredictably, freezing taking forever, matte edges crawling-community knowledge can be faster than official docs because someone has likely suffered your exact problem last week.
Useful places to ask and search:
- Adobe Community Forums: Good for version-specific issues and official responses.
- Professional motion design communities: Great for practical workflow hacks and plugin recommendations.
- Post-production subcommunities: Often more focused on compositing realism and advanced matte strategies.
When posting for help, include:
- After Effects version and system specs (GPU matters).
- Footage specs (codec, resolution, fps, whether it’s heavily compressed).
- What you’ve tried (stabilization, denoise, Reduce Chatter, edge shifts).
- Short screen recording or stills of the matte view (alpha boundary is especially helpful).
The more specific you are, the more likely someone can give you a fix that’s better than “try turning it off and on again.”
Conclusion
Once you’ve learned to remove backgrounds with rotoscoping in After Effects, you’ve quietly gained a superpower: the ability to re-stage reality. That’s not just useful for swapping backgrounds-it’s the foundation for selective color grades, targeted effects, invisible cleanups, and the kind of “how did they do that?” shots that make motion design feel like sorcery.
If you want to keep improving, try building a small personal roto library: save presets for edge treatments you like, keep notes on what settings worked for noisy footage versus crisp footage, and collect a few “stress test” clips you revisit every few months. You’ll be surprised how much faster you get-not because the tool changes (though it will), but because your eye gets sharper and your decisions get simpler.
And when you inevitably run into outdated links, missing pages, or that familiar 404 wall, treat it as a reminder to rely on principles, not just tutorials: choose strong base frames, correct early, stabilize when it helps, refine edges only where necessary, and always judge the matte in the context of the final composite. The software is a tool. Your taste is the real engine.