
To create a camera rig in After Effects, you don’t “build a special camera” so much as you wrap a normal 3D Camera layer in a small hierarchy of Null objects (controllers), then animate those Nulls instead of wrestling the camera directly. That rig gives you clean, predictable controls for moves like pan/tilt, dolly, orbit, handheld shake, and focus pulls-without gimbal-y headaches or keyframes scattered across a dozen camera properties.
In practice, the most common (and most useful) rig is a two- or three-Null setup: one Null for position (dolly), one for rotation (pan/tilt), and optionally one for orbiting around a subject. Once you understand that parenting structure, you can scale it up into more “cinema-style” rigs (with separate roll, crane, or handheld layers), add expressions for smoothing, and integrate lights and 3D layers so the camera move actually feels like it’s happening in space.
📋 Table of Contents
What is a Camera Rig in After Effects?
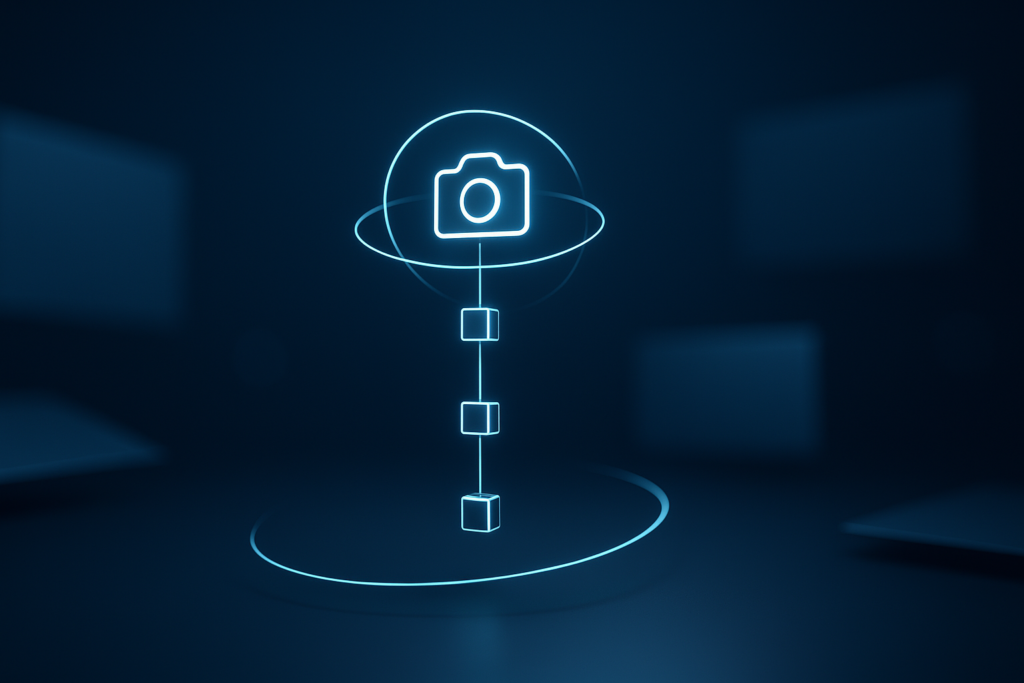
A camera rig in After Effects is a control system-usually built from Null objects and parenting-that drives a Camera layer’s movement and rotation in a structured way. Think of it like putting your camera on a tripod head, a slider, and a jib, except those pieces are invisible controller layers in your timeline. You animate the controllers, and the camera follows.
After Effects already lets you animate a camera’s Position, Point of Interest, Orientation, and X/Y/Z Rotation. The issue is that those properties can quickly become a tangled knot: you’ll keyframe Position for a dolly, then tweak Orientation for a pan, then discover your “simple” move now arcs weirdly because the camera’s Point of Interest is doing its own thing. A rig imposes order: each controller has a job, and you know exactly where to keyframe when you want a certain kind of motion.
Purpose and Benefits of Using a Camera Rig
The main purpose of a camera rig is to separate concerns. In the real world, a camera operator doesn’t mix “move the tripod” and “rotate the head” and “change the lens focus” into one action; those are different controls. A good After Effects rig mirrors that reality: one controller handles translation (dolly/truck/pedestal), another handles aim (pan/tilt), another handles orbiting around a subject, and so on.
That separation buys you several practical benefits:
- Cleaner animation curves: When a Null only does rotation (for example), your Graph Editor work becomes simpler and more readable.
- Faster revisions: If the director (or your future self) asks, “Can we ease into the orbit more slowly?” you know exactly which controller to adjust.
- Reusable setups: Once you have a rig you like, you can save it as a template or copy/paste it into new comps.
- More natural camera language: Moves like “dolly in while panning left” become intuitive: animate the dolly Null forward and the pan Null left.
- Fewer technical surprises: Parenting reduces the chance of accidental double transforms, weird arcs, or fighting between Point of Interest and Orientation.
There’s also a subtle creative benefit: a rig encourages you to think in shots. Instead of keyframing a camera like it’s a drifting spaceship, you start making choices like a cinematographer-where is the camera mounted, what is it trying to reveal, and how does it settle at the end of a move?
Finally, rigs play nicely with expressions. Once controls are isolated, it’s easy to add a gentle handheld layer, a procedural “look at” behavior, or a smoothing expression without turning your timeline into an archaeological site.
Difference Between a Camera Rig and a Standard Camera Layer
A standard Camera layer is just that: a camera with properties you can keyframe directly. It’s perfectly capable, and for simple moves (a slow push-in, a basic pan), it may be all you need. But it’s also “flat” in the sense that everything happens on the same layer, inside the same set of properties.
A camera rig is a system. The camera may have few or even zero keyframes; instead, the animation lives on controller Nulls. The difference shows up most clearly when you:
- Stack multiple motion types: Dolly + pan + orbit + roll is easier when each motion has its own controller.
- Need stable aim: Keeping a subject framed while the camera moves is cleaner with a dedicated “target” or “aim” control.
- Want non-destructive tweaks: You can adjust a parent Null without destroying carefully tuned child animation.
In other words, the standard camera layer is the lens; the rig is the tripod, slider, head, and operator’s hands. After Effects doesn’t force you to rig-but if you do any meaningful amount of 3D camera work, rigging is the difference between “I hope this works” and “I can art-direct this.”
How to Set Up a Basic Camera Rig in After Effects
Let’s build a basic rig that covers the majority of everyday needs: a clean separation between moving the camera through space (dolly/truck/pedestal) and rotating it (pan/tilt/roll). We’ll do this with a camera plus two Nulls-then I’ll show you a third Null option for orbiting around a subject.
Before you start, a quick sanity checklist: you’ll want a composition with at least one 3D layer (a text layer toggled to 3D is fine) so you can actually see parallax. Also, decide whether you want a One-Node or Two-Node camera; that choice affects how “aiming” behaves.
Watch more After Effects motion design breakdowns
Creating a 3D Camera Layer
In After Effects, create a camera via Layer > New > Camera. You’ll be asked to choose a preset (like 35mm) and whether it’s One-Node or Two-Node. Here’s the practical difference:
- Two-Node Camera: Has a Point of Interest. It’s great for “always look at this thing” behavior, but it can become confusing when you also animate rotations.
- One-Node Camera: No Point of Interest. It behaves more like a real camera body: you rotate it to aim. This is often easier to rig cleanly.
If you’re new to rigs, start with a One-Node Camera. You can still create a target system later (and you’ll have more predictable results). Choose a sensible focal length (35mm or 50mm are friendly defaults), click OK, and make sure you can see the camera view by selecting Active Camera in the Comp viewer.
Now add a few 3D layers at different Z depths (for example, three text layers: “Foreground,” “Mid,” “Back,” spaced out along Z). This gives you immediate feedback when you dolly the camera-parallax should be obvious and satisfying.
Adding Null Objects to Control Camera Movements
Create your first Null: Layer > New > Null Object. Turn on its 3D switch (the little cube). Rename it something clear, like CTRL_DOLLY. This Null will handle translation: moving the camera forward/back, left/right, up/down.
Create a second Null, also 3D, and name it CTRL_PAN_TILT. This Null will handle rotation. If you want an even more film-like setup, you can split pan and tilt into separate Nulls later; for now, one rotation controller is enough.
Place the Nulls thoughtfully:
- CTRL_DOLLY can sit at the camera’s current position (so moving it moves the camera from where it already is).
- CTRL_PAN_TILT should also start aligned with the camera, because it will rotate the camera around its own anchor point.
A fast way to align layers is to select the camera, press P to reveal Position, copy it, then select a Null and paste. Repeat for the other Null. You can also use the Align panel, but copying Position is usually more exact in 3D space.
At this stage, you have a camera and two controller Nulls, but nothing is connected. The rig becomes a rig when parenting defines who follows whom.
Parenting the Camera to Nulls for Rig Functionality
Here’s a simple, reliable parenting structure:
- Parent the Camera to CTRL_PAN_TILT.
- Parent CTRL_PAN_TILT to CTRL_DOLLY.
In the Parent & Link column (the pick whip), drag from the Camera to CTRL_PAN_TILT, then from CTRL_PAN_TILT to CTRL_DOLLY. The logic is: the camera inherits rotations from the pan/tilt controller, and the whole “head + camera” assembly rides on the dolly controller.
Test it:
- Select CTRL_DOLLY, press P, and scrub Position values. The camera should move through space.
- Select CTRL_PAN_TILT, press R, and scrub Rotation values. The camera should rotate in place.
If you’re using a One-Node camera, rotation is straightforward: rotate the controller, the view changes. If you’re using a Two-Node camera, you may notice Point of Interest complicates the feel. You can still rig Two-Node cameras, but you’ll typically manage the Point of Interest with an additional target Null (covered later).
Optional: Add an ORBIT controller. If you want the camera to orbit around a subject (common in product shots), add a third 3D Null named CTRL_ORBIT. Place it at the subject (or where you want the orbit center). Then parent:
- CTRL_DOLLY to CTRL_ORBIT (so rotating ORBIT spins the whole dolly+camera around that center).
Now you can rotate CTRL_ORBIT on Y for a left/right orbit, and the camera will circle the subject while maintaining its own pan/tilt control. It’s a small addition that unlocks a lot of “expensive-looking” motion.
How to Animate a Camera Rig Effectively
Rigging is only half the story. The other half is animation that feels intentional-like a camera operator made choices, not like keyframes happened to occur. The good news is that rigs make good animation easier because they give you fewer places to make mistakes.
Below are practical approaches to keyframing, smoothing, and adding that last 10% of realism. You don’t need all of them for every shot; treat them like tools on a belt, not commandments.
Keyframing Camera Positions and Rotations
Start by deciding what kind of move you’re making. Name it in plain language: “slow dolly in,” “orbit reveal,” “push-in + pan to follow,” “crane up.” That sentence tells you which controller(s) should get keyframes.
For a dolly move: keyframe CTRL_DOLLY Position. Set a keyframe at the start (press P, click the stopwatch), move the playhead, then change Position-often the Z value for a push-in/out, but don’t be afraid of subtle X/Y drift to avoid robotic perfection.
For a pan/tilt: keyframe CTRL_PAN_TILT Rotation. In After Effects, rotation can be managed via Orientation and X/Y/Z Rotation. Many animators prefer using X/Y/Z Rotation for clarity. If you do, consider zeroing Orientation and sticking to explicit axes so you know what you animated later.
For an orbit: keyframe CTRL_ORBIT Y Rotation (and sometimes X Rotation for a slight “over/under” feel). Keep orbits slower than you think; fast orbits scream “template.” A gentle arc reads more premium.
Two practical habits that keep camera animation sane:
- Animate fewer properties: If the move is a dolly, don’t also rotate unless you need to. Add complexity only when it serves the shot.
- Block first, finesse second: Put down rough start/end keyframes, preview, then refine timing and easing.
Also, watch your horizons. If your camera accidentally rolls a few degrees, the shot feels like the tripod leg sank into mud. Sometimes that’s a style; usually it’s a mistake. If you want stability, keep roll (Z Rotation) intentionally at 0, or control it on its own Null.
Using Expressions for Smooth Camera Movements
Expressions are where rigs really shine, because you can add “behavior” without manually keyframing every micro-adjustment. The goal is not to replace animation, but to enhance it: smoothing, subtle shake, automated aiming, and procedural offsets.
1) Smoothing with smooth() or a lightweight lag
If you have slightly jittery keyframes (or you’re driving motion from another layer), smoothing can help. One common approach is to add an expression to a controller’s Position:
smooth(0.2, 5)This tells After Effects to average the value over a short window. Use it gently; too much smoothing makes the camera feel floaty, like it’s underwater.
2) Handheld shake (controlled, not chaotic)
A tasteful handheld layer often sells realism. Add a new 3D Null named CTRL_HANDHELD and place it above the camera in the parenting chain (for example, parent the camera to CTRL_HANDHELD, and CTRL_HANDHELD to CTRL_PAN_TILT). Then add expressions like:
// Position wiggle (pixels in comp space can be too strong; keep it subtle)
wiggle(0.6, 20)
And for rotation:
// Rotation wiggle in degrees
wiggle(0.5, 0.3)
Numbers depend on your comp scale and focal length. Wide lenses exaggerate shake; long lenses magnify it. The trick is to keep it almost imperceptible until you turn it off-then you miss it.
3) Automated “look at” aiming
If you want the camera to always face a subject, create a 3D Null named CTRL_TARGET and place it at the subject. Then you can use expressions to aim the camera or a rotation controller at that target. A common method is to apply Look At logic to Orientation. One approach is:
// Apply to a layer's Orientation (e.g., CTRL_PAN_TILT)
// Target is a 3D Null named CTRL_TARGET
lookAt(position, thisComp.layer("CTRL_TARGET").position);
Depending on layer type, you may need to convert the resulting vector into angles; After Effects’ 3D math can be finicky. If you want reliability, consider using the built-in command Layer > Transform > Auto-Orient set to Orient Towards Point of Interest for a Two-Node camera workflow, or use a known-good “lookAt to orientation” rig from a trusted template. The key idea remains: keep aim separate from movement.
4) Slider controls for art-directable intensity
Add Slider Control effects to your controller Nulls (Effect > Expression Controls) so you can adjust shake amount, smoothing, or focus pulls without digging into expressions. This is especially helpful if someone else will open the project later-or if you’re simply being kind to Future You.
Adding Ease and Motion Blur for Realistic Animation
Camera moves rarely start and stop at full speed. Even “snappy” handheld motion has weight. In After Effects, that weight is mostly created through easing, velocity shaping, and motion blur (plus, occasionally, a touch of imperfection).
1) Easy Ease is the beginning, not the end
Select keyframes on your controller Nulls and press F9 (Easy Ease). That’s a good first step, but the real control comes from the Graph Editor. For a cinematic move, you often want:
- Long ease-in (the camera “finds” its motion)
- Stable mid-velocity (the move feels confident)
- Long ease-out (the camera settles, not slams)
If your camera is doing an orbit reveal, try easing the orbit rotation more than the dolly position-this mimics a real operator prioritizing framing while the body continues to drift.
2) Motion blur: use it intentionally
Enable motion blur for the relevant layers and also enable the comp’s motion blur switch. Note: cameras themselves don’t blur, but the layers in the scene will. Motion blur sells speed; if your move is slow and graceful, heavy blur can look like a mistake. Adjust shutter angle in Composition Settings if needed (a common “cinema-ish” value is around 180°, but stylized looks vary).
3) Add micro-settle
A real camera often has a tiny settle at the end of a move-especially if it’s on a head or stabilizer. You can create this by adding a small overshoot and return on the rotation controller, or by using a subtle expression like a damped oscillation on the last few frames. Keep it minimal; the viewer should feel it, not notice it.
4) Beware of linear Z moves
Pure linear Z pushes can feel like a video game noclip camera. Break perfection by adding a tiny X or Y drift, or by slightly adjusting pan/tilt during the move. Even a 1-2 degree pan over several seconds can make the shot feel “operated.”
How to Customize Your Camera Rig for Different Effects
Once your basic rig works, customization is where After Effects starts feeling like a small virtual studio. You can build controllers that mimic real equipment (tripod head, slider, crane), create repeatable complex moves, and combine camera options like depth of field with lighting and 3D layers for a more photographic result.
The trick is to add complexity only when it buys you clarity. If a new Null makes the rig easier to understand and animate, it’s a win. If it adds another place to accidentally keyframe, it’s a tax.
Creating Multiple Null Controllers for Complex Movements
Here are a few proven controller patterns, from simple to fancy. You can mix and match depending on the shot.
1) Separate Pan and Tilt
Create two 3D Nulls: CTRL_PAN and CTRL_TILT. Parent the camera to CTRL_TILT, CTRL_TILT to CTRL_PAN, and CTRL_PAN to CTRL_DOLLY. Now:
- Y Rotation on CTRL_PAN = pan left/right
- X Rotation on CTRL_TILT = tilt up/down
This avoids accidental diagonal rotations and makes it easy to adjust one axis without disturbing the other.
2) Add a Roll controller
Roll is powerful and easy to overdo. Add CTRL_ROLL between the camera and the pan/tilt controller. Animate only Z Rotation there. This gives you clean “Dutch angle” moments without contaminating other rotation axes.
3) Crane/Jib controller
Create CTRL_CRANE above the dolly controller. Animate its Y Position to lift the whole rig, and optionally X/Z to arc. A crane move combined with a gentle pan can instantly make flat scenes feel dimensional.
4) Parallax booster (foreground drift)
Sometimes your scene is too shallow, so the camera move feels weak. You can cheat by adding a subtle expression-based offset to select foreground layers (not the camera) so they drift slightly relative to the move. It’s a compositing trick, but when used lightly, it reads as depth.
5) “Operator” layer for imperfections
Instead of applying wiggle directly to the main controllers, put all imperfections on a dedicated Null (CTRL_HANDHELD / CTRL_OPERATOR). This keeps your hero animation clean and lets you toggle the operator layer on/off for client versions (“stable” vs “handheld”).
Using Camera Options like Depth of Field and Focus Distance
Depth of field (DOF) is one of the fastest ways to make an After Effects 3D scene feel less like flat cards in space. It’s also one of the fastest ways to make previews slow. Use it with intention.
1) Enable Depth of Field
Select the camera, reveal Camera Options, and set Depth of Field to On. Then adjust:
- Aperture: Larger values = blurrier background/foreground (shallower DOF).
- Focus Distance: The distance from the camera that is in focus.
- Blur Level: A multiplier that can intensify blur (use carefully).
Because After Effects’ 3D is not a full ray-tracer in the classic sense, DOF can look slightly “synthetic” at extremes. Moderate settings usually look more believable than trying to mimic a wide-open f/1.2 look.
2) Focus pulls with a Focus Null
Create a 3D Null named CTRL_FOCUS and place it on the object you want in focus. Then link the camera’s Focus Distance to the distance between the camera and that Null. A common expression (applied to the camera’s Focus Distance) is:
// Focus Distance expression
cam = thisLayer;
focus = thisComp.layer("CTRL_FOCUS");
length(cam.toWorld([0,0,0]) - focus.toWorld([0,0,0]));
Now you can animate CTRL_FOCUS moving from subject to subject, and the camera will “rack focus” automatically. This is one of those small rigs that feels like magic the first time you use it.
3) Keep DOF performant
If previews crawl, reduce Aperture while animating, or temporarily turn DOF off until timing is approved. You can also preview at half resolution. The goal is to keep your iteration loop fast; polish comes after the move feels right.
4) Match DOF to lens choice
Wide lenses tend to have deeper focus; telephoto lenses feel shallower. If you’re using a 24mm preset but cranking Aperture for extreme blur, the image can feel inconsistent. It’s not “wrong,” but it can look like an effect rather than photography.
Integrating 3D Layers and Lights with Your Camera Rig
A camera rig looks best when the world it’s moving through behaves like a world: layers have depth, scale is consistent, and lighting gives you cues about distance and form. Even simple 3D setups benefit from a little intentional staging.
1) Use 3D layers with real spacing
Put foreground elements closer to the camera (more negative Z if your camera faces down -Z, depending on setup), midground around your subject, and background farther away. Then do a slow dolly: if parallax is subtle but present, you’re in a good range. If parallax is wild, your layers may be too close or your move too large.
2) Add lights for dimension
After Effects lights (Point, Spot, Parallel, Ambient) can create shading on 3D layers that have materials enabled (or on extruded text/shape layers in certain renderers). A simple setup:
- Key light (Spot): angled from above to create shape
- Fill light (Point or low Spot): softer, lower intensity
- Rim light (Spot): behind to separate subject from background
Even if you’re not chasing photorealism, light direction changes across a camera move help sell depth. If everything is evenly lit, the camera move can feel like sliding a flat poster.
3) Light linking and falloff
Use light falloff so foreground and background don’t receive identical illumination. This creates atmospheric depth. Also consider linking certain lights to your rig (for example, a subtle “on-camera” fill light parented to the camera) for stylized looks-just keep it subtle so it doesn’t scream “flashlight attached to lens.”
4) Use guide layers and proxies for speed
If you’re moving through a complex scene, build with lightweight proxies first: low-res precomps, draft textures, simple solids. Once the camera motion is approved, swap in the heavier assets. A rig doesn’t care what it’s moving through; your CPU does.
Troubleshooting Common Issues When Creating a Camera Rig
Camera rigs are conceptually simple-until they aren’t. Most problems come from three places: a layer isn’t actually 3D, parenting order is off, or you’re mixing One-Node and Two-Node behaviors without meaning to. The fixes are usually quick once you know what to look for.
Below are the issues that show up most often when someone says, “My rig is broken,” while After Effects quietly insists it’s doing exactly what it was told.
Why the Camera Rig Isn’t Moving as Expected
If you move a controller and the view doesn’t change, run this checklist:
- You’re not looking through the camera. In the Comp viewer, make sure you’re on Active Camera, not a custom view.
- You animated the wrong layer. It happens. Confirm you’re keyframing CTRL_DOLLY or CTRL_PAN_TILT, not the camera itself (unless that’s intentional).
- The camera isn’t parented. Check the Parent column: Camera should be parented to the rotation controller, which should be parented to the dolly controller.
- You’re moving the controller on the wrong axis. In 3D, Z movement can be counterintuitive depending on orientation. Use the 3D gizmo and watch the axis colors.
If the camera moves but the motion is “wrong” (like it arcs unexpectedly), you may be rotating a parent while also animating a child in a way that compounds transforms. This is not necessarily a bug-just hierarchy math. To diagnose, temporarily solo one controller: disable keyframes on others, or set them to hold values, and see which layer introduces the unexpected behavior.
Also check whether you’re using a Two-Node camera with an animated Point of Interest. If Point of Interest is keyframed (or being inherited oddly), it can fight your rotation controller. In many rigs, the cleanest fix is to use a One-Node camera, or to manage Point of Interest via a dedicated target Null.
Fixing Layer Visibility and 3D Toggle Problems
Sometimes the rig “works,” but you can’t see your layers, or the camera doesn’t seem to affect them. Common culprits:
- 3D switch is off on your scene layers. A camera only affects 3D layers. If your text/solids are still 2D, they won’t show parallax.
- Shy layers / locked layers / guide layers. You may have hidden your controllers (which is fine), but make sure you can still select them when needed.
- Collapse transformations / continuously rasterize confusion. Precomps with collapse transformations can behave differently in 3D space. If something looks “stuck,” test by turning collapse off temporarily.
- Camera is inside a layer. If the camera’s position intersects a 3D layer, you can get clipping or sudden huge perspective changes. Pull the camera back or adjust layer positions.
Also check the renderer. Some features (like certain 3D extrusion workflows) depend on the chosen 3D renderer. If you’re mixing classic 3D layers with more advanced 3D features, confirm your comp’s 3D renderer is set appropriately for what you’re doing.
When in doubt, simplify: create three 3D text layers at different Z depths, and test the rig there. If the rig works in a clean comp, the problem is in the scene setup, not the rig.
Ensuring Correct Parenting Structure
Parenting order is the skeleton of your rig. A small mistake-like parenting the dolly to the pan/tilt instead of the other way around-can produce motion that feels cursed.
Here are a few “known good” structures:
- Basic (dolly then rotate)
-
Camera → CTRL_PAN_TILT → CTRL_DOLLY
- Orbit around subject
-
Camera → CTRL_PAN_TILT → CTRL_DOLLY → CTRL_ORBIT
- Handheld on top of everything
-
Camera → CTRL_HANDHELD → CTRL_PAN_TILT → CTRL_DOLLY
Two more parenting pitfalls to avoid:
- Accidental double parenting: If you duplicate layers or import rigs, you may end up with a controller parented to something unexpected. Always scan the Parent column top to bottom.
- Anchor point drift: Nulls rotate around their anchor point. If a controller’s anchor isn’t where you think it is, rotations will orbit strangely. Re-center by aligning the Null to the camera or subject as needed.
If you inherit a messy project, one of the best debugging moves is to temporarily color-label controllers (all rig layers in one color) and then reorder them in the timeline so the hierarchy reads clearly. It doesn’t change functionality, but it changes comprehension-and comprehension prevents mistakes.
Tips to Improve Efficiency When Working with Camera Rigs in After Effects
Once you’ve built a rig a few times, the bottleneck stops being “how do I do this” and becomes “how do I do this quickly, consistently, and without breaking things at 2 a.m.” Efficiency in After Effects is mostly about repeatable habits: templates, naming, and automation.
The goal isn’t to rush. It’s to keep your brain available for creative decisions instead of spending it on housekeeping.
Using Templates and Prebuilt Rigs
If you find yourself building the same rig structure repeatedly, turn it into a template. You can do this in a few practical ways:
- Project template: A .aep file that already contains your favorite rig, controller sliders, and a sample 3D staging setup.
- Animation preset: Save expressions (like focus distance linking) as presets you can apply to any camera.
- Copy/paste rig: Keep a “Rig Library” comp in a utility project; copy the rig layers into new comps as needed.
Prebuilt rigs are especially helpful for teams. If multiple artists touch the same project, a shared rig template prevents the “everyone invents their own naming system” problem. Consistency is a kind of speed.
When you use templates, keep them modular. A rig that includes everything (orbit, crane, handheld, focus, target, roll, UI controls) can be great-until it’s overkill and makes simple shots feel heavy. Consider having a basic rig template and an advanced rig template.
Organizing Layers and Naming Conventions
Camera rigs create layers. Layers create clutter. Clutter creates mistakes. A small naming and organization discipline goes a long way.
Use names that describe function, not just type. “Null 12” is a cry for help; “CTRL_DOLLY” is a plan. A simple convention:
- CTRL_ prefix for controllers (CTRL_DOLLY, CTRL_PAN, CTRL_TILT, CTRL_ORBIT, CTRL_FOCUS)
- CAM_ prefix for cameras (CAM_MAIN)
- LGT_ prefix for lights (LGT_KEY, LGT_FILL, LGT_RIM)
Then keep rig layers together in the timeline. You can also:
- Color label all controllers the same color.
- Shy the rig layers once animation is set, so you can focus on scene layers.
- Lock controllers you don’t want to accidentally select (but don’t lock everything-leave yourself a door back in).
Another efficiency trick: add a comment in the layer name or marker notes like “Animate only P on CTRL_DOLLY” or “Roll lives on CTRL_ROLL.” When you revisit the project weeks later, those notes feel like a gift from a kinder version of you.
Utilizing Expressions and Scripts to Automate Rigging
Automation is where you stop “building rigs” and start “deploying rigs.” Even if you don’t write scripts, you can still get a lot of mileage from expressions, presets, and a few built-in conveniences.
1) Expression controls as a mini UI
Add sliders like:
- Handheld Amount
- Handheld Speed
- Focus Offset
- Orbit Speed
Then reference them in expressions. This keeps your rig tweakable without opening expression code every time.
2) One-click focus rigging (semi-automated)
Save the Focus Distance expression (camera-to-focus-null distance) as an animation preset. Then your workflow becomes: create CTRL_FOCUS, apply preset to camera, done. That’s the kind of tiny automation that compounds over a year of projects.
3) Scripts for building the hierarchy
If you’re comfortable using scripts (or installing trusted ones), you can automate: creating the camera, creating named Nulls, aligning them, and parenting them in the correct order. Even without a third-party tool, you can create a repeatable manual checklist and follow it the same way each time. The real time-saver is eliminating decision fatigue.
4) Bake and simplify when you need to deliver
Sometimes you need to hand off a project to someone who doesn’t want your rig complexity. In those cases, you can “bake” motion by copying the resulting transforms onto the camera (or by precomping). Keep a versioned file before you bake. Rigs are great for production; baked motion is sometimes better for delivery.
5) Use markers like a camera department would
Add timeline markers for beats: “start push,” “hit reveal,” “focus shift,” “settle.” This is not code automation, but it’s workflow automation: you’re turning a vague move into a staged shot with cues, and that makes revisions faster.
Conclusion
Once you can build a camera rig quickly, you can start thinking beyond mechanics and into craft: staging, lens choice, and editorial rhythm. Try designing your next rigged move like a tiny story-what does the camera know at the start, what does it discover, and what does it leave the viewer with? That mindset naturally pushes you toward better blocking, clearer depth cues, and more purposeful focus decisions.
If you want to level up further, study real camera moves and steal them shamelessly: watch how often professional shots don’t move, how frequently they settle before a cut, and how rarely they orbit just because orbiting is possible. Then bring that restraint back into After Effects. A camera rig gives you power; taste tells you when to use it.
See a polished After Effects look with depth and camera movement
And one last practical note for 2026 workflows: as motion design pipelines keep blending 2D, 2.5D, and true 3D, your After Effects camera rig becomes a bridge tool-something that can match the “feel” of a 3D package shot even when your scene is built from cards, text, and clever lighting. Build your rig once, name it well, keep it tidy, and it will quietly pay rent on every project that follows.
Watch a UI-style After Effects animation with believable depth